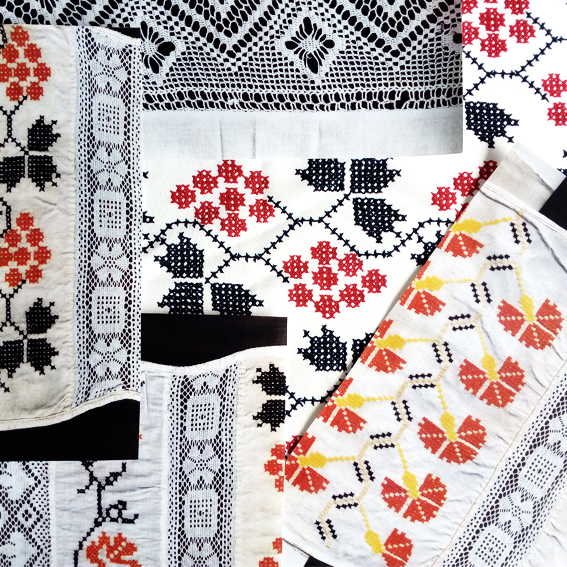
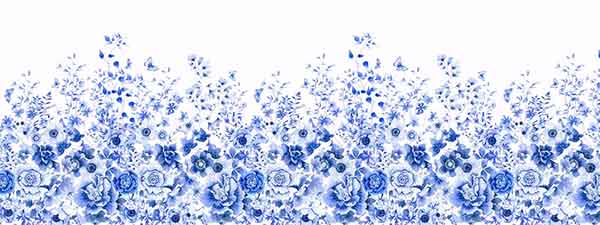
Exciting news from us at Digital Fabrics, we have launched a new textile collection! This time we dove head first into a private collection of vintage European textiles and found just the inspiration we needed! The Boho-Chic trend is one that pops up time and time again, and it’s for good reason. We just can’t get enough of bohemian patchwork, colours and textures, and have designed a range of prints heavily inspired by collected embroidery treasures.
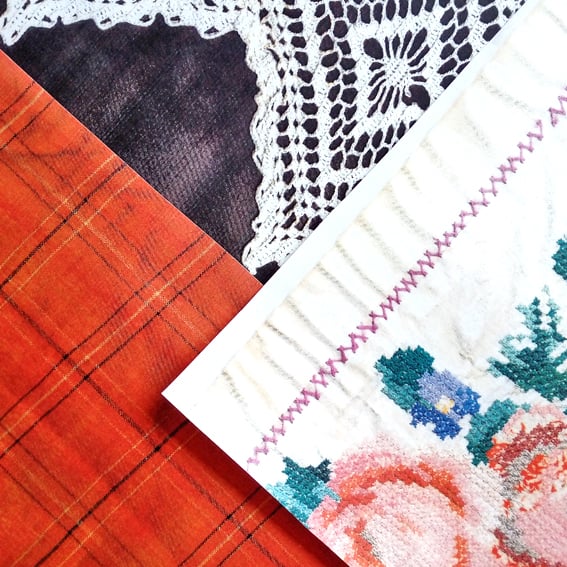
Whilst the boho design aesthetic is undoubtedly fabulous, the statement style can be a little overwhelming for some. We wanted to create timeless re-imaginings that pared-back the heavily embellished designs typical of bohemian textiles, resulting in versatile and accessible designs.
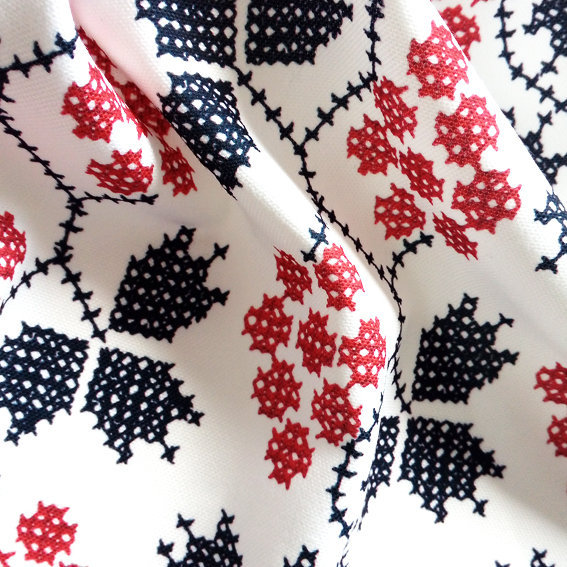
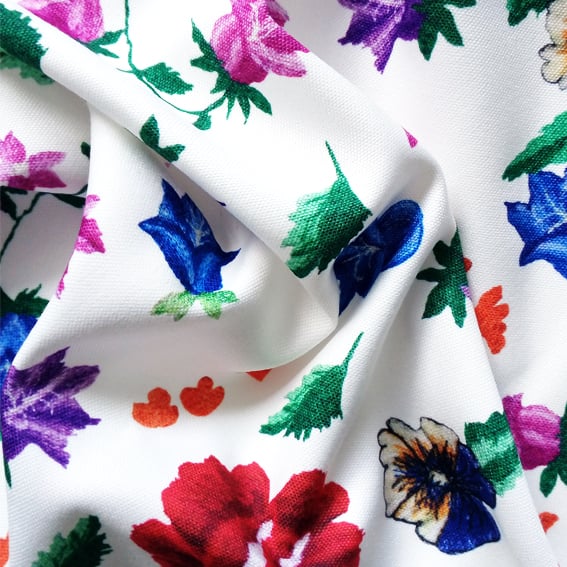 Elements of vintage textiles were scanned, redrawn and redesigned to create the Babushka collection. Finding the balance between streamlined design and textured details was key in maintaining the essence of folk embroidered pieces whilst still giving them a more contemporary feel, and negative space became as important a feature to focus on as the motifs and designs themselves.
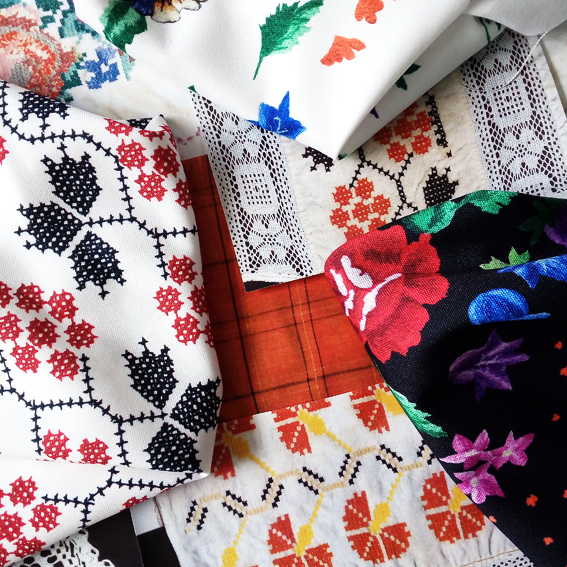
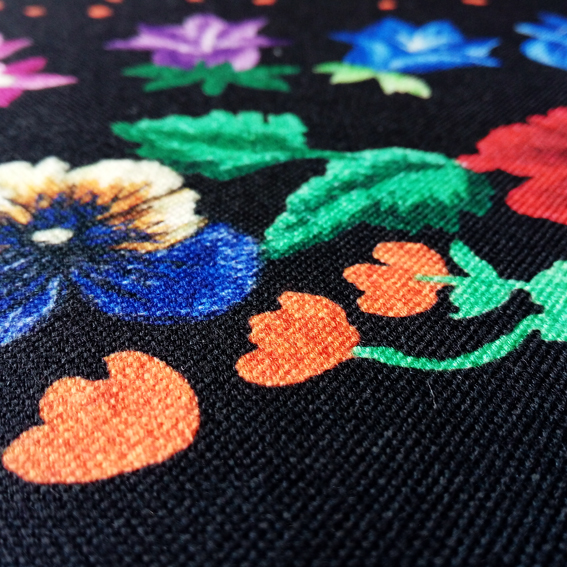
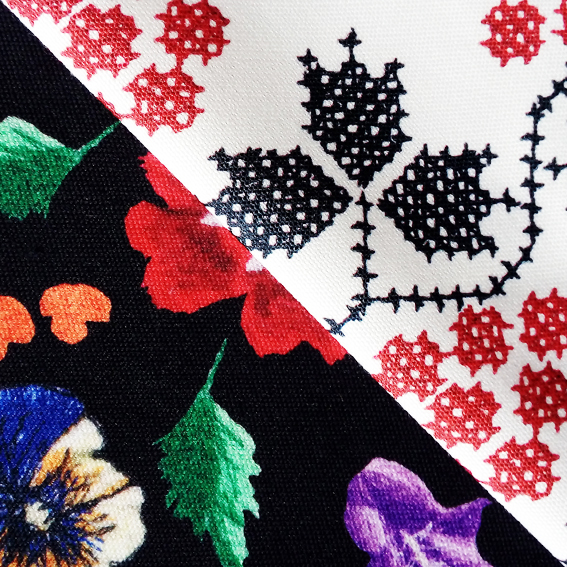 The collection features both flirty, feminine motifs and minimal, geometric design elements, whilst using bold contrasting colours to maintain a crisp aesthetic throughout the range. The range revamps vintage embroidered textiles, resulting in elegant, graphic designs that can be used for so much more than the blouses and table-wear that we so often associate with the bohemian style. We cannot wait to see what you create with these prints!
The Babushka Collection is available for purchase in our Design Library!
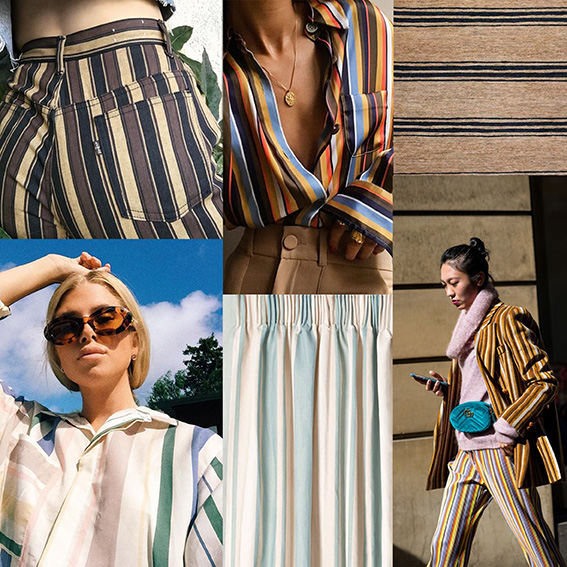
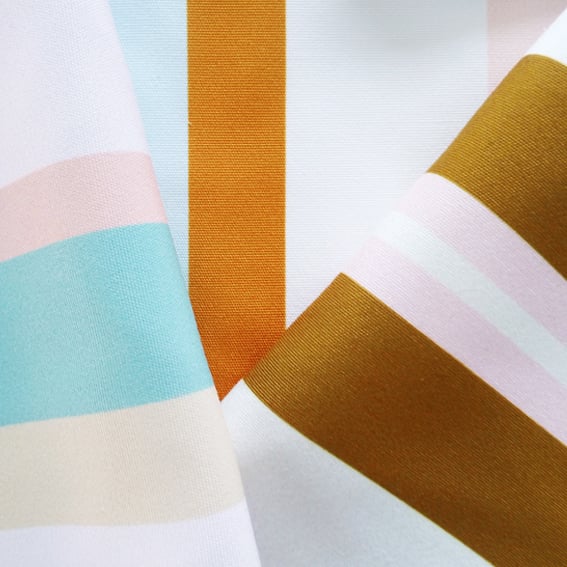
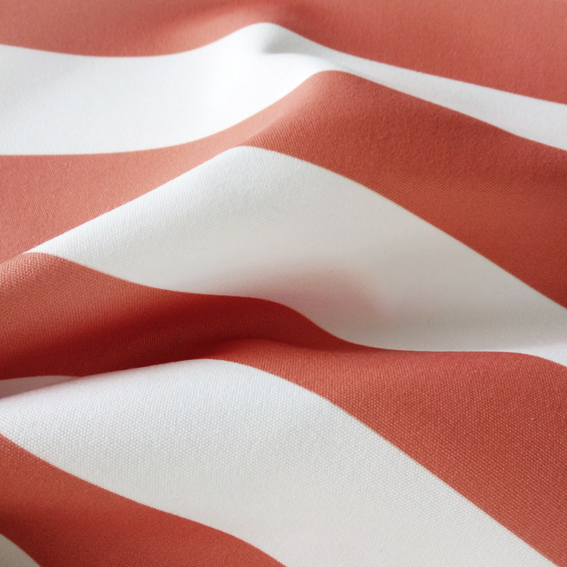
Stripes are an absolutely timeless design staple! But with them always being in style it’s easy to sometimes forget just how fabulous and versatile they are. Here at Digital Fabrics we wanted to shine the spotlight on stripes again, and have created a gorgeous range of prints that re-imagines classic stripe designs – introducing our Stripped Back Collection.
 Our most recently designed textile collections drew focus to luscious textures and the organic nature of hand drawn motifs. What better way to keep things interesting than to launch a series of designs that celebrates crisp lines, formal shapes and a timeless aesthetic. It was crucial to adopt interesting considerations of both colour and form since we were working in the continuous design space of ‘stripes’. Not only did the designs need to feel fresh, it was also essential to create a diverse collection to avoid designing prints that were too similar to each other.
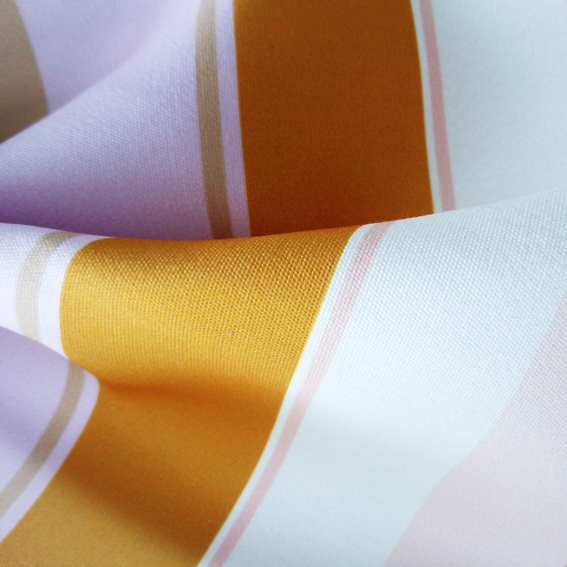
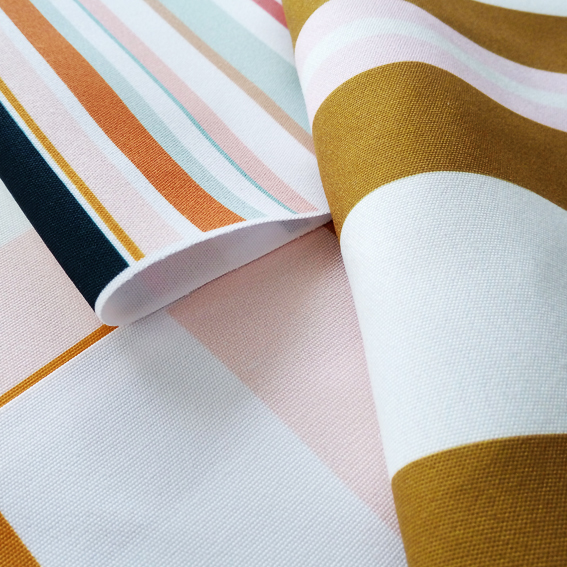
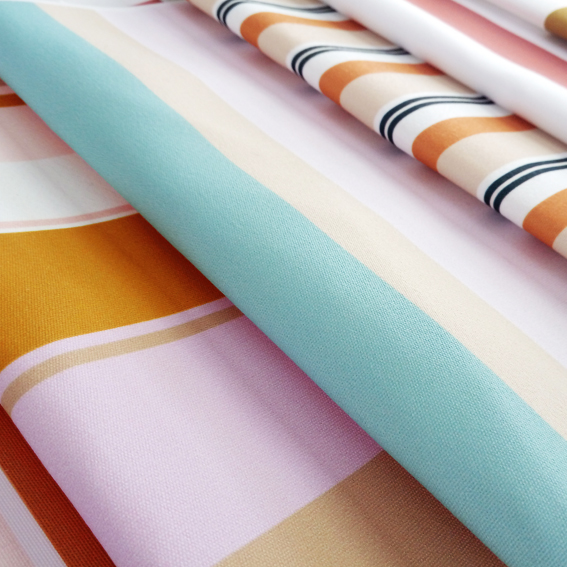
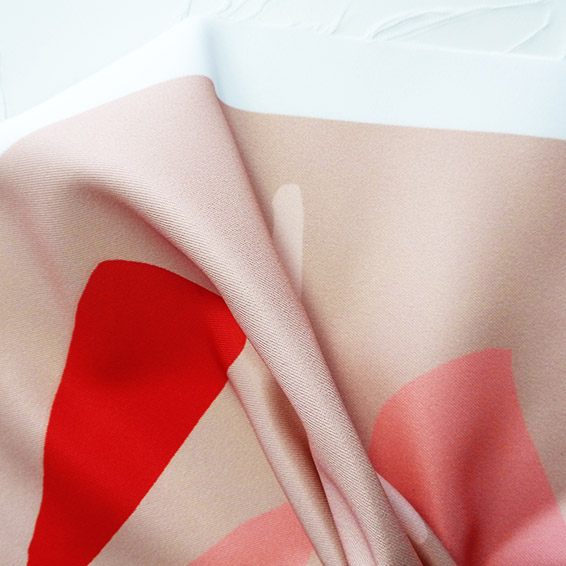
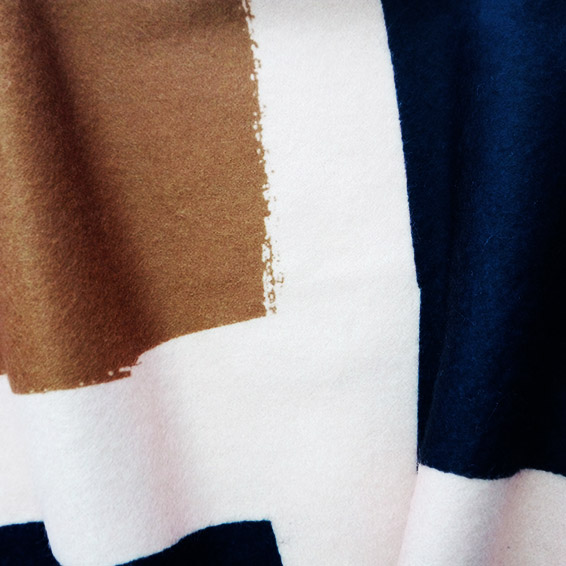
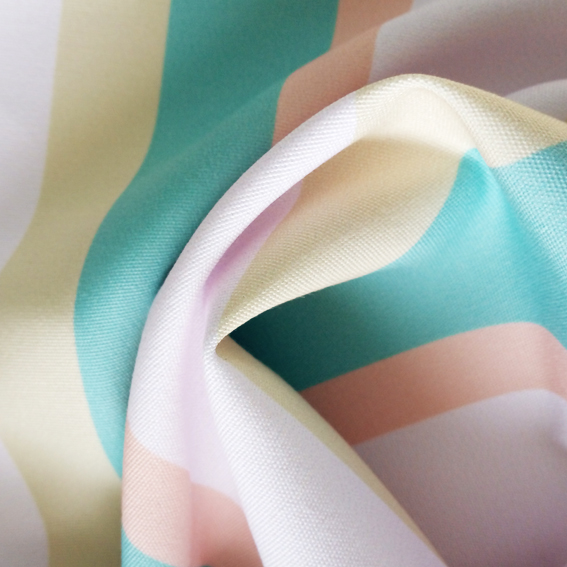 Variation in band width was key in generating a distinct range of textiles. This allowed us to develop wide, colour-blocked styles as well as contemporary revivals of the pinstripe. Colour was also a major element when it came to designing striking stripe prints. The collection re-imagines neutrals, using soft blush pinks in the same way that you would typically use brown and cream colours. The range pairs these neutrals with dreamy sorbet inspired hues, bold mustards and deep navy accents.
 The collection features prints which are both minimal and edgy, with some designs undeniably inspired by the rich history of stripe patterns in print design. These designs would be fabulous in both the home and the wardrobe, and we can’t wait to see what you do with them!
The Stripped Back Collection is available for purchase in our Design Library!
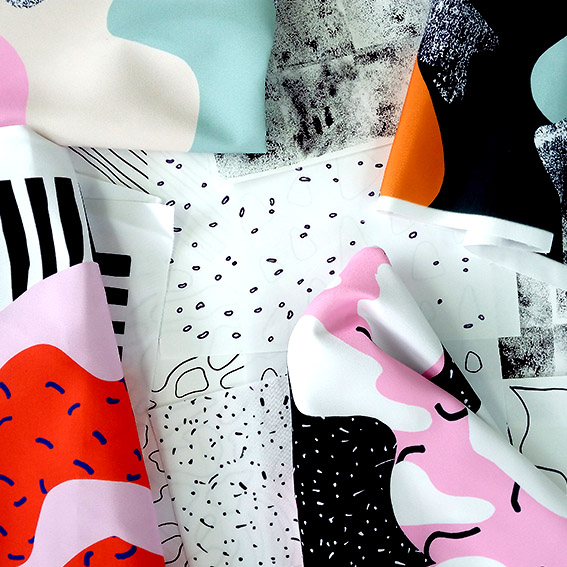
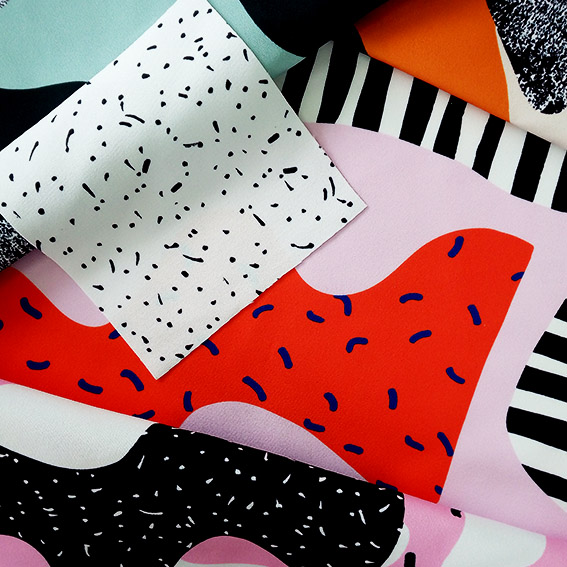
Here at Digital Fabrics we have a very exciting textile collection to launch just before the end of the year, with a really fun range of fabric prints to get you through Summer. The designs are inspired by dynamic and quirky Memphis design surface patterns and uses contrasting colours, shapes and textures to create playful designs that can be used together or on their own.
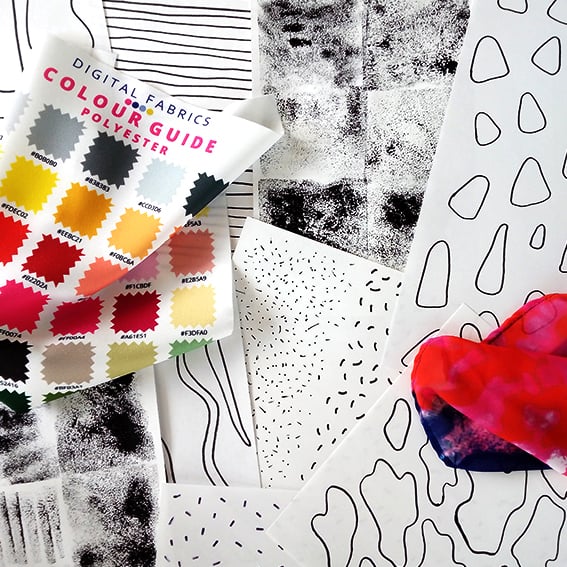
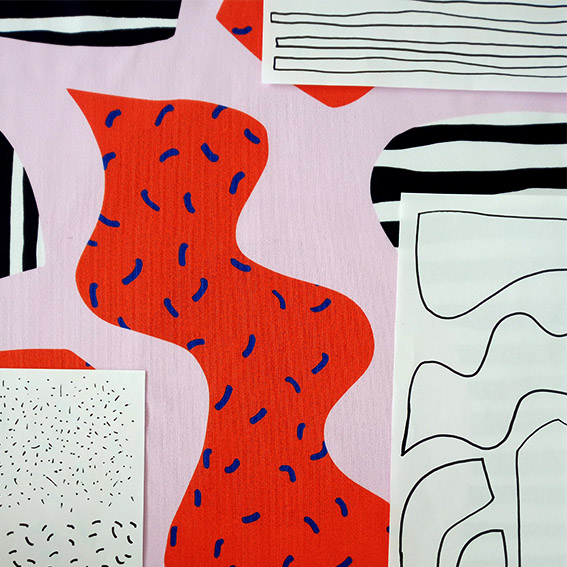
All of the print designs started out on paper! By using different mark making processes with a variety of materials such as markers, paints, pens and sponges, graphic shapes and surfaces began to emerge. These were then dissected and collaged together to create interesting designs with lots of energy.

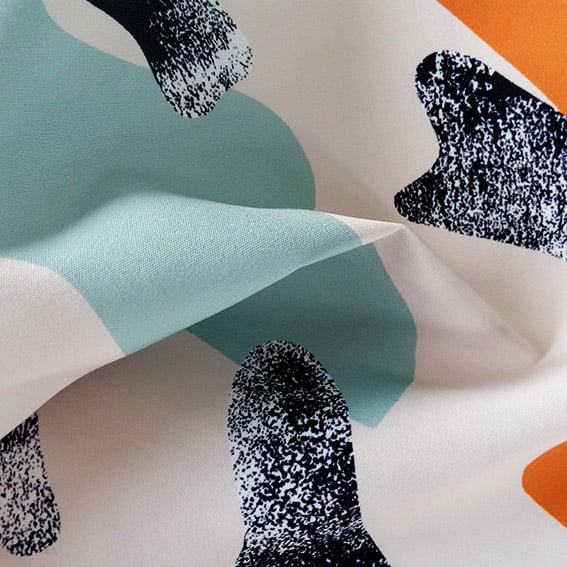
Colour is such a key component of this collection and it was really important to get them right. We combined very on trend pastel shades, with timeless neutrals, and whites to contrast with bold blacks and splashes of electric warm colours.
The Memphis Summer Collection is perfect to get those creative juices flowing over the next few months! Whether it’s making something in time for an event over the festive season or it’s because you’ve finally some free time to work on a DIY project, Digital Fabrics can help out with your fabric printing needs. We see these designs working for both interiors and fashion, with statement cushions and fabulous Summer dresses being the first things that come to mind!
The Memphis Summer Collection is available for purchase in our Design Library!
We’re very excited here at Digital Fabrics to be dropping another range of yummy prints! This time we’re inspired by bold earthy colours and organic forms, bringing to you a collection of hand painted, textural abstract designs.

Our Sunset Gum design is a small scale abstract print with bold contrasting colours. Who doesn’t love a splash of red?

Our Blush Pebble design is a medium scale graphic print. We just can’t get enough of pink!
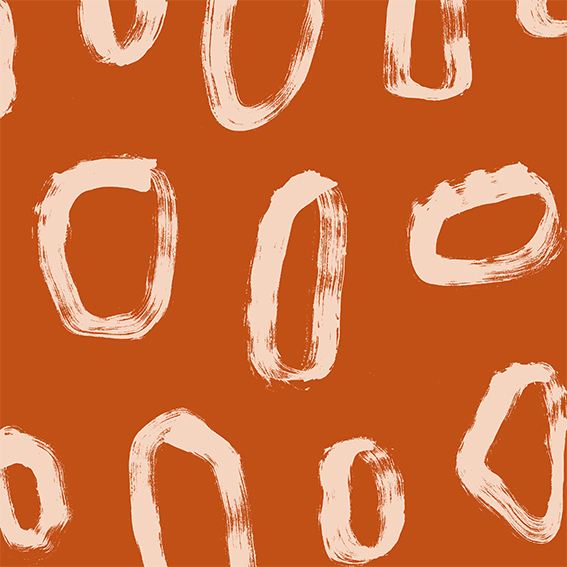
Our Ochre Scatter design is a small scale print with a fabulous burnt vermilion colourway, able to liven up any space or outfit!
Our Clay design is a medium scale print with bold geometric shapes and a deep warm colour palette.
The Artful Simplicity collection is available for purchase in our Design Library. We can’t wait to see what you do with them!
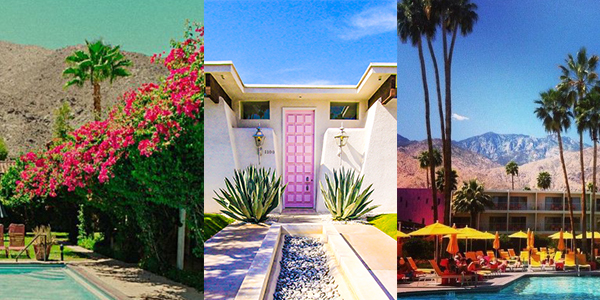
Exciting news! We have a new competition for all Textile designers out there, budding or experienced. The theme is ‘Palm Springs’. We know, fun right?
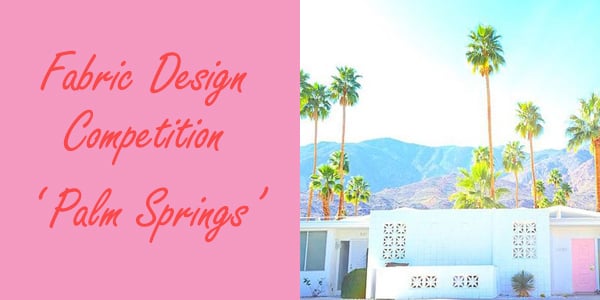
Create a fabric design for ‘interiors’ or ‘fashion’ inspired by ‘Palm Springs’ using any method you want. This could be photograph, paint, collage, sketch and could be based on colour, texture, architecture or landscape, there are no boundaries. Let your creativity GO WILD!
There will be 3 winners:
1st Prize will receive $250 worth of custom printing on a fabric from our stock plus a 45cm x 45cm cushion on waratah with their winning design, insert included.
2nd Prize will receive $100 worth of custom printing on a fabric plus a 45cm x 45cm cushion on waratah with their winning design, insert included.
3rd Prize will receive $50 worth of custom printing on a fabric plus a 45cm x 45cm cushion on waratah with their winning design, insert included.
All top ten designs will receive a strike-off of their design.
How it works:
Create it. Design it. Share it! Get your friends to share it too.
Why?
The top 10 designs will be voted for by the public, so share your designs with your friends, get them voting for you!
From the Top 10, there will also be one public voted winner, this will be the design that gets the most likes and the prize will be one 45cm x 45cm cushion with their design. Yay!
The competition will open on Saturday 21st October and close on Thursday 16th November at 9am Eastern Standard Time. All voting will close at 9am Eastern Standard Time Monday 20th November.
Top 10 will be announced on Monday 20th November on social media and will be featured on our website.
Winners will be announced on Friday 24th November.
Rules:
- Upload your design onto your Instagram account.
- Add the tag: #dfpalmsprings and tag us: Digital Fabrics @digitalfabrics so we can find your entry! If you don’t use the correct hash tag we may not see your design.
- We love to know the story behind the design and what inspired you so tell us everything!
All designs must be submitted by Thursday 16th November 9am Eastern Standard Time to be included in the competition.
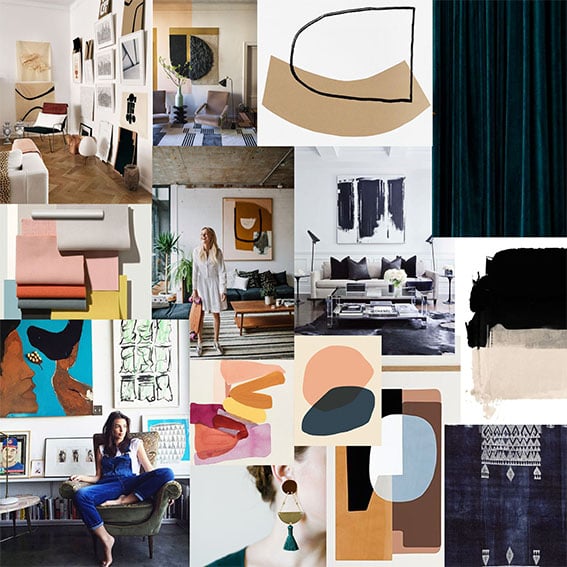
Just a little inspiration for you to enjoy:
 Terms and conditions:
This competition for Australian residents only.
Please use the correct hashtag to be included: #dfpalmsprings and tag us @digitalfabrics to ensure we can see your entry.
Only entries with the correct hashtag #dfpalmsprings will be in the running of the competition.
Unlimited entries allowed.
The team at Digital Fabrics will choose the finalists.
The winning prize can be used for one fabric type only from our stock fabric collection.
The 45cm x 45cm cushion will be printed front and back and mailed to you.
We can’t wait to see all the designs!
DF Team
Save
Save
Save
Save
Save
Save
Save
Exciting news! We have a new competition for all Textile designers out there, budding or experienced. The theme is ‘Palm Springs’. We know, fun right?
Create a fabric design for ‘interiors’ or ‘fashion’ inspired by ‘Palm Springs’ using any method you want. This could be photograph, paint, collage, sketch and could be based on colour, texture, architecture or landscape, there are no boundaries. Let your creativity GO WILD!
There will be 3 winners:
1st Prize will receive $250 worth of custom printing on a fabric from our stock plus a 45cm x 45cm cushion on waratah with their winning design, insert included.
2nd Prize will receive $100 worth of custom printing on a fabric plus a 45cm x 45cm cushion on waratah with their winning design, insert included.
3rd Prize will receive $50 worth of custom printing on a fabric plus a 45cm x 45cm cushion on waratah with their winning design, insert included.
All top ten designs will receive a strike-off of their design.
How it works:
Create it. Design it. Share it! Get your friends to share it too.
Why?
The top 10 designs will be voted for by the public, so share your designs with your friends, get them voting for you!
From the Top 10, there will also be one public voted winner, this will be the design that gets the most likes and the prize will be one 45cm x 45cm cushion with their design. Yay!
The competition will open on Saturday 21st October and close on Thursday 16th November at 9am Eastern Standard Time. All voting will close at 9am Eastern Standard Time Monday 20th November.
Top 10 will be announced on Monday 20th November on social media and will be featured on our website.
Winners will be announced on Friday 24th November.
Rules:
- Upload your design onto your Instagram account.
- Add the tag: #dfpalmsprings and tag us: Digital Fabrics @digitalfabrics so we can find your entry! If you don’t use the correct hash tag we may not see your design.
- We love to know the story behind the design and what inspired you so tell us everything!
All designs must be submitted by Thursday 16th November 9am Eastern Standard Time to be included in the competition.
Just a little inspiration for you to enjoy:
Terms and conditions:
This competition for Australian residents only.
Please use the correct hashtag to be included: #dfpalmsprings and tag us @digitalfabrics to ensure we can see your entry.
Only entries with the correct hashtag #dfpalmsprings will be in the running of the competition.
Unlimited entries allowed.
The team at Digital Fabrics will choose the finalists.
The winning prize can be used for one fabric type only from our stock fabric collection.
The 45cm x 45cm cushion will be printed front and back and mailed to you.
We can’t wait to see all the designs!
DF Team
Save
Save
Save
Save
Save
Save
Save
Snippets’. Chats with Creatives. Here at Digital Fabrics we love everything print, pattern and colour and we love to know what makes designers tick. This series is all about asking some fun and different questions and learning about the inspirations and ideas behind the artist and their work. We hope to inspire others by sharing snippets of these creative stories. We gave the artists and designers featured a varied list of questions to choose from so we will learn something new from everyone involved, should be fun!
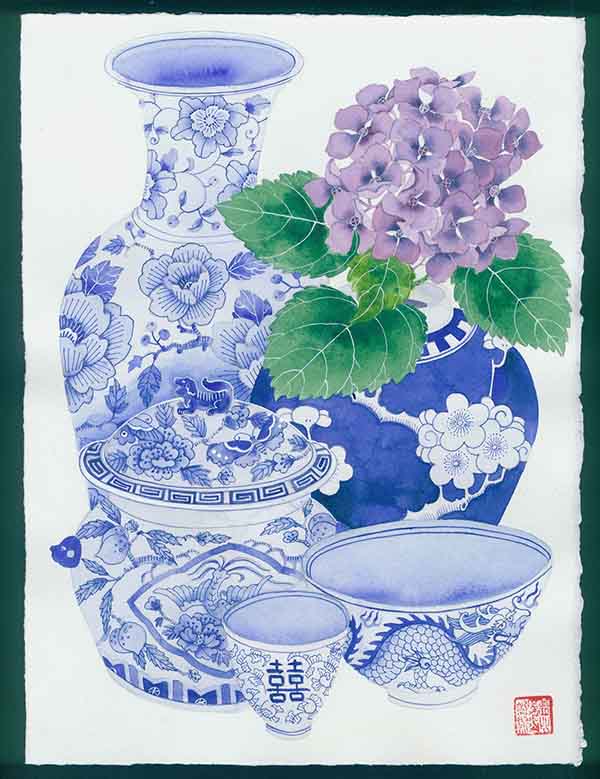
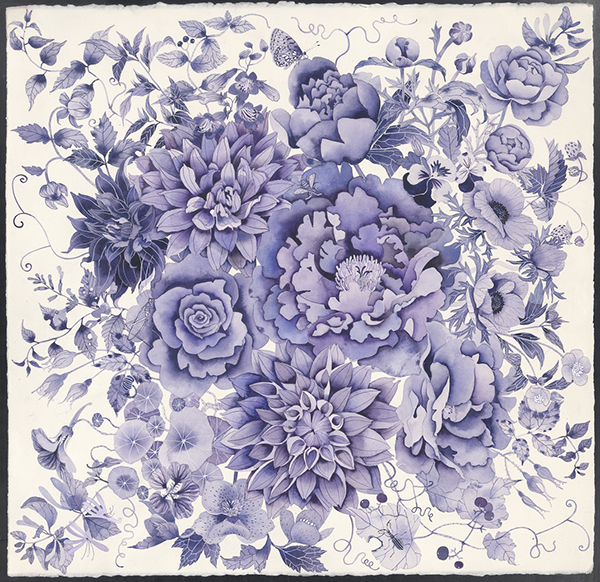
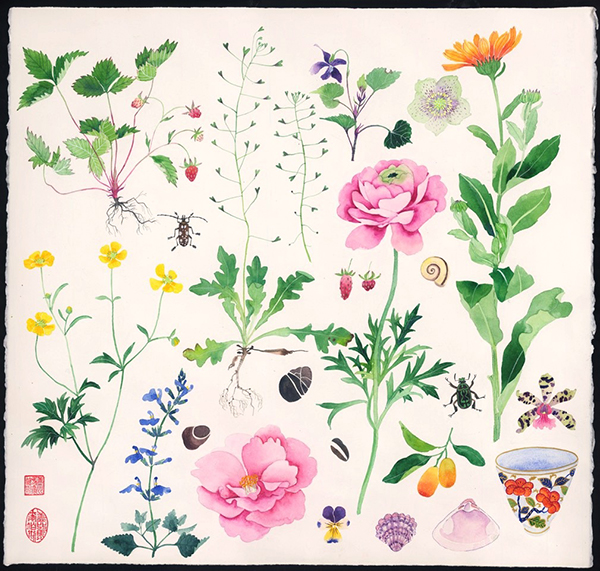
Today on Snippet’s we are talking to Gabby Malpas, an artist with a flair for painting detailed still life of Australian grown flora and fauna with a hint of what Gabby calls ‘chinoiserie.’
 The Snippety Snips:
Tell us a bit about yourself and what your creative practice is, how and when you began:
I’m Chinese, I was born in NZ and adopted into a white family of 9 children making me #10. I trained as a potter in Dunedin, after Art school I started using inks and watercolour on paper – as it is very much like liquid glaze. I left NZ in 1988, lived in the UK until 2003 and arrived in Sydney later that year. I’ve been a professional artist since late 2014 but exhibited and painted the whole way through since leaving art school.
I’ve been a digital project manager in agency and corporate since around 1992 – girl’s gotta eat and pay for holidays! These days I license my work, exhibit regularly, work with clients on creative stuff and get involved in a lot of adoption and community causes.
I am still learning how not to be a dick.
Which five words best describe you?
Most can’t be repeated in public but how about: scary, mad, loyal, loud, and dependable.
 How would you describe your work, and what influences your style?
My work is figurative watercolours. It has been dismissed as purely decorative but a lot of my work actually communicates my life experiences as a trans racial, Chinese adoptee. Some of the messages are a little hard to swallow – which is why I temper these with lavish and engaging imagery. I am influenced by a lot of artists and things: from Paul Klee, Matisse and Elizabeth Blackadder as European artists, to Japanese woodcuts and traditional SE , Central and West Asian imagery, textiles and ceramic designs.
What would your dream creative project look like?
Anything that gives me free rein to do what I like and I get paid for it… hang on – that’s a lot of what I do now.
 Which other Australian designers, artists or creative people are you enjoying at the moment?
Well I discovered Cressida Campbell when I got here and she’s my idol but there are a heap of fabulous designers I follow on Instagram and Facebook – I appreciate artists who just do their thang and are not worried about fashion or what’s hot. Oh and I’ve loved Ken Done since 1988 when I went to Brisvegas expo.
What has been your proudest achievement to date, creative or otherwise?
There have been a few: Getting some artwork into Liberty of London in the 90s, getting into the Affordable art Fair Sydney in 2009 was the first step to getting somewhere in Oz but finally calling myself a professional artist in Dec 2014 has got to be up there after nearly 30 years of slog.
 In another life what natural talent would you wish for?
It would be infinitely cool to be good at math.
If you could have your portrait painted by any artist dead or alive, who would you choose?
Not one for portraits but would love to see what Robert Crumb would do.
If you could only use one colour in your work what would it be?
PINK!
Love your Locals:
City/Town/Village where you currently reside:
Alexandria Sydney – yep, a local
Favourite spot for a bite:
Fratelli Fresh, Mitchell Road or Tuki Kanuki Erko. Fave pho place is Phd in Marrickville
Secret Inspirational spot: can I have 3?
The Asian Galleries at the AGNSW, the lotus pond in the botanic gardens and Kinokunya bookshop though I wish they’d let you sit on the step stools.
You can follow what Gabby is upto: Website, Instagram, Facebook
Snippets’. Chats with Creatives. Here at Digital Fabrics we love everything print, pattern and colour and we love to know what makes designers tick. This series is all about asking some fun and different questions and learning about the inspirations and ideas behind the artist and their work. We hope to inspire others by sharing snippets of these creative stories. We gave the artists and designers featured a varied list of questions to choose from so we will learn something new from everyone involved, should be fun!
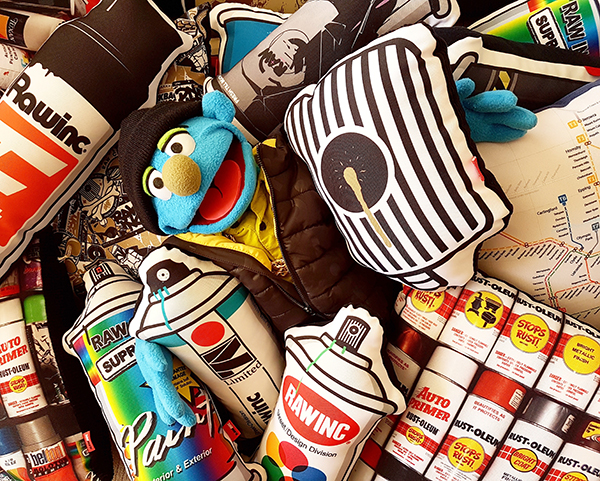
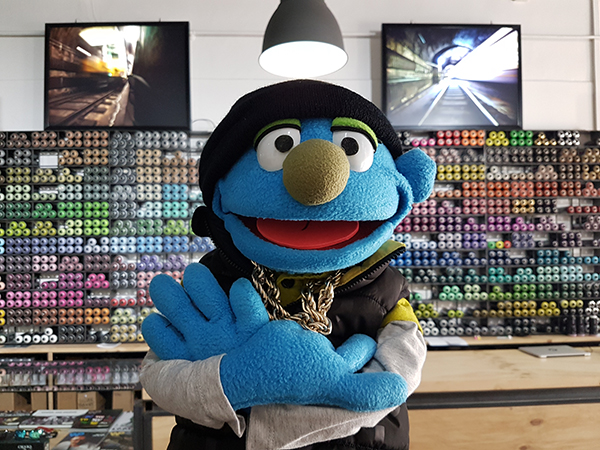
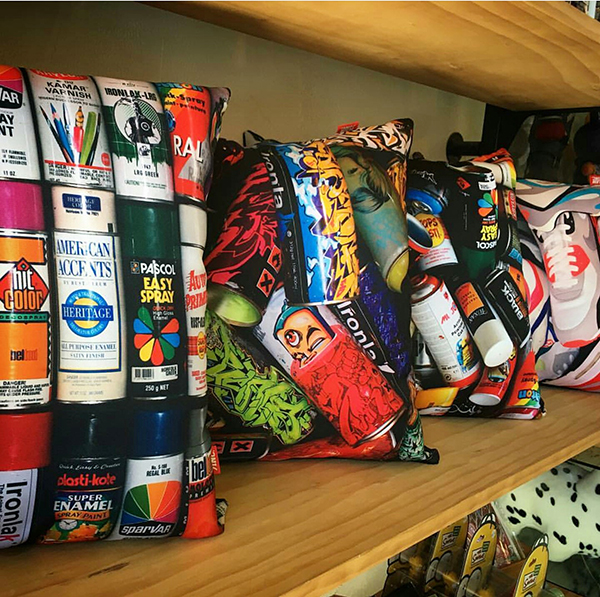
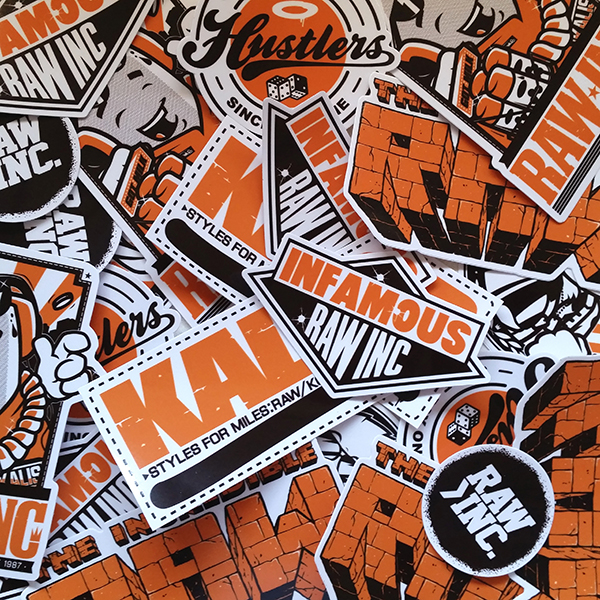
Today on Snippet’s we are talking to Darren Church, graphic designer behind ‘Raw Inc’ a street design division based in Australia. Inspired by graffiti and street culture they design and create unique apparel, cushions and accessories.
 The Snippety Snips:
Tell us a bit about yourself and what your creative practice is, how and when you began:
I’m currently based out in Penrith in Sydney’s lower Blue Mountains, but personally I enjoy the days out into the city and other areas I have to go, walking between stores and checking out what’s new on the streets in the graffiti scene catching up with shop owners.
How would you describe your work, and what influences your style?
I base 99% of our designs around graffiti and the classic sneaker culture, and we’re all about bold clean lines with fresh colours, using illustrations and different elements in photographs to create for that next cushion design. It’s our little niche and very different to what is out there in the industry.
We find people can relate to our different types of cushions, by bringing out what they grew up with a twist and purely for the love of the novelty of the item. We get contacted all the time by paint companies asking when are we going to do a cushion of their design.
 What does a typical day look like for you?
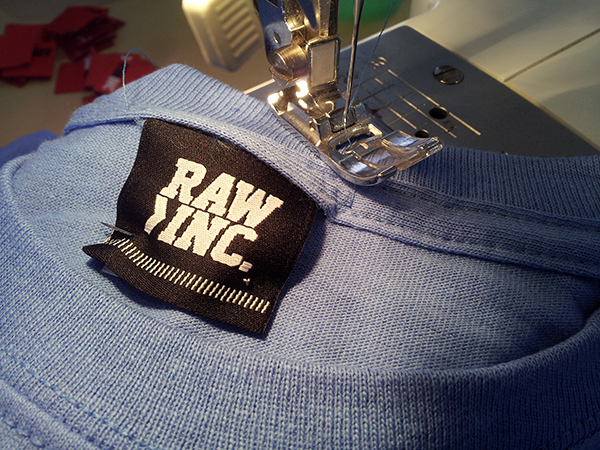
Always finding myself sketching up new designs and redrawing artwork ready for print for clients. And always hunting around Sydney fabric stores to find that perfect fabric to match artwork being printed. Cutting and sewing up fabric for those store orders.
It does get chaotic sometimes and a little stressful but very satisfying and it’s worth it in the end to see people loving the products.
 What has been your proudest achievement to date, creative or otherwise?
After many years of Managing retail stores here in Sydney and while living in the UK for 10 years, I got to the point of having enough and had to do something I enjoyed. So I studied Diploma in Graphic Design and a quick 12 month course in Screen Printing and realized I had so much to artwork and ideas I could do.
Now I have people coming up to me here in Sydney and in other states, that don’t even know me and treat me with a lot of respect. When we get emails weekly from European and US stores asking for order forms, it makes your day.
 Tell us something people may not know about you
I’ve been doing graffiti since the late 80’s and I like to combine the elements and influences into my work and whilst living in the UK I studied fashion and design for 2 years. It really opens up your eyes to how things are designed and so easily produced.
Love your Locals:
City/Town/Village where you currently reside:
Sydney West
Favourite spot for a bite:
I don’t really have a favourite food spot, I like to try new things all the time and sometimes catch up with friends for lunch or drinks and talk about new projects and ideas.
Secret Inspirational spot:
I’m always out and about in the city. I like to walk around the city and look at all the different graffiti, art, stickers, advertisements and t-shirts people wear, I carry around a little sketch book and I’m always stopping and sit down somewhere doodling ideas down.
 You can follow what Darren is upto: Website, Instagram, Facebook
Save
Save
Save
Snippets’. Chats with Creatives. Here at Digital Fabrics we love everything print, pattern and colour and we love to know what makes designers tick. This series is all about asking some fun and different questions and learning about the inspirations and ideas behind the artist and their work. We hope to inspire others by sharing snippets of these creative stories. We gave the artists and designers featured a varied list of questions to choose from so we will learn something new from everyone involved, should be fun!
Today on Snippet’s we are talking to Gabby Malpas, an artist with a flair for painting detailed still life of Australian grown flora and fauna with a hint of what Gabby calls ‘chinoiserie.’
The Snippety Snips:
Tell us a bit about yourself and what your creative practice is, how and when you began:
I’m Chinese, I was born in NZ and adopted into a white family of 9 children making me #10. I trained as a potter in Dunedin, after Art school I started using inks and watercolour on paper – as it is very much like liquid glaze. I left NZ in 1988, lived in the UK until 2003 and arrived in Sydney later that year. I’ve been a professional artist since late 2014 but exhibited and painted the whole way through since leaving art school.
I’ve been a digital project manager in agency and corporate since around 1992 – girl’s gotta eat and pay for holidays! These days I license my work, exhibit regularly, work with clients on creative stuff and get involved in a lot of adoption and community causes.
I am still learning how not to be a dick.
Which five words best describe you?
Most can’t be repeated in public but how about: scary, mad, loyal, loud, and dependable.
How would you describe your work, and what influences your style?
My work is figurative watercolours. It has been dismissed as purely decorative but a lot of my work actually communicates my life experiences as a trans racial, Chinese adoptee. Some of the messages are a little hard to swallow – which is why I temper these with lavish and engaging imagery. I am influenced by a lot of artists and things: from Paul Klee, Matisse and Elizabeth Blackadder as European artists, to Japanese woodcuts and traditional SE , Central and West Asian imagery, textiles and ceramic designs.
What would your dream creative project look like?
Anything that gives me free rein to do what I like and I get paid for it… hang on – that’s a lot of what I do now.
Which other Australian designers, artists or creative people are you enjoying at the moment?
Well I discovered Cressida Campbell when I got here and she’s my idol but there are a heap of fabulous designers I follow on Instagram and Facebook – I appreciate artists who just do their thang and are not worried about fashion or what’s hot. Oh and I’ve loved Ken Done since 1988 when I went to Brisvegas expo.
What has been your proudest achievement to date, creative or otherwise?
There have been a few: Getting some artwork into Liberty of London in the 90s, getting into the Affordable art Fair Sydney in 2009 was the first step to getting somewhere in Oz but finally calling myself a professional artist in Dec 2014 has got to be up there after nearly 30 years of slog.
In another life what natural talent would you wish for?
It would be infinitely cool to be good at math.
If you could have your portrait painted by any artist dead or alive, who would you choose?
Not one for portraits but would love to see what Robert Crumb would do.
If you could only use one colour in your work what would it be?
PINK!
Love your Locals:
City/Town/Village where you currently reside:
Alexandria Sydney – yep, a local
Favourite spot for a bite:
Fratelli Fresh, Mitchell Road or Tuki Kanuki Erko. Fave pho place is Phd in Marrickville
Secret Inspirational spot: can I have 3?
The Asian Galleries at the AGNSW, the lotus pond in the botanic gardens and Kinokunya bookshop though I wish they’d let you sit on the step stools.
You can follow what Gabby is upto: Website, Instagram, Facebook
Snippets’. Chats with Creatives. Here at Digital Fabrics we love everything print, pattern and colour and we love to know what makes designers tick. This series is all about asking some fun and different questions and learning about the inspirations and ideas behind the artist and their work. We hope to inspire others by sharing snippets of these creative stories. We gave the artists and designers featured a varied list of questions to choose from so we will learn something new from everyone involved, should be fun!
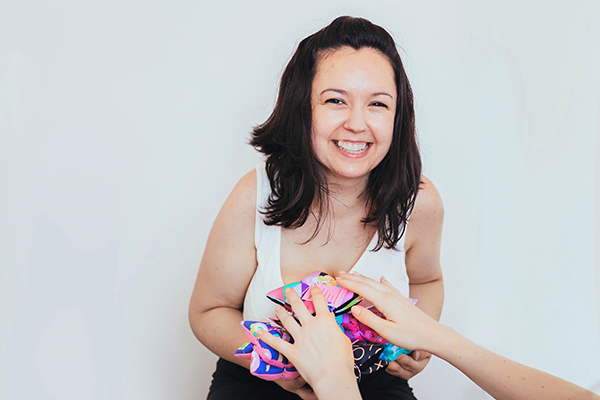
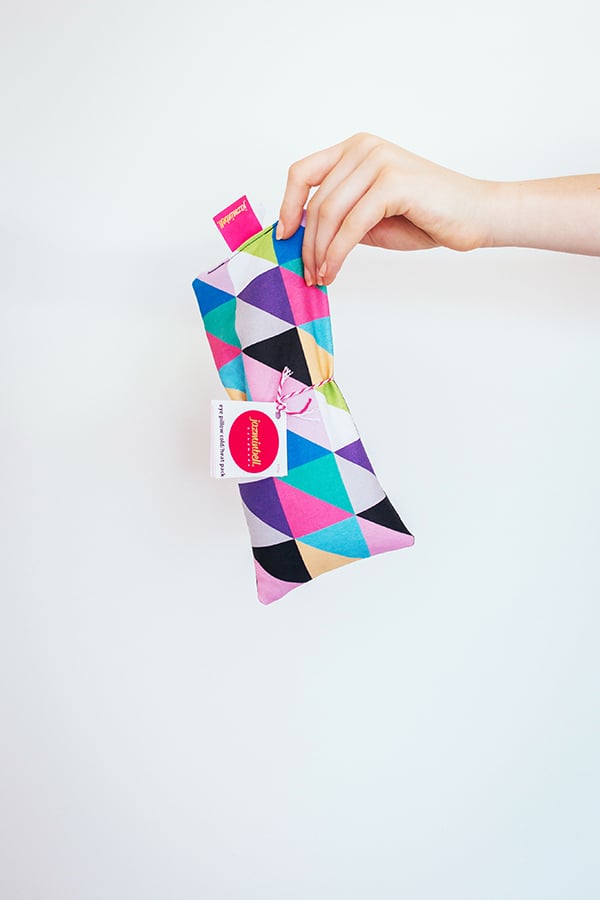
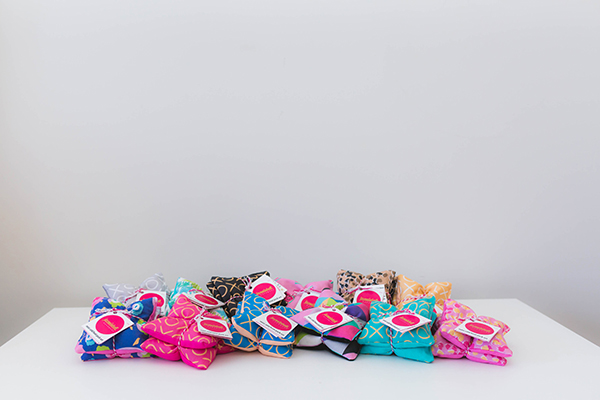
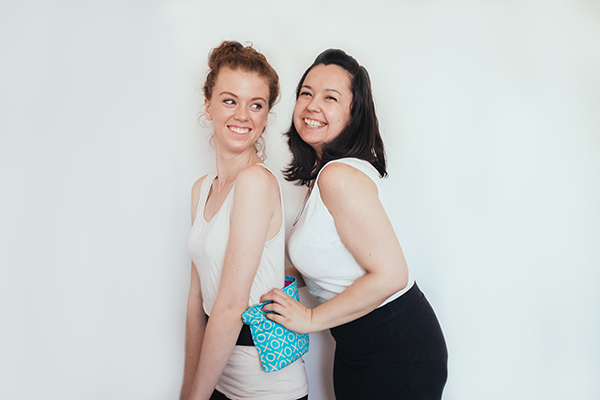
Today on Snippet’s we are talking to Jasmin Owen, the designer behind Jazminbell, a homewares brand that designs and creates heat packs from fabrics she designs and prints.
 The Snippety Snips:
Tell us a bit about yourself and what your creative practice is, how and when you began:
Hi there, my name is Jasmin Owen and I am the founder of the jazminbell® brand. The dream of running my own business all started at the age of 4 when I decided that I would work within Australia’s creative industry. After completing my design degree I went on to deliver my products to the world. I never realised how much there is to learn in the world of business and it has been the most amazing journey.
Jazminbell® began as a homewares brand, offering a unique range of cushion covers. With a pile of scrap fabric I sought to make mini hand warmers and they instantly took within the market. I never really saw success until I took the brave initiative to turn the business into a cold/heat pack brand and it has thrived ever since. It is hard to imagine now that it all began with tiny hand warmers – That is the incredible and unpredictable journey of business, I guess!
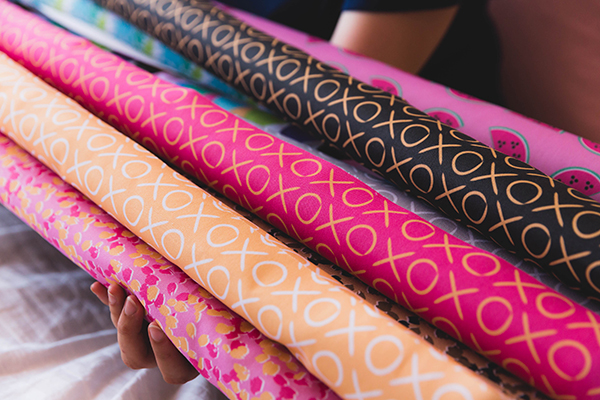
Working with Digital Fabrics has given me the opportunity to deliver a unique range of textile designs for my products and also create a relationship with another local business within the Australian industry.
Which five words best describe you? Quirky, happy, bright, inspirational, goal-digger.
Which other Australian designers, artists or creative people are you enjoying at the moment? I am forever inspired by the creative practice of Nicola Cerini. Her beautiful studio and printed textiles are so inspirational for me and what I do.
 What has been your proudest achievement to date, creative or otherwise? Completing a Bachelor of Design Arts and Graduate Certificate in Accounting, bringing the most wonderful daughter into the world and having the opportunity to work on my business and have the freedom of my own career.
If you could only use one colour in your work what would it be? Pink!
Love your Locals:
City/Town/Village where you currently reside: Canberra, Australia
Favourite spot for a bite: Canberra Yacht Club
Secret Inspirational spot: Lake Burley Giffin

X
You can follow what Jasmin is upto: Website, Instagram, Facebook
Save
Save
Save