We have absolutely loved sharing these divine floral designs by Queensland-based designer Nicole Spencer and hope you’ve loved her designs as much as we have! To coincide with Nicole’s “Take Delight” collection being made available to all of our customers through our Fabric Shop online, the artist herself has put together a guest blog which further explains her one of a kind approach to creating surface patterns and what inspires her work.
Keep reading to find out more about Nicole Spencer and her stunning designs!
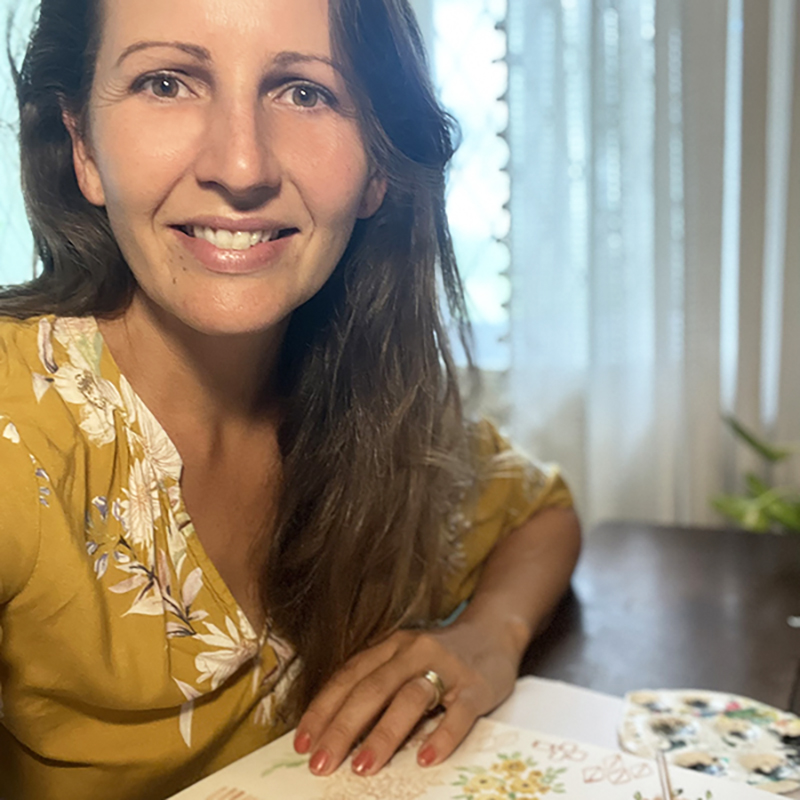
Hello! I’m Nicole, the face behind Ebb & Flow Surface Design. I am a wife to one, mum to 5, painter to some and emerging as a surface designer to many. My family I and live in Bundaberg, QLD, a town not far from the beach, which is our happy place. I love to paint, enjoy a hot morning coffee, have the sand between my toes and just be with my family. Being a stay home mum to 5, I realised a few years ago I had no hobbies and needed to do something for myself. I quickly fell in love with watercolour painting, and over time it’s grown from doing painting commissions, to digital prints, and now to wanting to see my work on all sorts of surfaces and textiles.
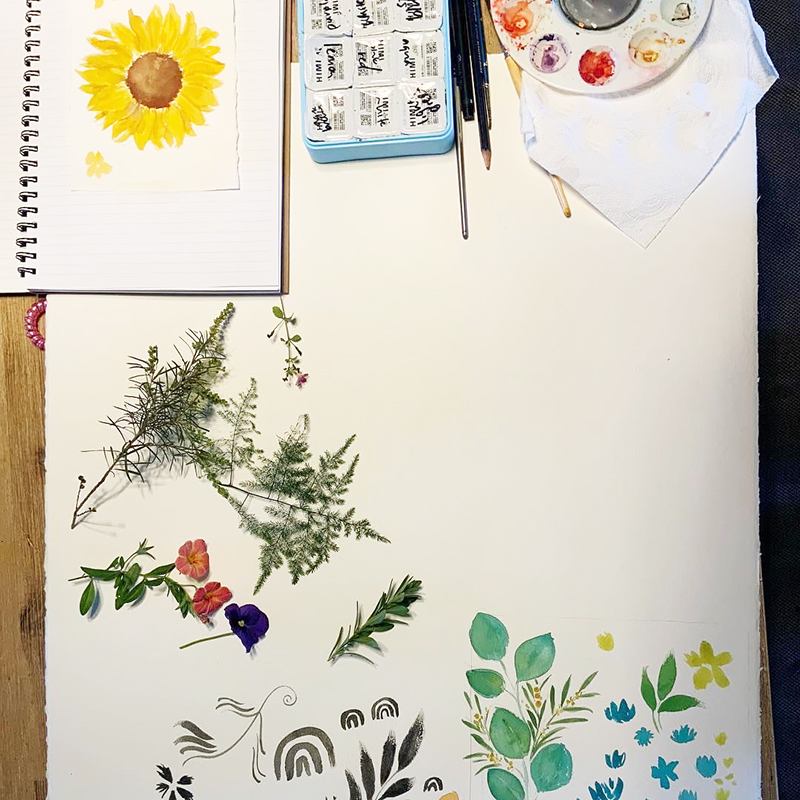
I’m constantly inspired by the seasons we face, the beauty of the world around us, and I love how I can incorporate story telling into my designs. Ebb & Flow not only creates designs, but captures elements from the beautiful world we’re in, and uses those to bring encouragement through the ebbs and flows we face in life. It finds beauty in the seasons of growth and in the seasons of change, and always aims to create joy in the simple things.
My process usually involves a few different elements, mostly watercolour painting, sketching, scanning random objects from the yard… weeds weirdly have the prettiest shaped leaves and always looking amazing in designs! Let me walk you through a design I put together this summer. “Take Delight”, is a collection I created, inspired by the reminders I had to embrace the pauses in life, (even the unexpected ones), and to choose to take delight in the simple things in front of us.
I had inspiration from both flowers in the garden and a gorgeous basket of florals I received over Christmas. I just loved the colours in this bouquet, and was able to use this to create a colour palette for the collection.
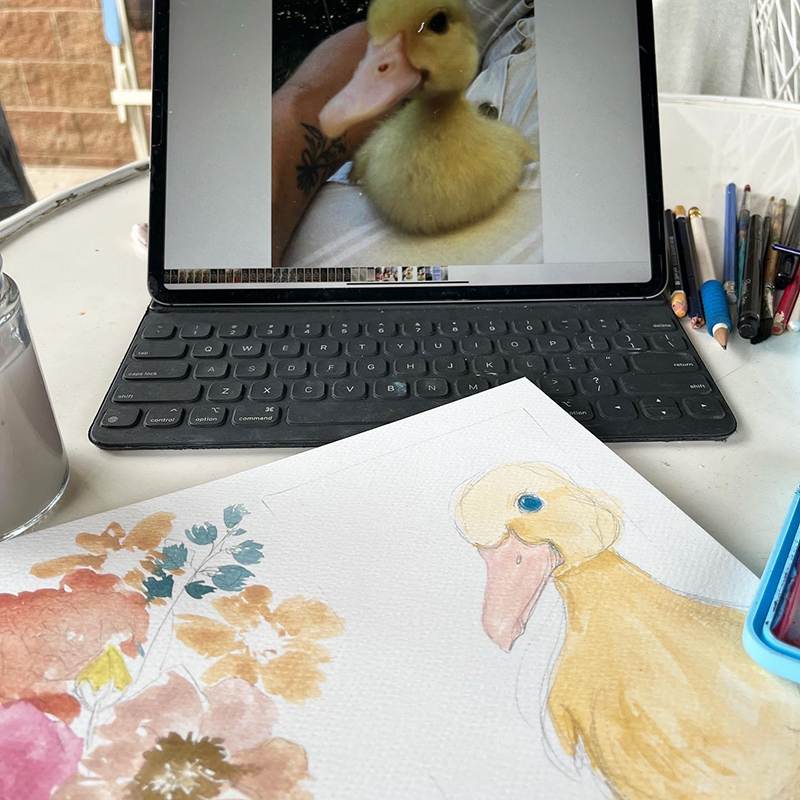
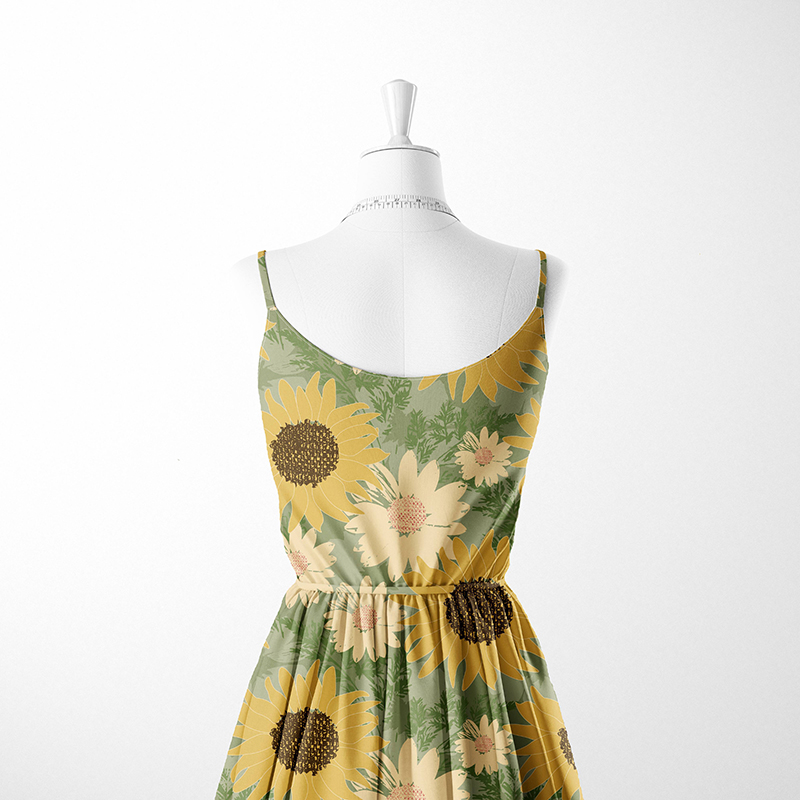
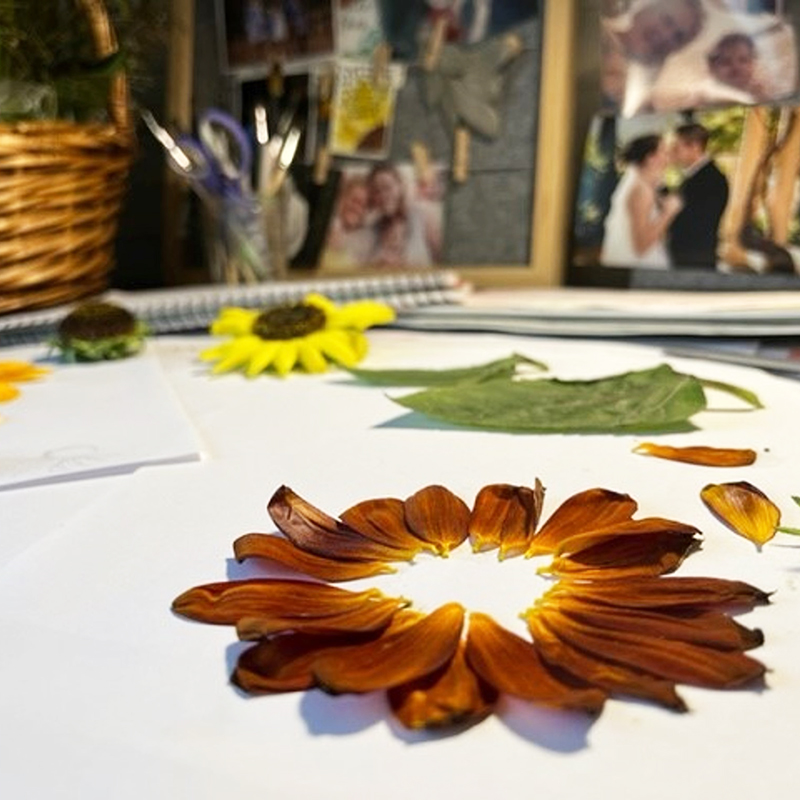
Like I mentioned my designs can include lots of different elements. For my one design in this collection – “Sunny Days”, I was able to pick some flowers out of the garden, pull apart some petals and create my own flowers on paper to scan in for design. This is the fun part where I love to play around with shades and textures. Remember how I said I love to incorporate random things. The centre of some of my florals in this design, was actually created by using a photo of the fabric on my bed head.
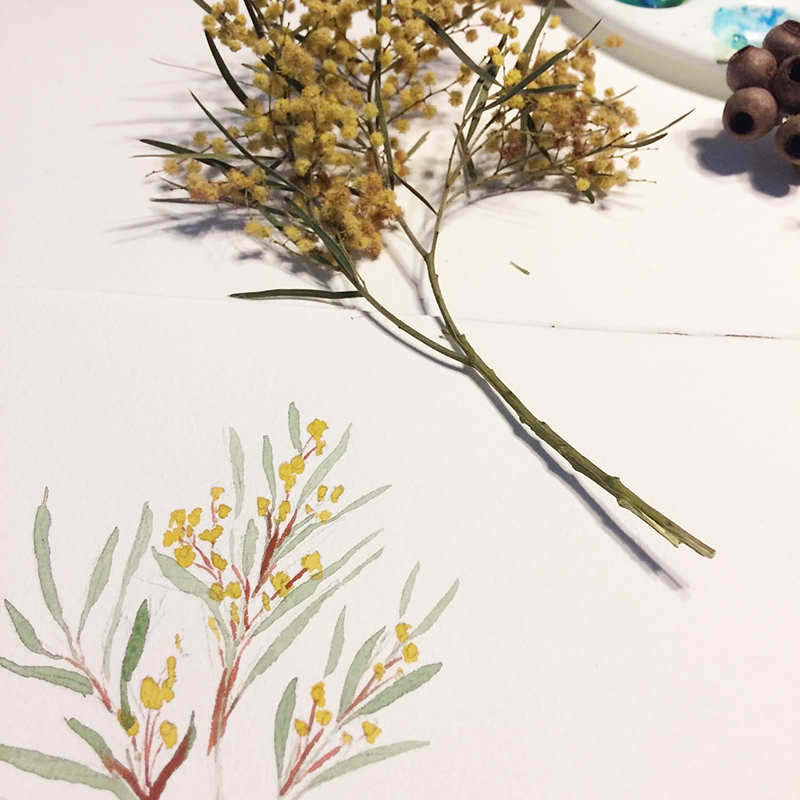
Watercolour painting has become a real love of mine, and a big part of my process. These paintings are often inspired by things found outside. I love when my daughter walks home from school and finds random flowers and leaves for me on the way home, it always brings a smile to my face, and gets the creative mind ticking over. The wattle in the picture was actually one of her treasures she found for me.
I think designing for me is a process of joy, discovery and creating beauty. I love using what’s around me to create designs, and I hope you find the joy in them too.
If you want to collaborate with us on The Designer Project and become part of this creative club, please apply! Send us an email with your portfolio and why you would like to be part of this initiative, and we will be in touch!
It’s come that time again to introduce our newest featured artist of The Designer Project for the month of November! Introducing the lovely and amazing Nicole Spencer from Ebb & Flow Design.
Ebb & Flow creates designs that are full of florals and nature, with colour palettes drawn from the beautiful outdoors. Nicole loves to create designs that flow across the page and as you can see, she kinda has a thing for flowers!
Each of Nicole’s beautiful designs can be printed onto any of our fabrics. Keep reading to find out more about Nicole Spencer and her ‘Take Delight’ Collection!
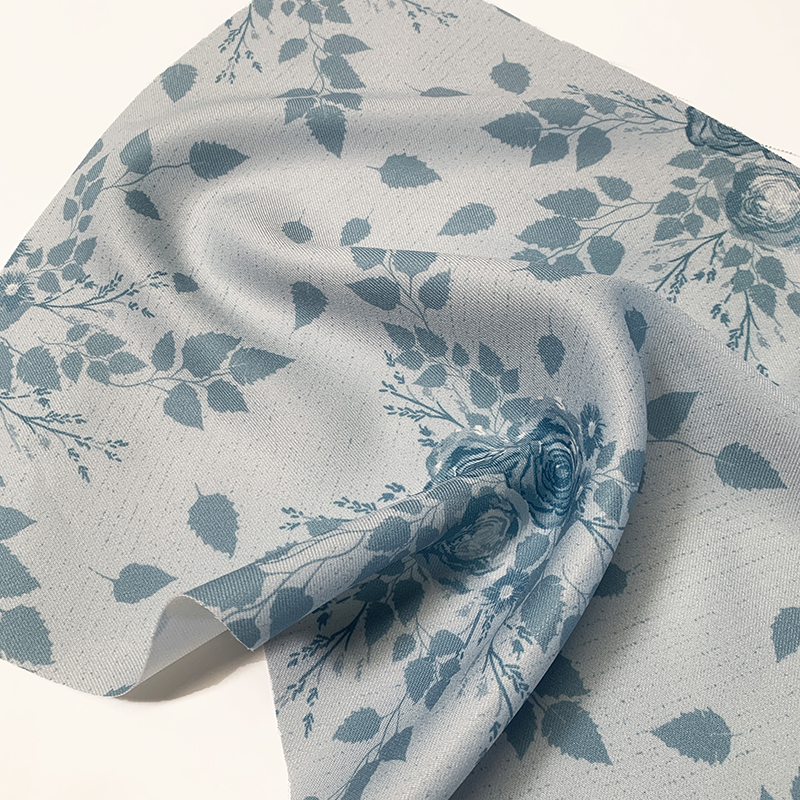
Fresh Pickings is a combination of both paintings and elements of things picked from the garden. We love how it dances across the page and is a sweet reminder that seasons change and beautiful things await us. The blue tones of this design work so well with the floral motifs.
Fresh Pickings could work for a variety of fashion and home projects, perhaps some lovely pillowcases and napkins? Or maybe a new beach kaftan!
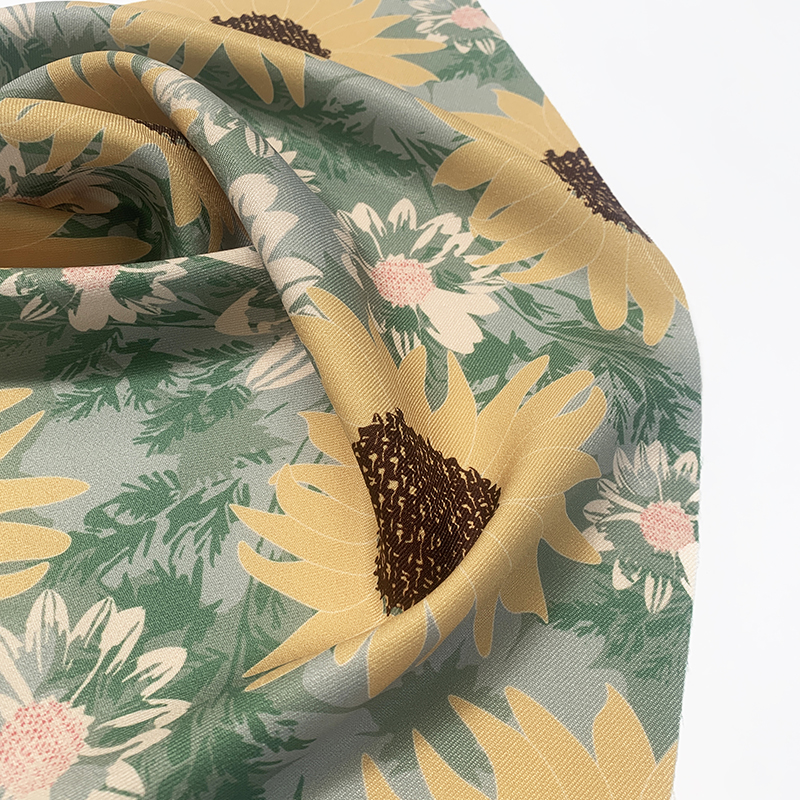
Sunny Days is full of wonderful summer florals, with a few hand painted elements. Inspired by summer days, fresh sunflower blooms, and the warm sunshine, it’s a fun print for the warmer days ahead.
We think Sunny Days would be such a fantastic print for homewares such as picnic rugs or tea towels, perhaps even some sweet, summer pants!
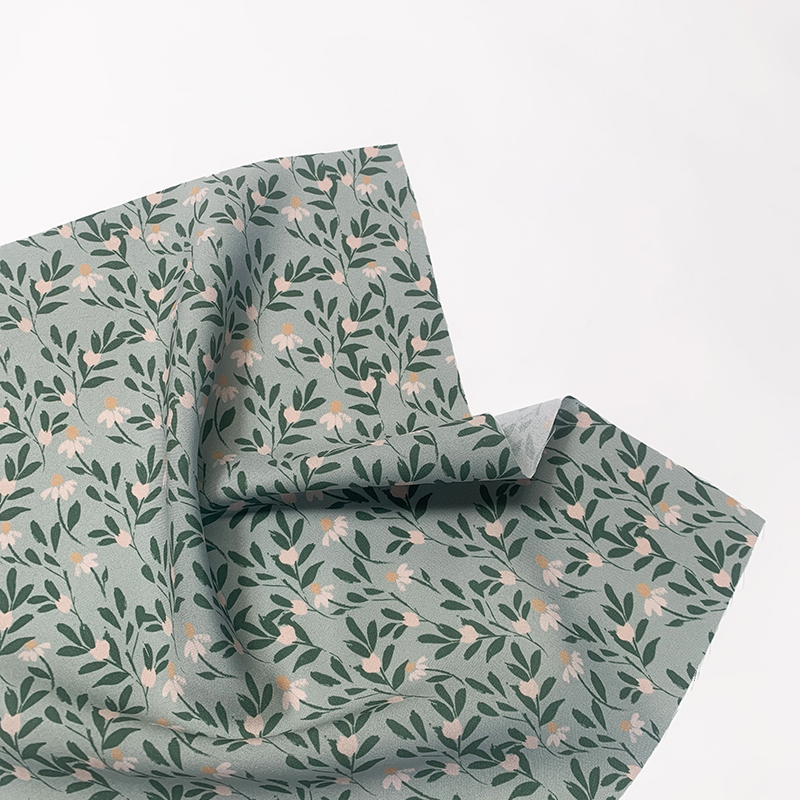
Hidden Beauty, a gorgeous print that features hand painted elements. With the florals peeking out from the foliage in this design, it reminds you not to miss the little moments of beauty hidden in the unexpected moments.
Hidden Beauty would be perfect for kids clothing such as dresses and pants or even a lovely matching pants and top for you!
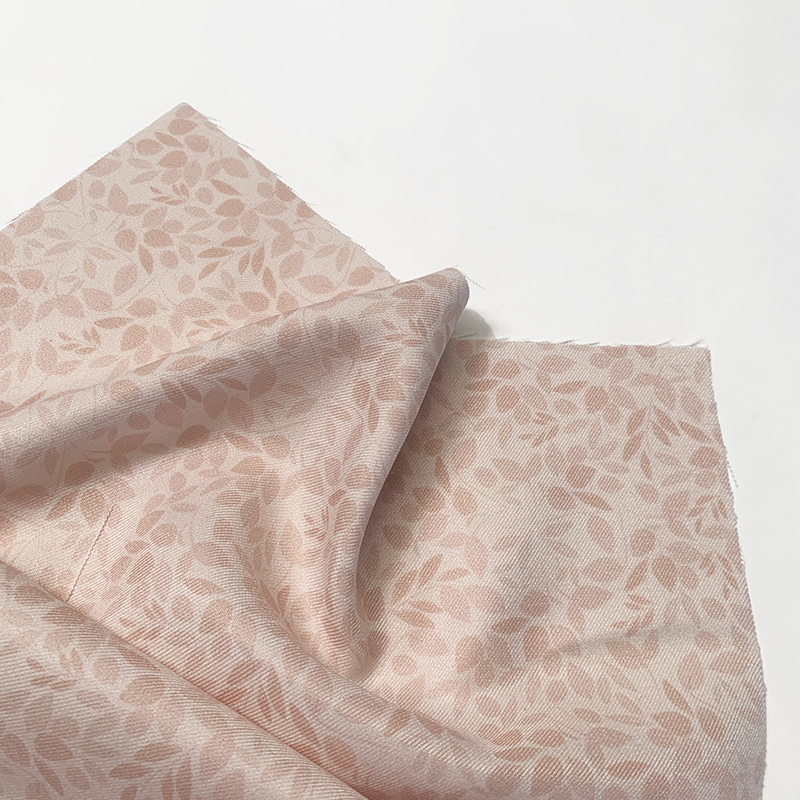
Swept Away showcases soft pink leaves and petals, scattered across the design. Think the wind carrying all the freshly fallen leaves across the ground, reminding you that as one season ends, a new one begins.
Swept Away is such a versatile print! We think it would be amazing for homeware projects such as cushions, tea towels and throw blankets!
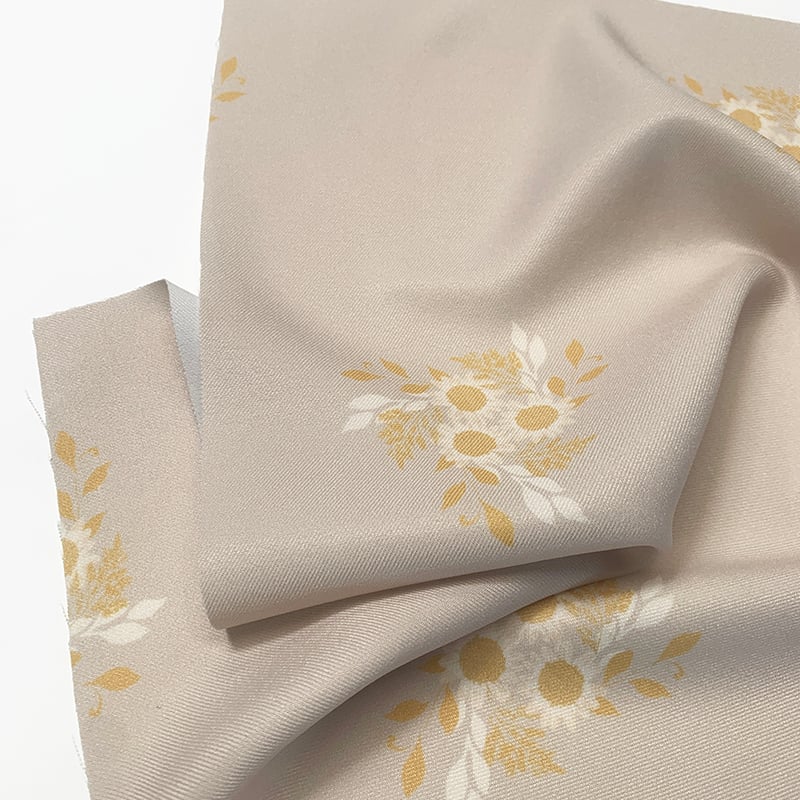
Sunshine Swirls, a sweet and simple print. It incorporates painted elements, scanned in florals as well as different textures. Full of warm, sunny colours to make you think of twirling around the yard, with a picked flower in hand.
We this Sunshine Swirls is such a wonderful design for fashion garments such as long flowing skirts and dresses.
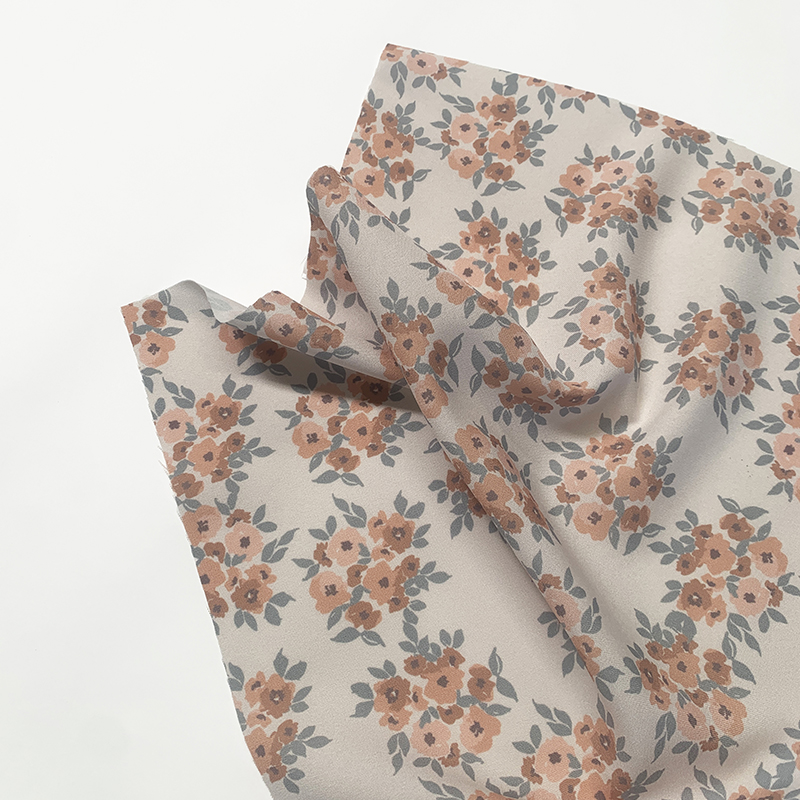
Pick a Posy is a lovely design that incorporates small painted elements. It’s a sweet reminder of little posies, gathered rustically but little hands, small gestures of big love – joy in its simplest form.
Pick a Posy would be the perfect print for summer dresses for yourself and the kids, or even a sweet little baby swaddle!
All of our project ideas above are suggestions only as the sky’s truly the limit with Nicole’s sweet floral collection! Each of Nicole’s designs can be found in our Fabric Shop, so head on over to be inspired for your next DIY project!
Unique branding has always been a cornerstone to success for any business, and in 2022 it is no different. A game once stacked in favour of the bigger businesses with the resources to employ oodles of marketing and production staff, the age of the internet and social media has allowed non-for-profits, government agencies and small business to enter the playing field with corporate merchandise. The internet has allowed custom design agencies such as Digital Fabrics to jump onto the scene providing businesses with the branding of their dreams. Then, there are the new marketing opportunities that now present themselves with just the click of a phone camera. As of 2019, nearly every single Australian adult between 18 and 49 owns a smartphone, and that rate is only projected to increase with an ageing population. That means every potential customer on your radar has the ability to take a quick snap and upload an image to Facebook or Instagram – and show your branding to the world.Think photos in front of banners at events, tote bags shopping at local markets – there are literally thousands of opportunities to get your brand out there for free. And in the age of climate change and environmental awareness, customers are taking more and more educated decisions when it comes to spending their dollars ethically and sustainably. That’s why we are proud to offer a range of environmentally-friendly textiles for commercial clients, to take advantage of the digital environment and take their branding to the next level. The possibilities in this space are endless. Here are just some of the products we have brought to life for our clients in a corporate or marketing setting:
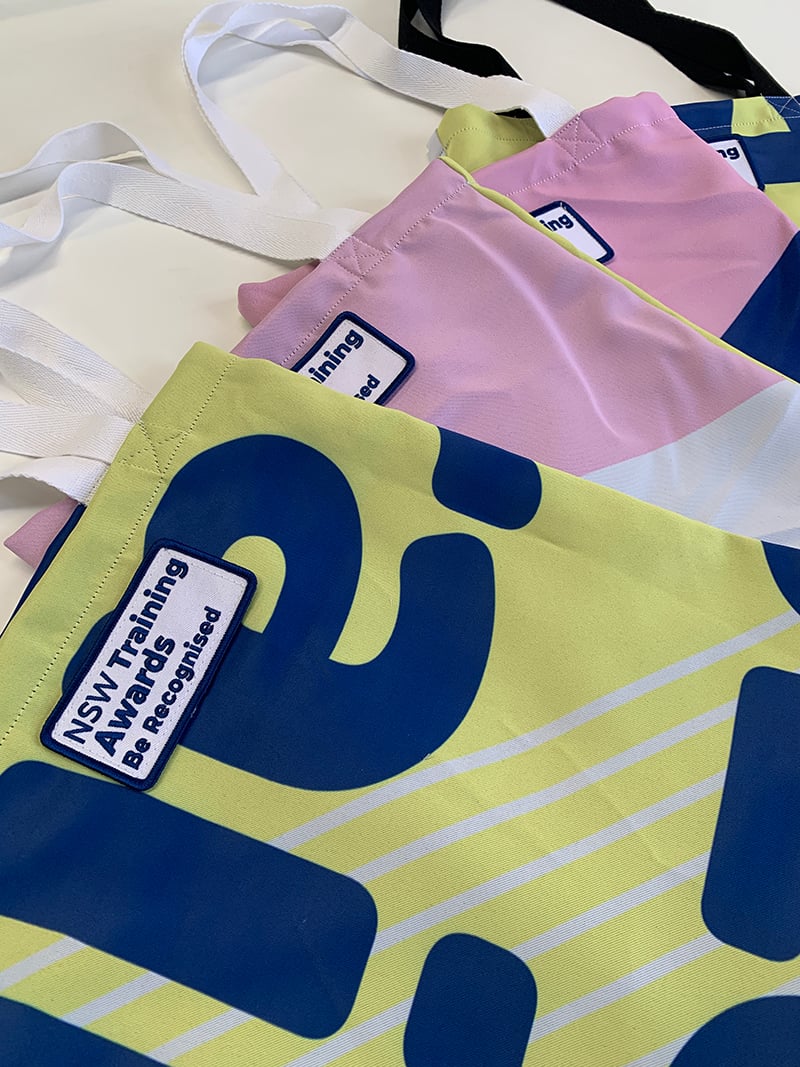
Corporate event branding – these tote bags were a hit for the 2022 NSW Training Awards. Everyone loves goodies to take home from conferences and events, and by using a reusable product that is also sustainable, their longevity means they become someone’s new beach or shopping bag – and your branding remains front and centre. These totes were made by recycling old banners. Don’t they look amazing!
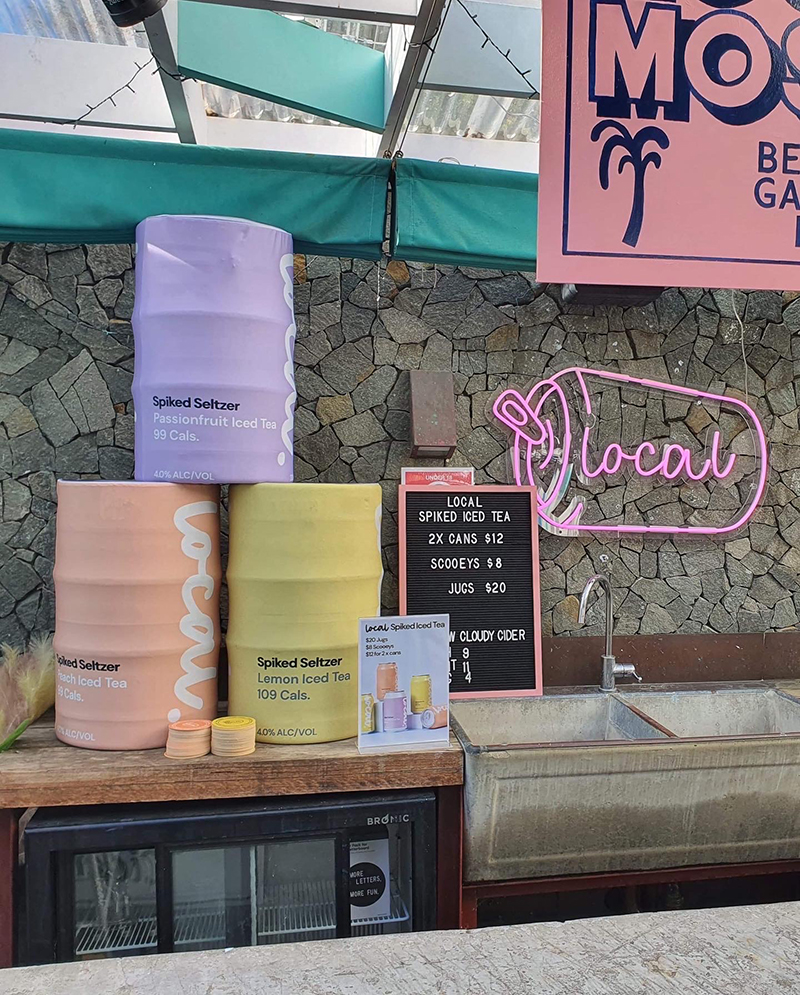
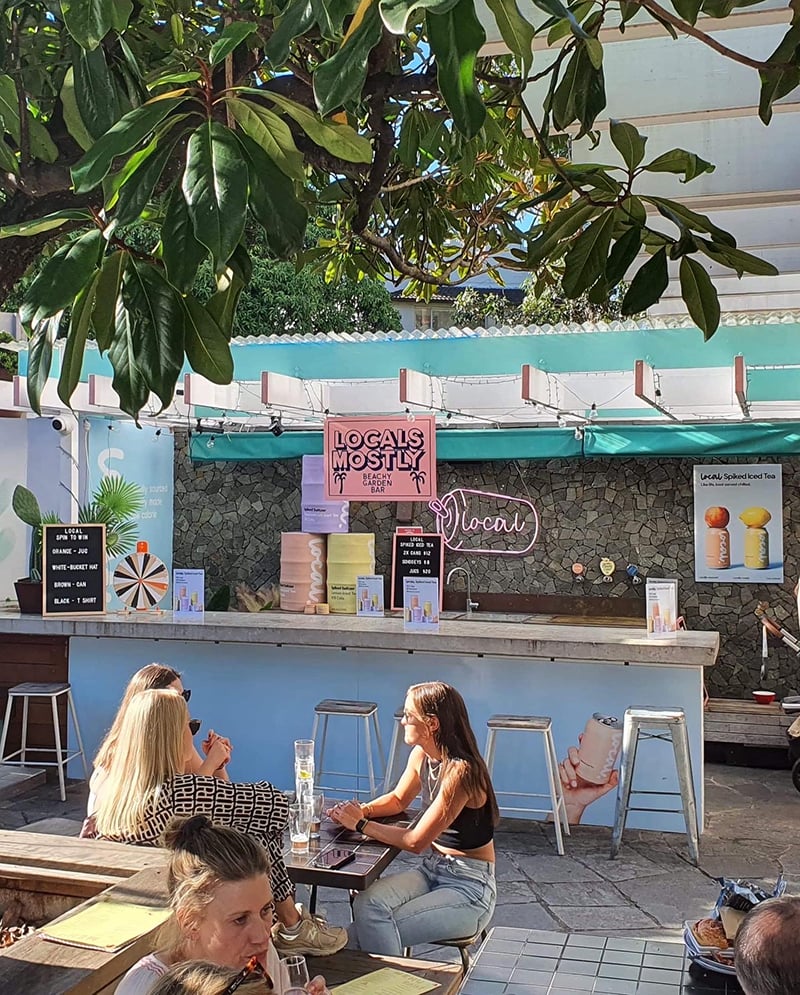
In-store merchandising – these funky barrels are what pastel dreams are made of. We teamed up with the fantastic team over at Local Beverages to make these custom keg covers for one for an event. As you can see, the idea was to create giant versions of their delicious spiked iced tea drinks, they turned out so cute. These were printed on and made from our Eco Recycled Vesna Lycra so they stretched nicely over the kegs and had a snug fit, promoting their seltzers in a style that is unique to their business. The best of it all these covers can be washed and easily relocated to the next promotional event space. We love a creative way to promote new products without the need for basic blackboards or promotional posters.
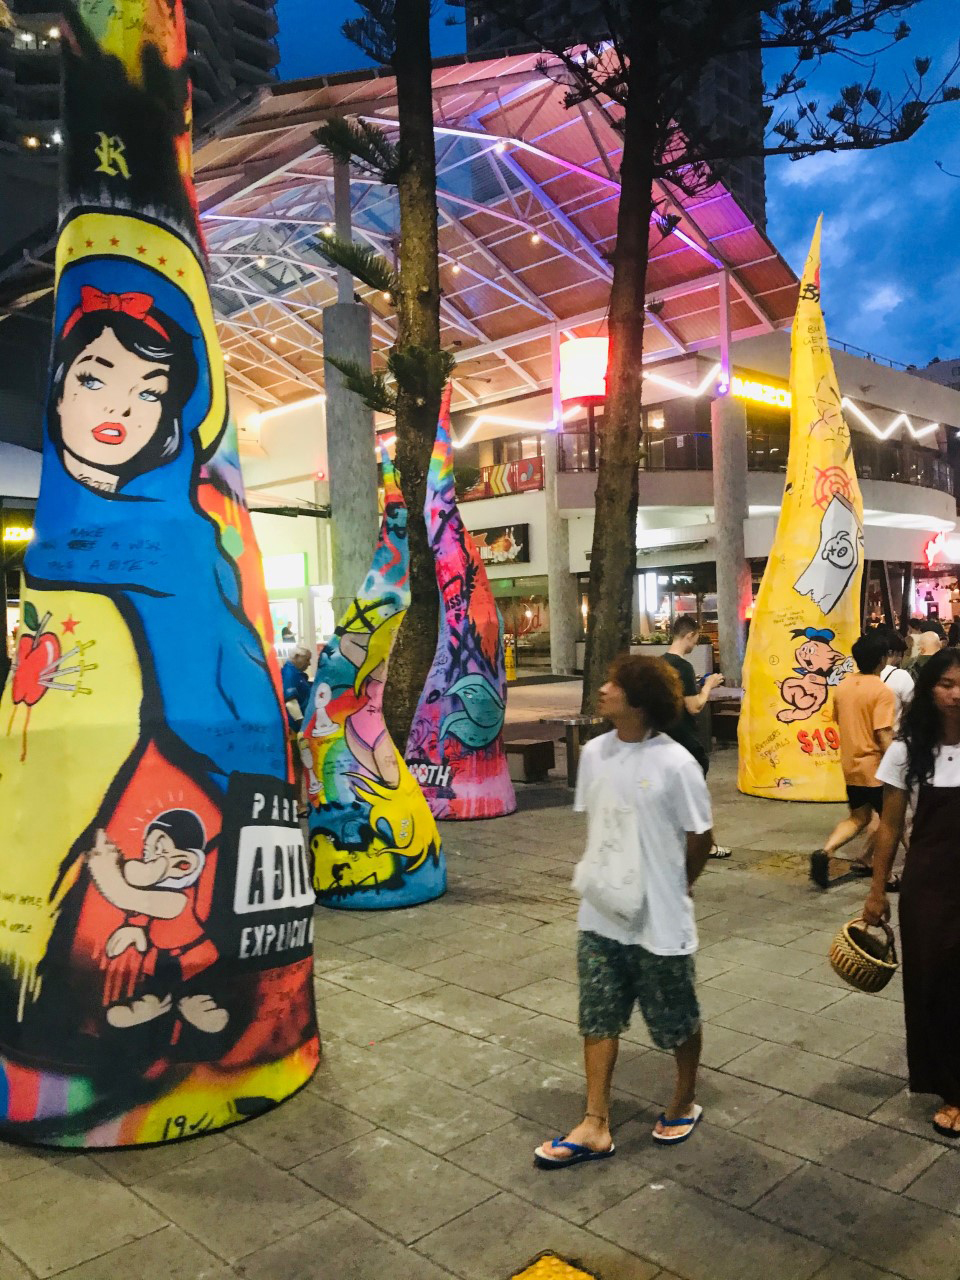
External Promotions – Whilst we’re often completing print orders in less than a week, sometimes we assist with projects that take a little longer to bring to life (but are worth the wait). A great example of this is the artistic collaboration between two Australian artists; Clayton Blake & Courtney McCue. Check out these portable tentacles that hit the Gold Coast as a part of the Sand Safari Artist’s Festival in Surfers Paradise. They certainly caught a few curious people and their iPhone’s attention!
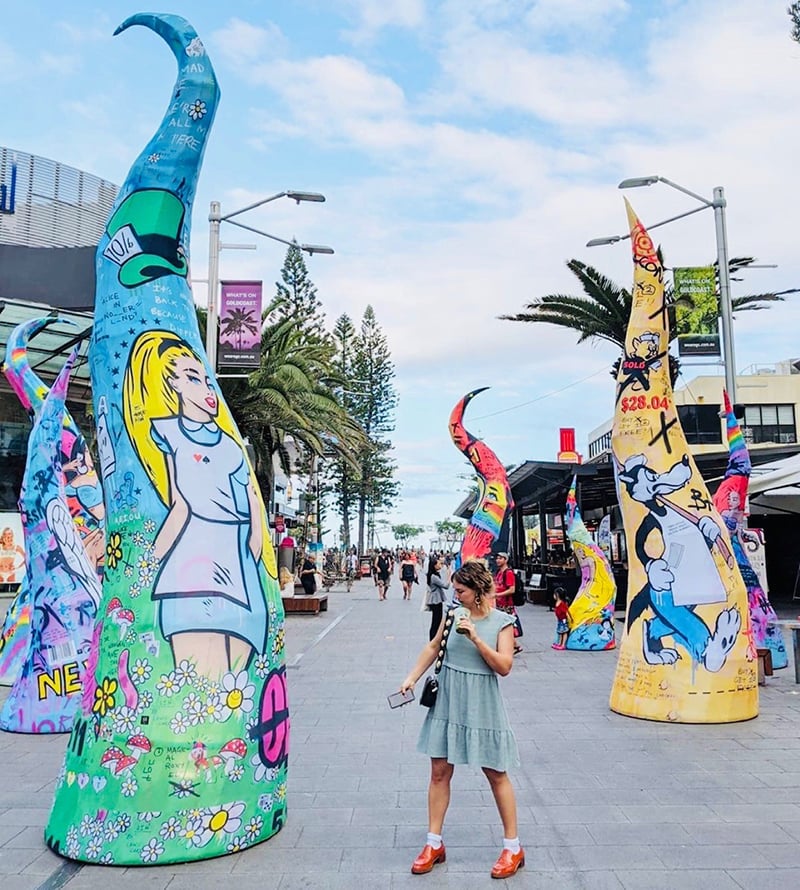
Backdrop and Stall Merchandising – whilst innovation and ingenuity help keep business ahead of the game, you don’t always have to reinvent the wheel to get the most out of your marketing. Backdrops and banners have been the backbone of visual presentation for market stalls and small outlets for over a century.
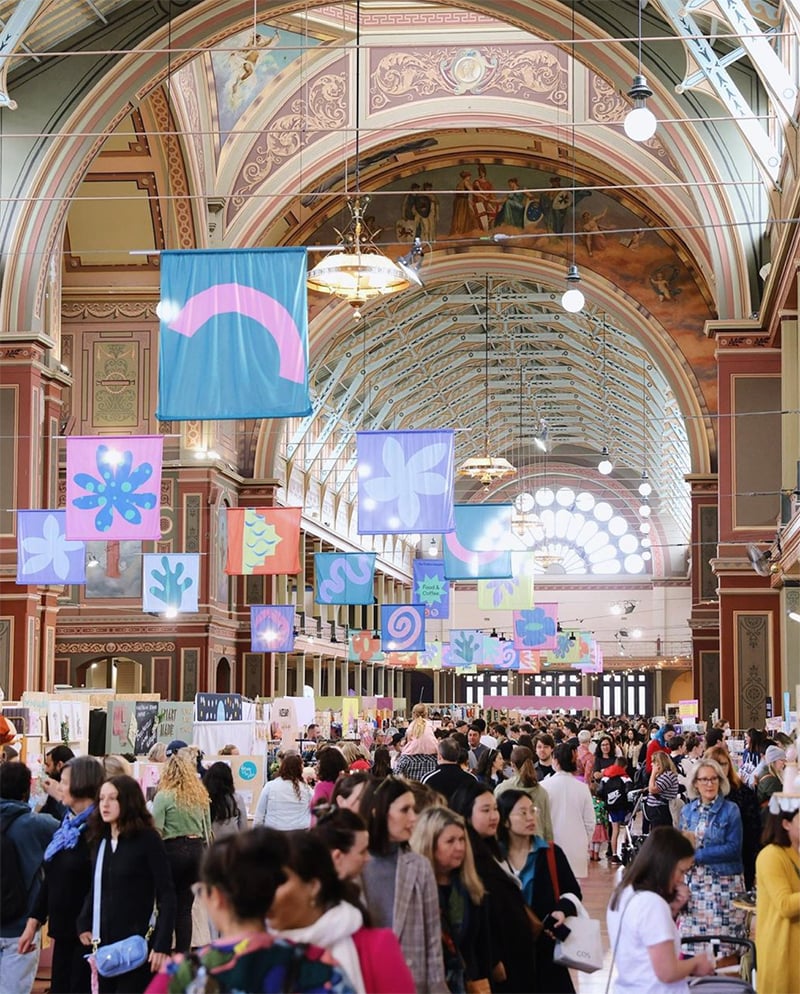
Image courtesy of Finders Keepers Market
It’s no secret we are passionate about supporting the dreams of small business and those with the entrepreneurial spirit, so we have jumped on board as a sponsor for the upcoming Finders Keepers event in Sydney on Friday 9 to Sunday 11 December 2022.
The Finders Keepers are the brainchild of two friends, Sarah Thornton and Brooke Johnston. Kicking off in 2008, they have grown from a humble side-hustle to become Australia’s leading design marketplace.
Digital Fabrics are proud to sponsor such a wonderful initiative that shares our values of inspiring sustainable and conscious shopping whilst promoting the talent on our very own shores.
For stallholders looking to make the most out of their Sydney display or for your upcoming Christmas market stalls, now is the time to get your thinking caps on and order your brand new designs with Digital Fabrics in time for December. Think branded and bright backdrops, table cloths or get extra creative with one of our specialists, get in touch and we’ll be happy to discuss how we can help you and your brand.
We can’t wait to see what our creatively conscious community will dream up for their business and marketing needs.
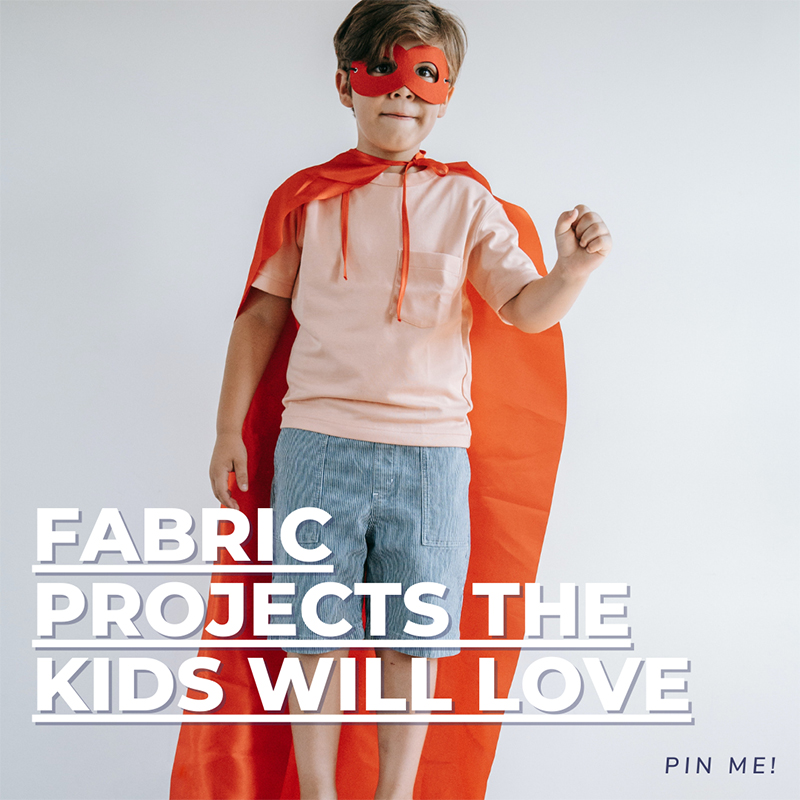 The Australian spring hasn’t quite begun the way we are used to. The sunny beach trips have turned into rainy weather days at home, meaning it becomes all that more difficult to keep the kids entertained. With a gloomy couple of months ahead, we understand the need to reduce screen time and find some indoor activities to keep the young ones busy. So, get ready to swap their iPads for some creativity as we have put together a list of really easy and simple fabric craft projects for kids to keep those rainy-day blues away!
Reusable Sandwich Bags | by A Beautiful Mess
The average Australian household uses 170 zip-lock sandwich bags per year, so this project will not only bring a little flare to school lunches, but will also save you money and bring down your carbon footprint. These reusable lunch bags can be brought to life with some cotton fabric, some thread and velcro, making it an easy project to occupy an afternoon. With the money you will save from buying plastic zip-locks, you can further customise these bags with our designer fabric shop that will no doubt become a household hit. How about these cute fruity fabrics?
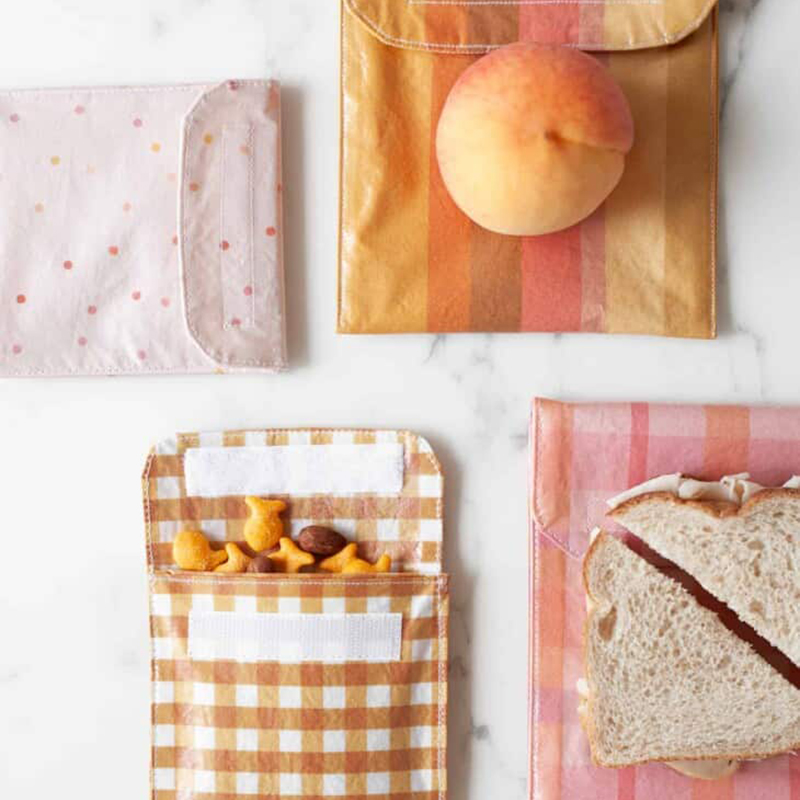
Reusable lunch bags. Image: A Beautiful Mess
No-Sew Capes | by Little Pink Monsters
Halloween is just around the corner so why not get ready for some trick-or-treating with this easy project that is totally needle free. All you need is 1.5 metres of fabric, 90cm of ribbon and a pair of scissors and you’re on your way to the unveiling of the next Superman or Wonder Woman. And, let’s be honest, Halloween is fun for adults too, so don’t be surprised if you need some longer fabric! Shop our Halloween inspired fabrics here.
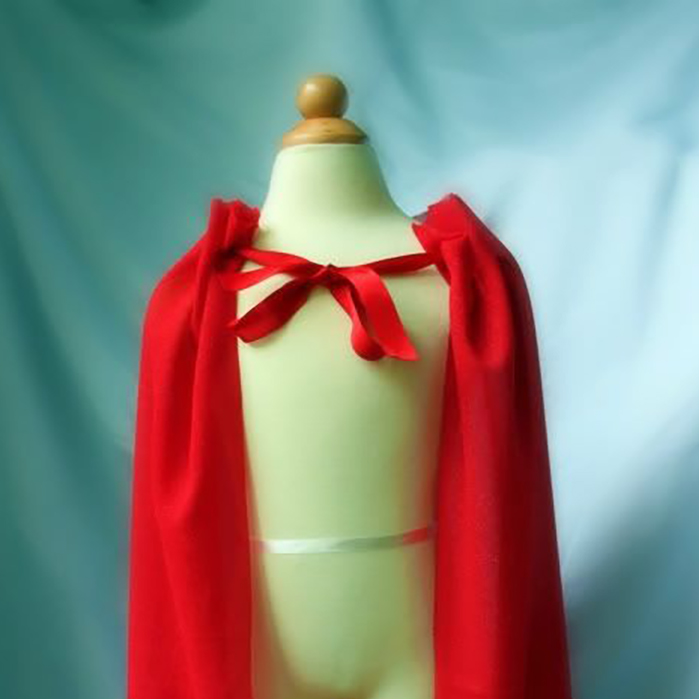
DIY Little Red Riding Hood. Image: Little Pink Monsters
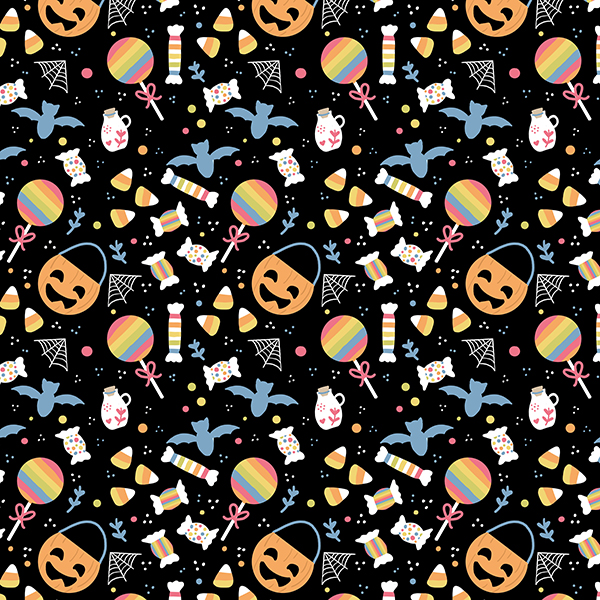
Trick or Treat Black Halloween fabric – Kathrin Legg
Making Memories
With Christmas around the corner, we know you’re always looking for ways to create memorable gifts that friends and family will cherish. We may be biased here but our custom product printing service is ideal for this time of year! Give the kids some colouring pens and task them with drawing the whole family, even down to the houses they live in, or drawing them with their favourite things and pets. Scan them into your computer then jump onto Digital Fabrics and choose some fabulous homeware items or gifts to print these designs onto. It could be our cushions, tea towels (a favourite for gifting!) scarf, pillow case or tote bag. Or order our Creatives Starter Pack with a little bit of everything! Our team will gladly help bring these designs to life.
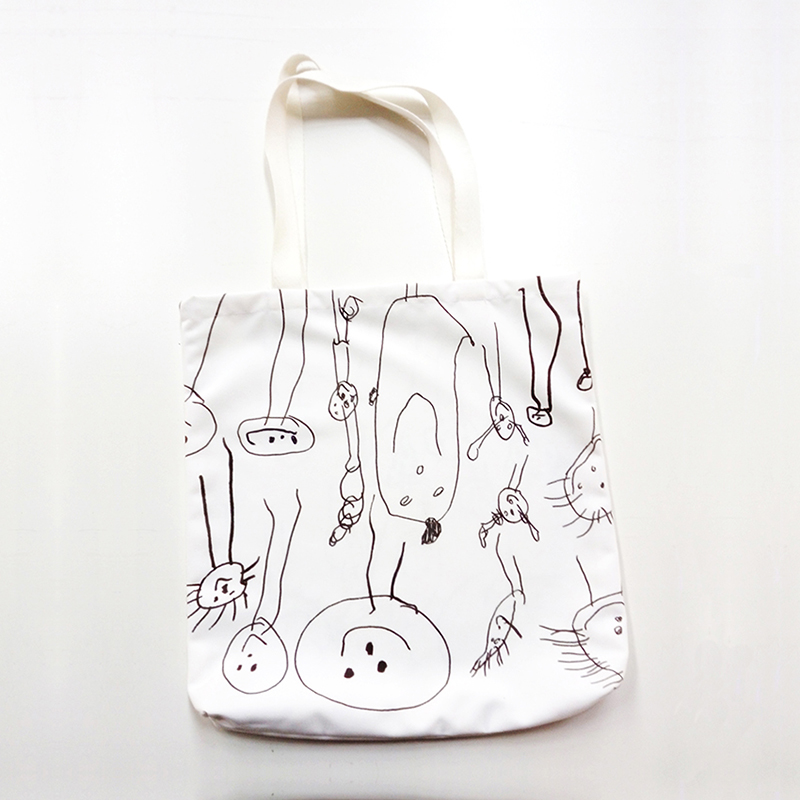
Now, if the kids are no modern-day Picasso, there’s another thoughtful option to create memorable gifts. You can send us an image of your favourite holiday moment, family or pet portrait and we’ll print them onto a product option of your choice! Leave it with us and we will turn these masterpieces into a special gift to be adored for years to come. We’re in for a rainy summer ahead, so keeping some of these ideas in your pocket to help the kids unleash their creativity will sure come in handy! We can’t wait to see what they’ll create!
It’s been such a treat having Meredith Simpson as our Featured Artist for the month of October! We have loved sharing her adorable animal prints and hope you’ve loved them just as much as we have!
To coincide with Meredith’s ‘Aussie Cuties’ collection being made available to all of our customers through our Fabric Shop online, the artist herself has put together a guest blog which further explains her one of a kind creative process and what inspires her work.
Keep reading to find out more about Meredith Simpson, her inspirations and design process!
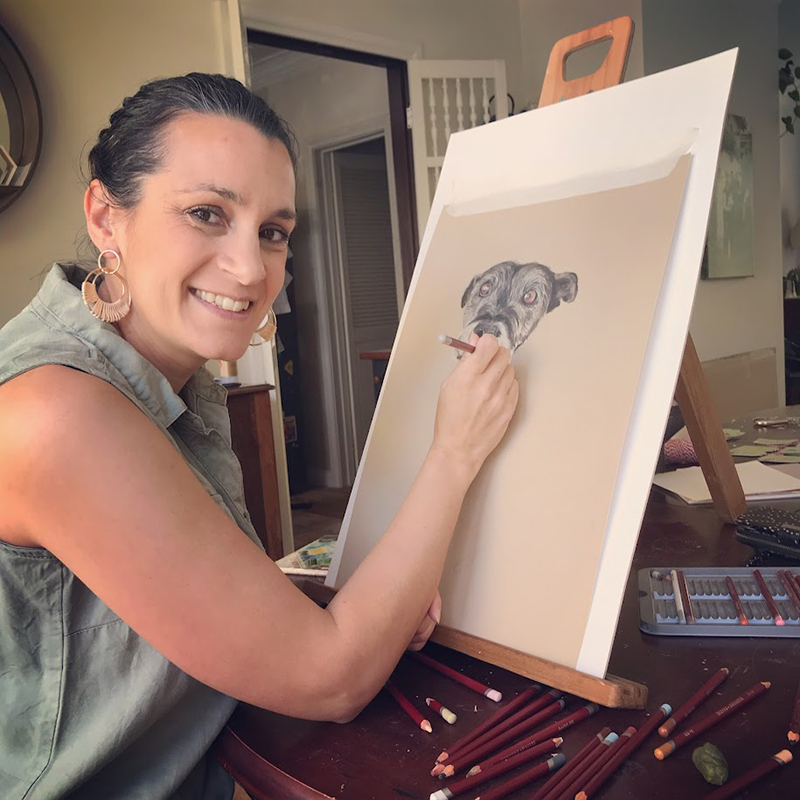 Meredith Simpson
This collection was inspired by our beautifully unique Australian native animals. I feel we are so lucky to have such wonderful creatures that are native to our home, they are just so gorgeous that I had to draw them. It started off only going to be a collection of 3 or 4 animals but grew as people kept suggesting others that were their favourites.
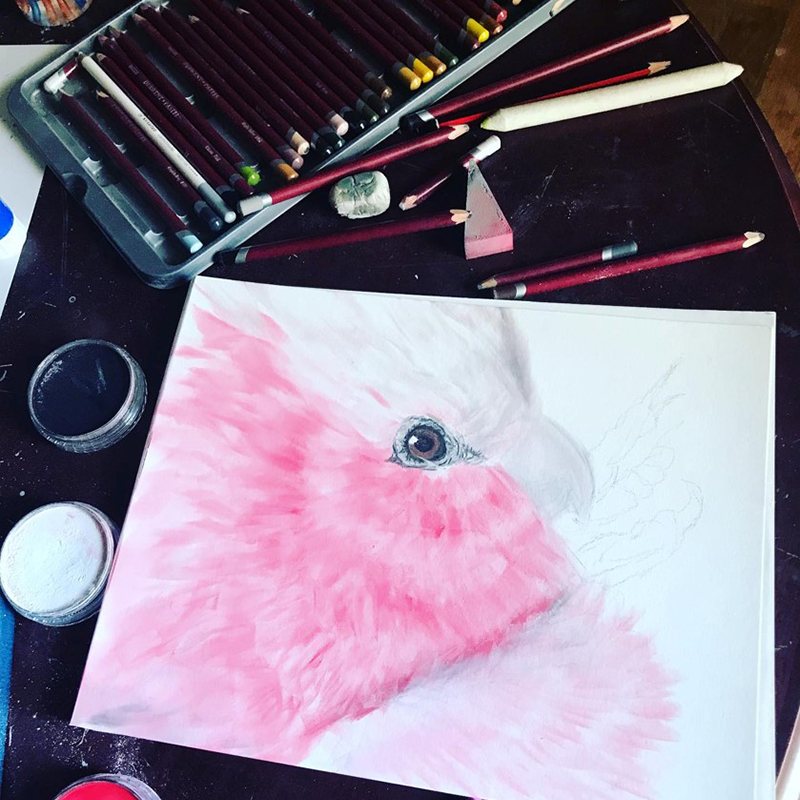
Galah Bird Drawing
This design process has been a learning curve for me, as it is my first real experience using my artwork to create digital designs. I love drawing and painting and now also enjoy using my artwork digitally too – it has opened up so many more possibilities of how to share my artwork with others.
My designs all start off with hand drawn artwork. I enjoy working with both pastel pencils and watercolour paints, but find that for furry animals the soft texture I can achieve with pastel pencils is best.
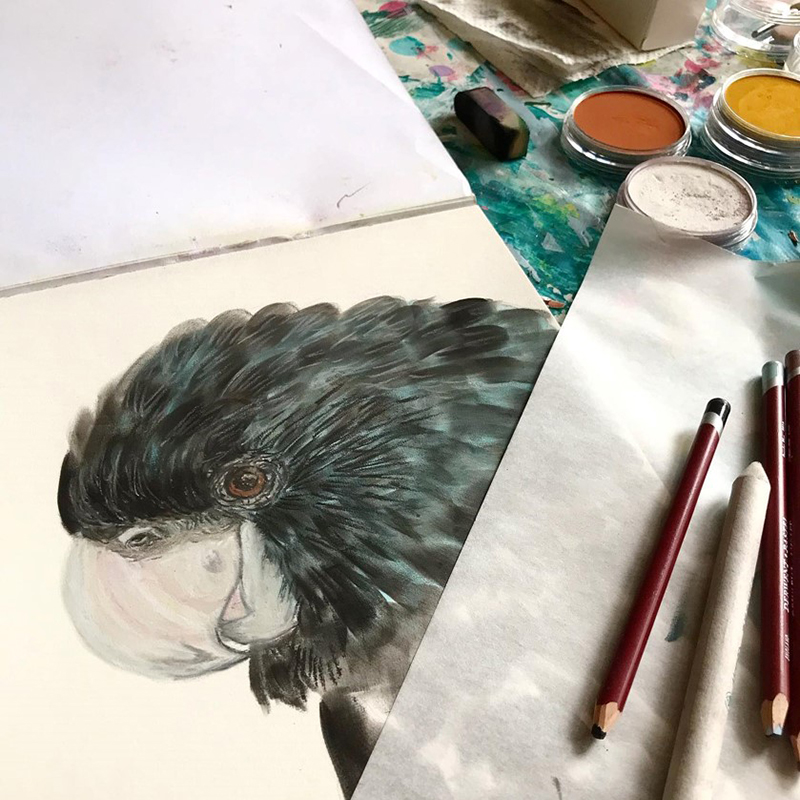
Black Cockatoo Bird Drawing
To create my prints, I first used an editing program to remove the backgrounds from my pictures and to cut small details, such as leaves and gum nuts, from larger art works. I then used Publisher to experiment with various backgrounds and combinations, with the ever patient help and feedback from Ella.
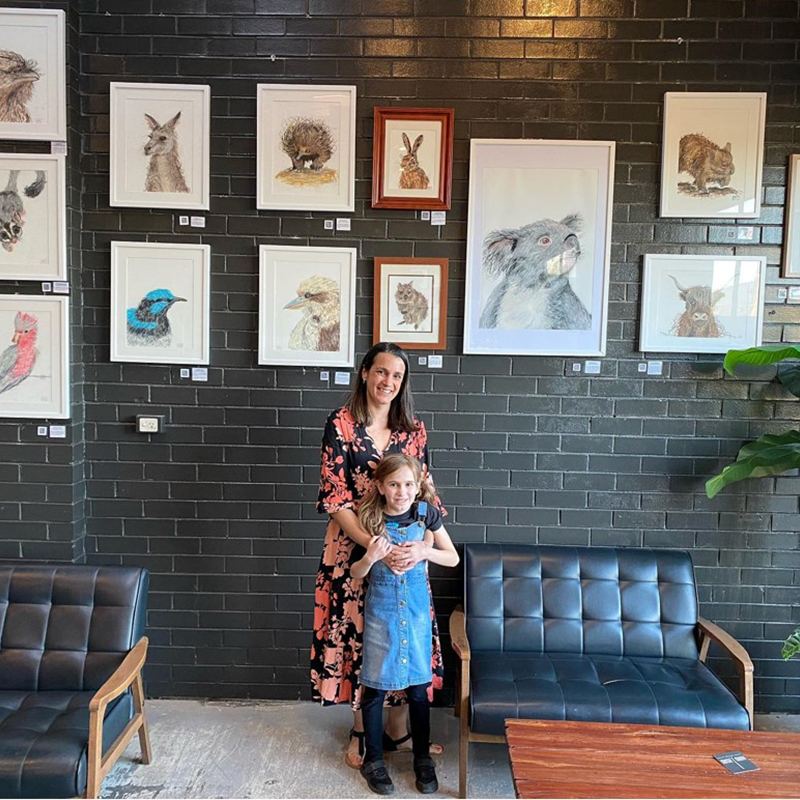
Meredith and her daughter with her Animal Artworks
The Australian animals used in the ‘Aussie Cuties’ collection were created by me as part of me finding time to create art work for the enjoyment of it. I had been drawing lots of pet portraits and then drew some woodland animals for my sister in law’s nursery. I loved the freedom of drawing animals that weren’t for a particular person and wanted to draw our native animals because I feel they are just so beautiful and unique.

Titch the Tasmanian Devil Sketch
It was fun collaborating over email to create these designs and I am so thankful to the Design Project for their guidance and for this opportunity. I look forward to creating more from my artworks in the future.
If you want to collaborate with us on The Designer Project and become part of this creative club, please apply! Send us an email with your portfolio and why you would like to be part of this initiative, and we will be in touch!
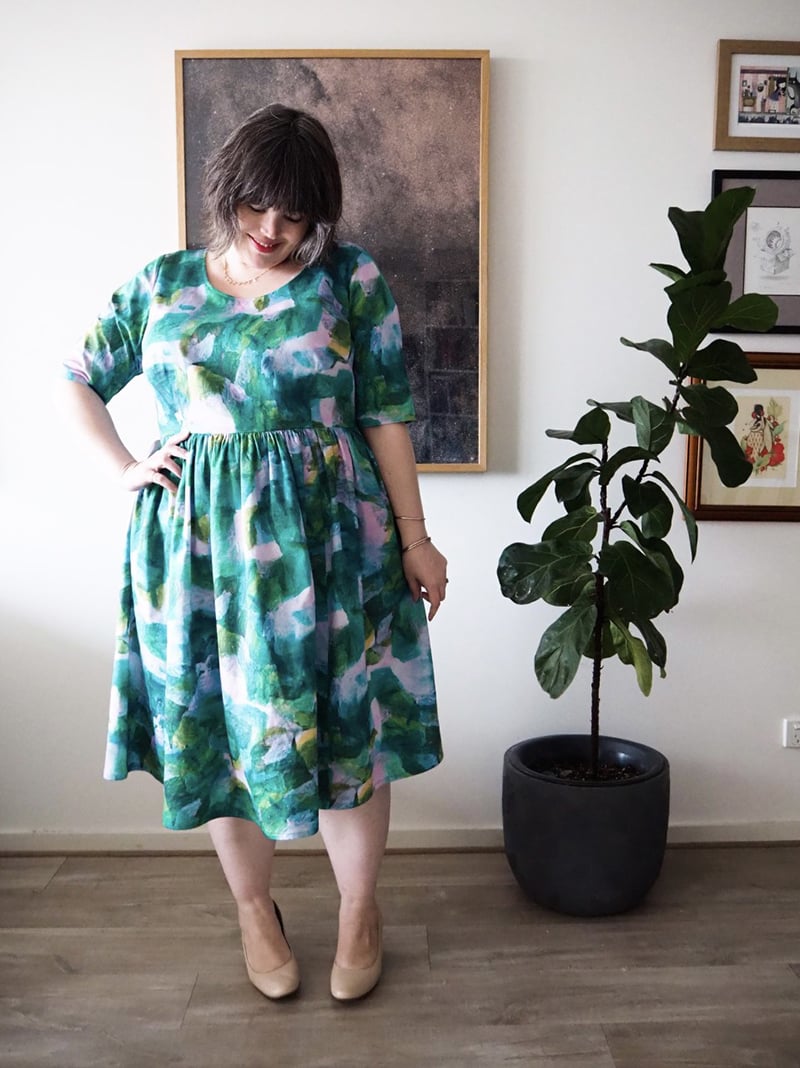
For the launch of our new organic cotton fabric Poppy we asked Lilli of Frocks and Frou Frou to test it for us. Lilli is a creator and a maker and we were so excited to collaborate with her. We sent her the Hearts Garden design print by Susanna April on Poppy sateen fabric to create a dress that her readers would love, and to share with you also! As Lilli said: The Poppy is light enough to billow when it catches the wind, but with a weight of 140gsm, it’s perfect for use in items that need just a little structure! Interested to know more about Lilli’s creation? Keep reading Lilli’s blog post!
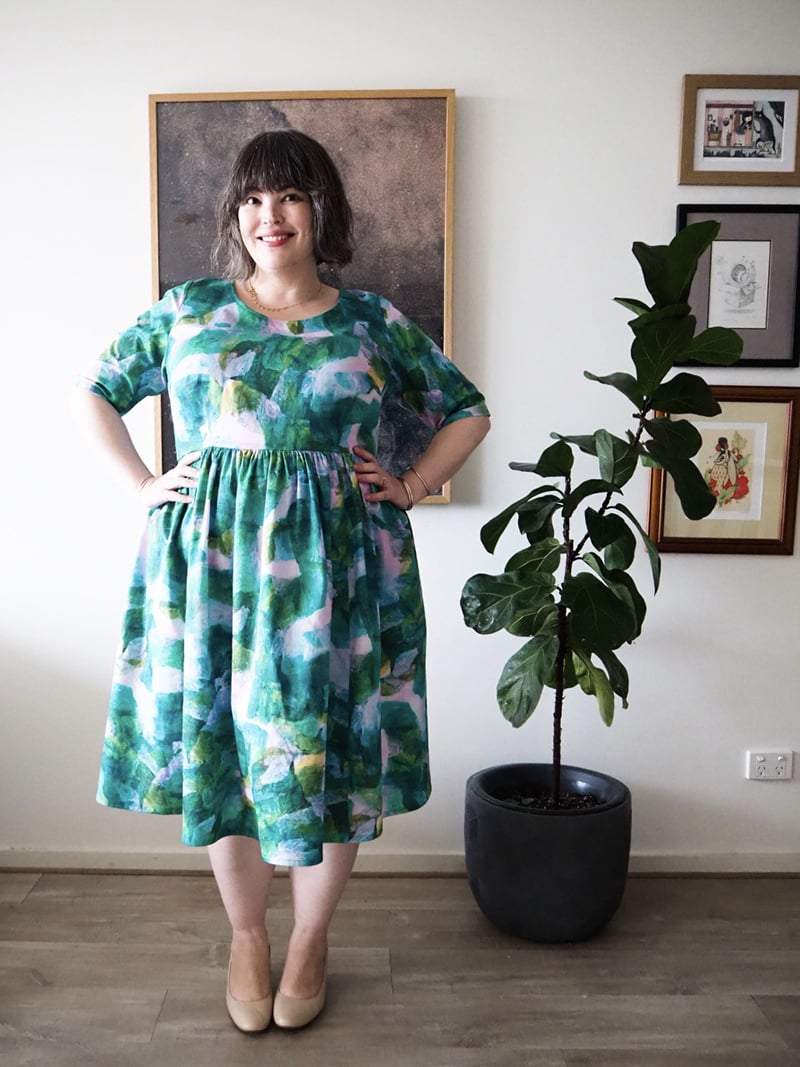
Dress pattern: Cashmerette Honeybourne, made from cotton sateen fabric Poppy printed by Digital Fabrics (print design by Susanna April)
I am not, let’s just say, an accomplished sewist. I can sew a straight(ish) seam, and I’ve more or less learned how to read the instructions of a sewing pattern. I know the difference between a French seam and a felled one. But apart from moving a hem up or down I don’t really know how to do alterations. About this time last year I bought myself a copy of Jenny Rushmore’s book Ahead of the Curve, thinking that it was probably time to teach myself how to do a full bust adjustment at the very least.
Reader, the book sat on my shelf. Then it sat on my shelf a little more. And then the team at Digital Fabrics got in contact to see if I’d like to road-test their brand-new cotton sateen, and I thought ‘Ooooh, I’ll need to make something really special with that!” and decided maybe it was time to try my very first Cashmerette pattern.
Based in Sydney, Digital Fabrics is a digital textile print house that prides itself on its quality, quick turnaround, and ease of design services. All their inks are non-toxic and water based, and they have a huge range of fabrics on offer including cotton, rayon, linen, ponti, lycra, canvas and more. They also offer on-demand cut-and-make product services for people who might not sew, but would like to take advantage of the ability to print their own artwork onto cushions, teatowels, curtains, totebags, etc.
On the website they have straightforward tutorials on how to create your own seamless fabric repeats, and if you’re feeling Very Serious about this textile design thing, you can actually take a one-on-one online class that will guide you through the process. Or you can do what I did, and simply choose an existing print from Digital Fabrics’ gallery of artists.
The print that I chose leapt out to me from the screen with its gorgeous painterly hues of blues and greens and hints of pinks. It reminded me immediately of Claude Monet’s Water Lillies series. Perhaps aptly, it’s called My Heart’s Garden, and it’s by Brisbane based artist, Susanna April.
Digital Fabrics sent me My Hearts Garden printed on their beautiful new Poppy sateen, a 100% cotton fabric with a slight sheen, and a soft hand-feel. It’s light enough to billow when it catches the wind, but with a weight of 140gsm, it’s perfect for use in items that need just a little structure. Which is to say: it was perfect for Cashmerette’s Honeybourne.
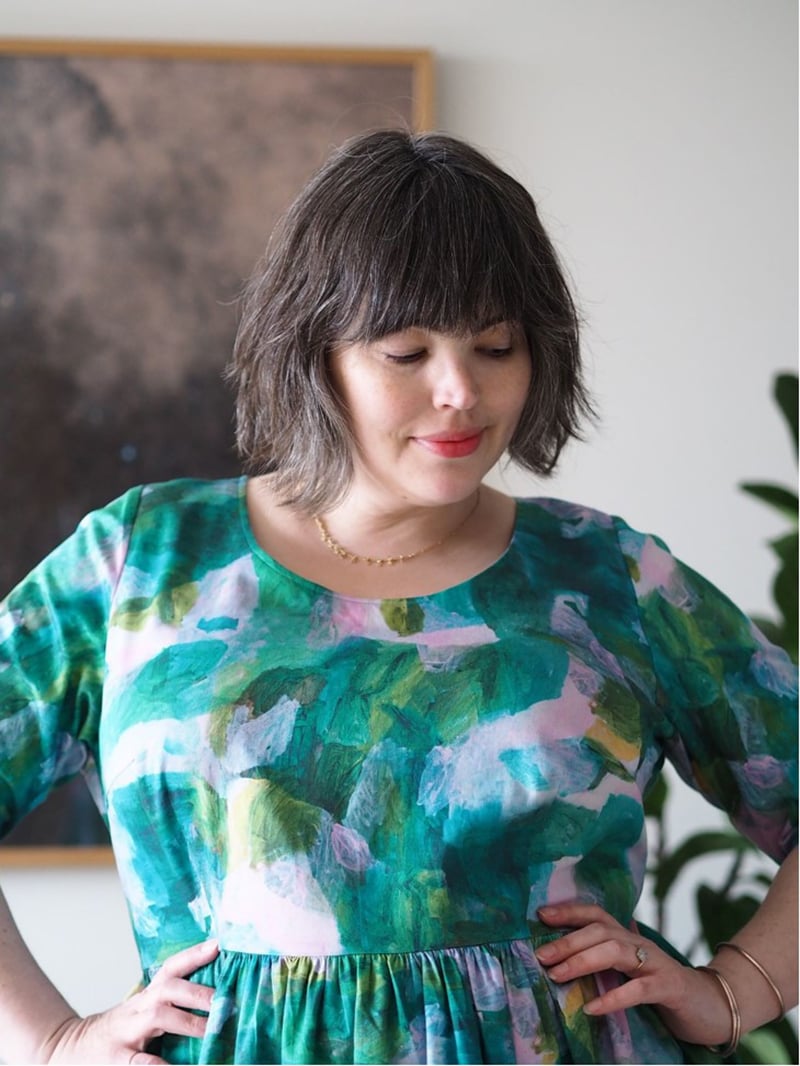
The Honeybourne is available exclusively with Ahead of the Curve, and it’s a woven dress pattern with a darted front, sleeves, and a full skirt. It’s the pattern where Jenny teaches you a brand range of alteration techniques, including full and small bust adjustments, a narrow shoulder adjustment, a full bicep adjustment, a swayback adjustment, and broad back adjustment. It comes in sizes 12-32 and in three cup ranges: C/D, E/F, G/H. I made the 18 E/F, and full disclosure – for all my hyping myself up to learn how to do adjustments, it fit perfectly (as far as I can tell) straight out of the packet.
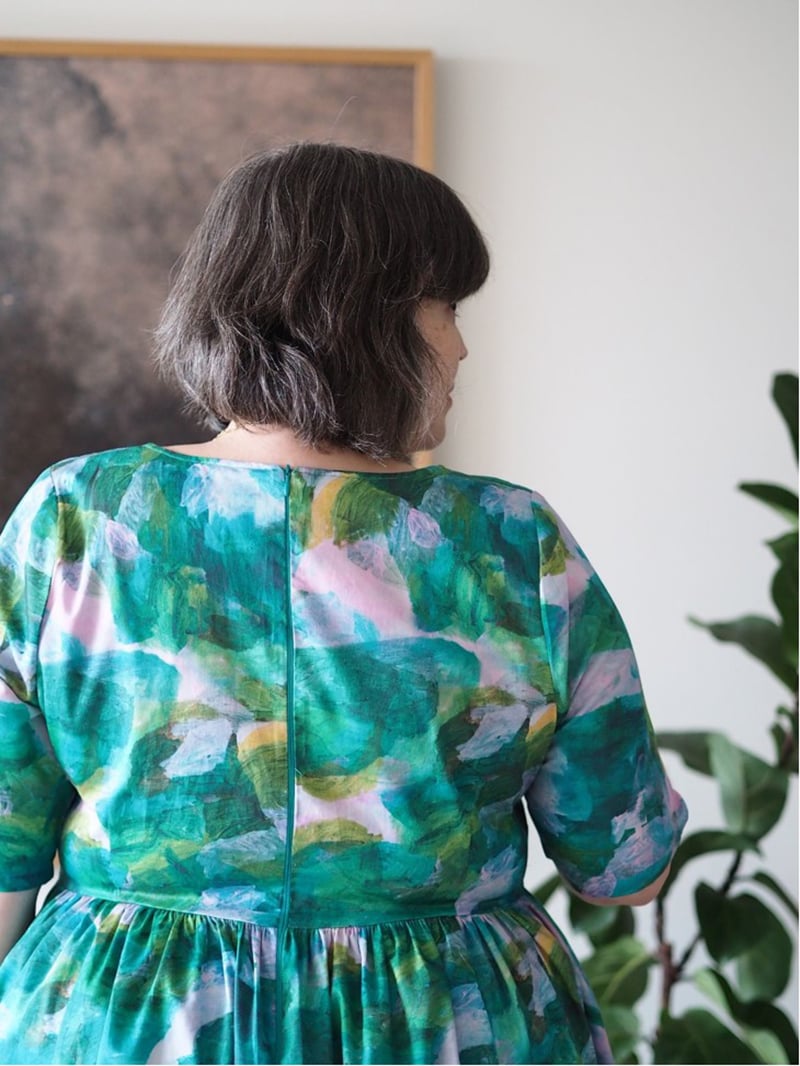
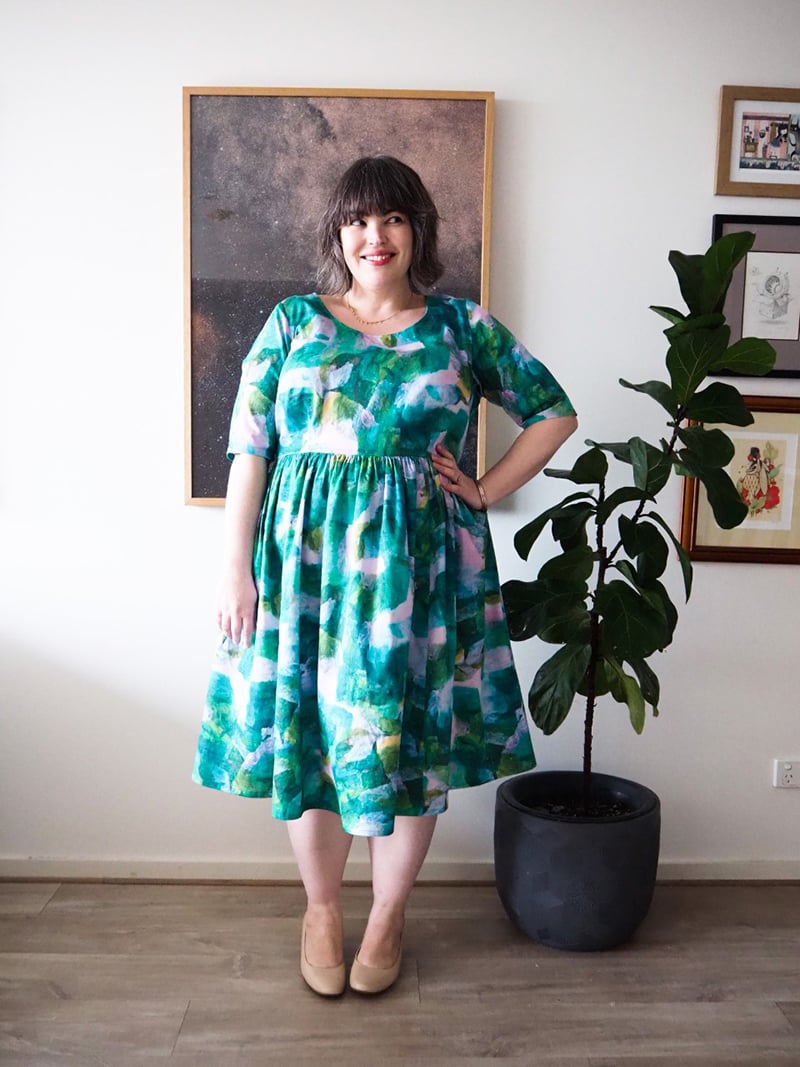
With the full gathered skirt, fitted bodice, and half-length sleeves, it’s got a real 1950’s party-dress vibe to it. There’s an enormous amount of yardage in that skirt – it’s actually six panelled, though the abstract print disguises that well – and it’s actually the perfect length for me to wear over my tulle skirt when I really want to fancy it up.
I love the pattern, and I LOVE the fabric; which at just $44 per metre (limited time only) is virtually the same price you’ll pay for fabric from one of the big European design houses. I’m keen to try my hand at designing my own print next time (or enlisting some three-year-old help!)
Have you felt inspired reading Lilli’s blog post? Are you ready to dive into your own creative project? If so, don’t forget to visit out
fabric shop online to view an enviable range print-to-order designer prints!
We’re super excited to announce that our next featured artist from The Designer Project will be ever so talented, Meredith Simpson!
The ‘Aussie Cuties’ collection was inspired by our beautifully unique Australian native animals. Meredith feels that we are so lucky to have such wonderful creatures that are native to our home and finds them so gorgeous to draw. Created from pastel pencils and that she finds to be the perfect medium for capturing the texture and softness of animal fur.
Keep reading to find out more about Meredith Simpson and her adorable animal designs!
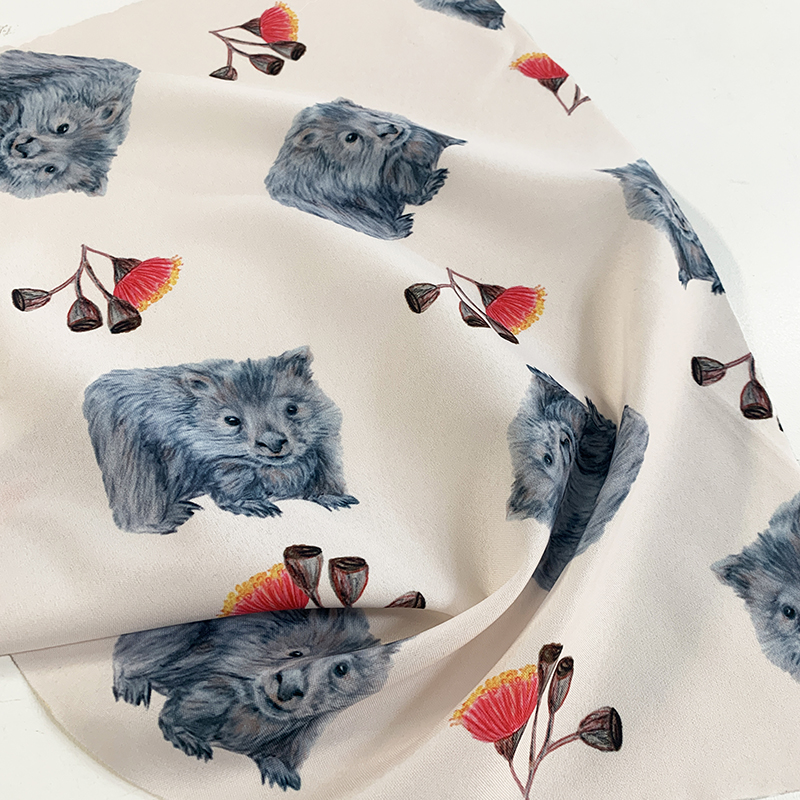
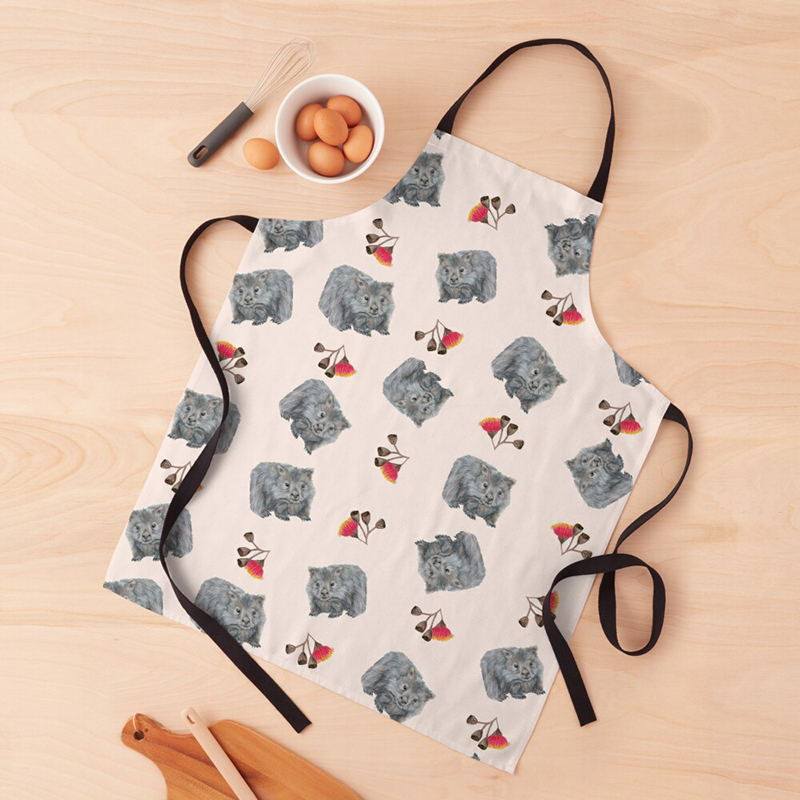
‘Walter Wombat’ is a fluffball full of fun. Paired with our beautiful native gum blossoms, this print is pretty and playful.
‘Walter Wombat’ would be such an adorable design for kitchen homewares and garments such as aprons!
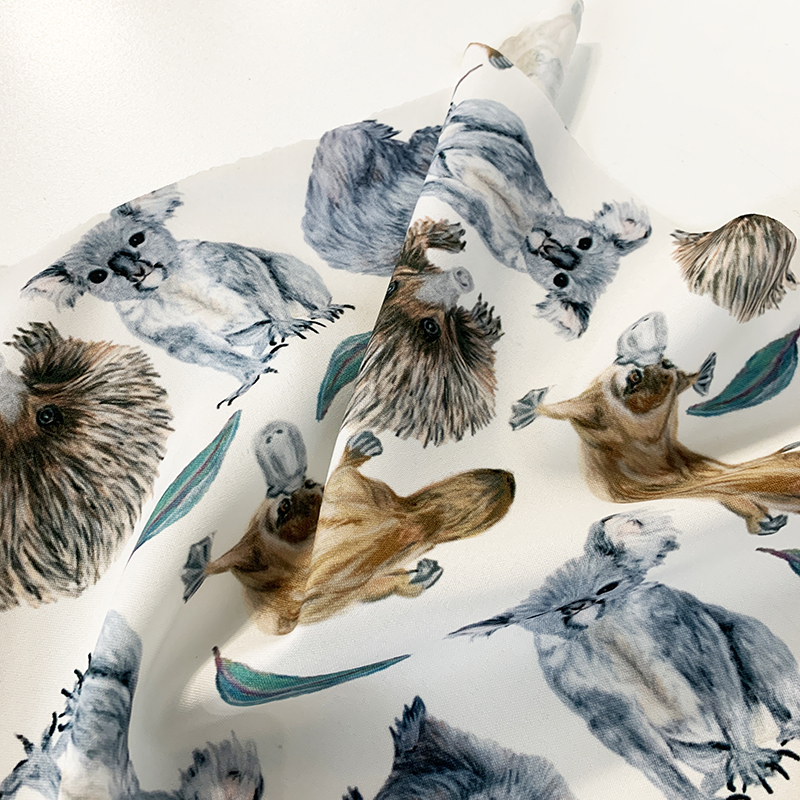
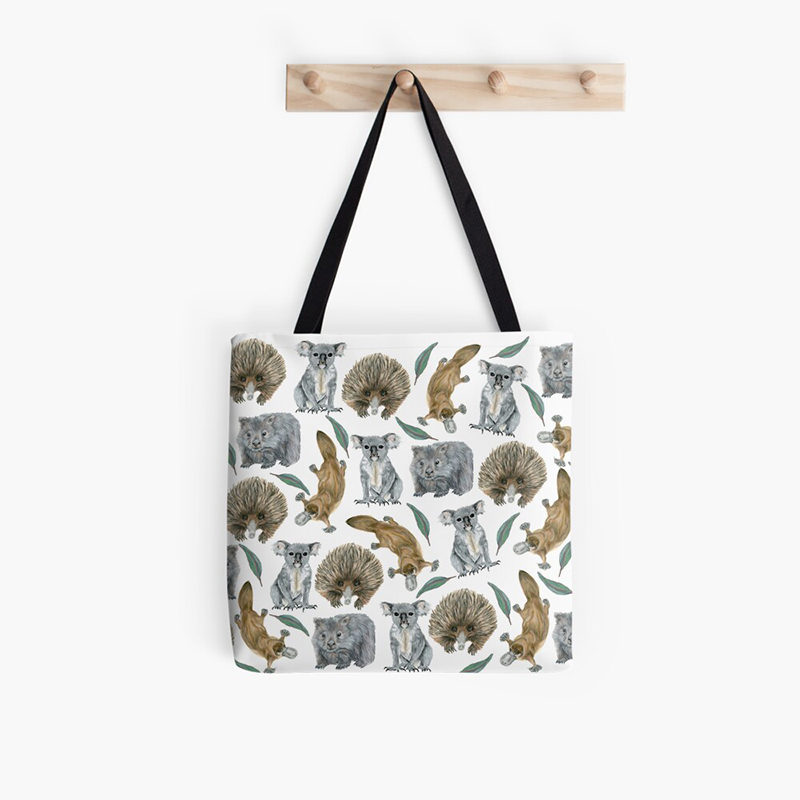
‘Native Cuties’ is a super cute print that features four of our iconic native animals: koala, echidna, platypus and wombat. The natural colours of the animals and the green gum leaves against the bright white background make the colours shine!
We love ‘Native Cuties’ for some fun fashion accessories like tote bags or even some kidswear!
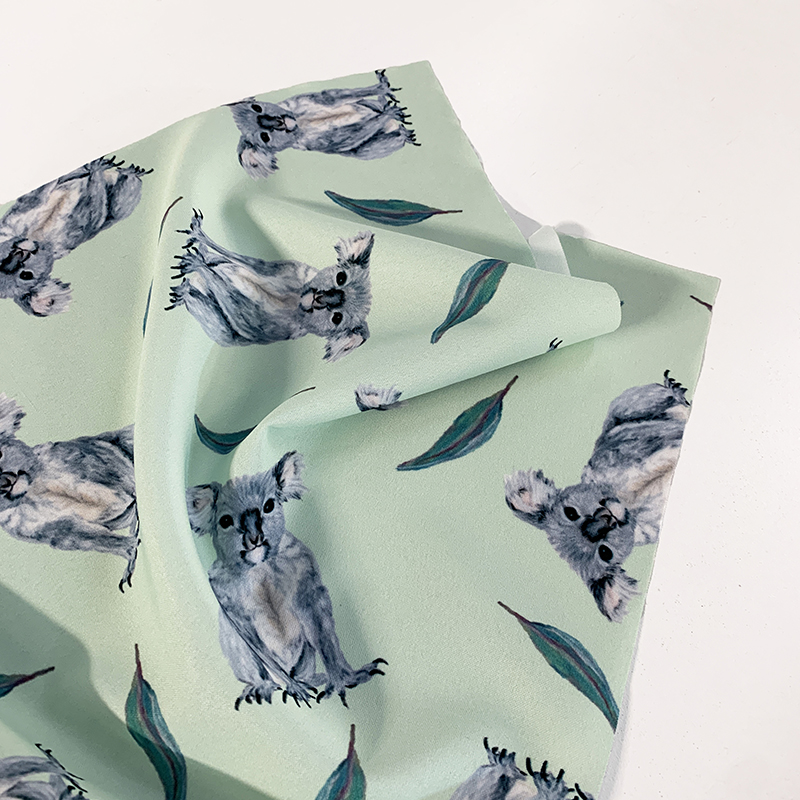
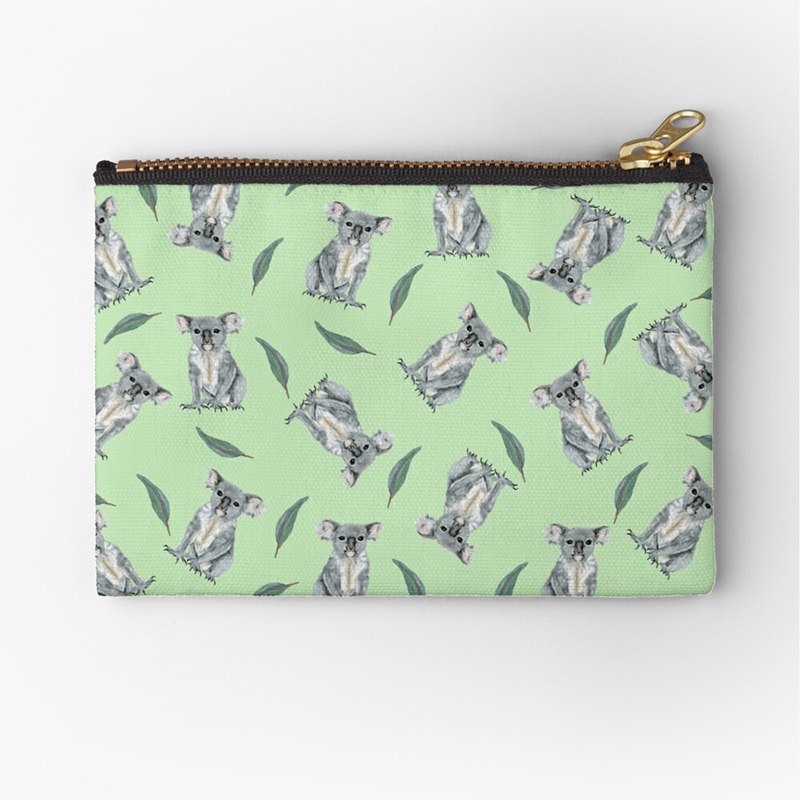
‘Keeley Koala’ is the most gorgeous green print that features the cute Keeley koala together with her favourite eucalyptus leaves!
‘Keeley Koala’ is the perfect print for sweet accessories such as pouches and bags!
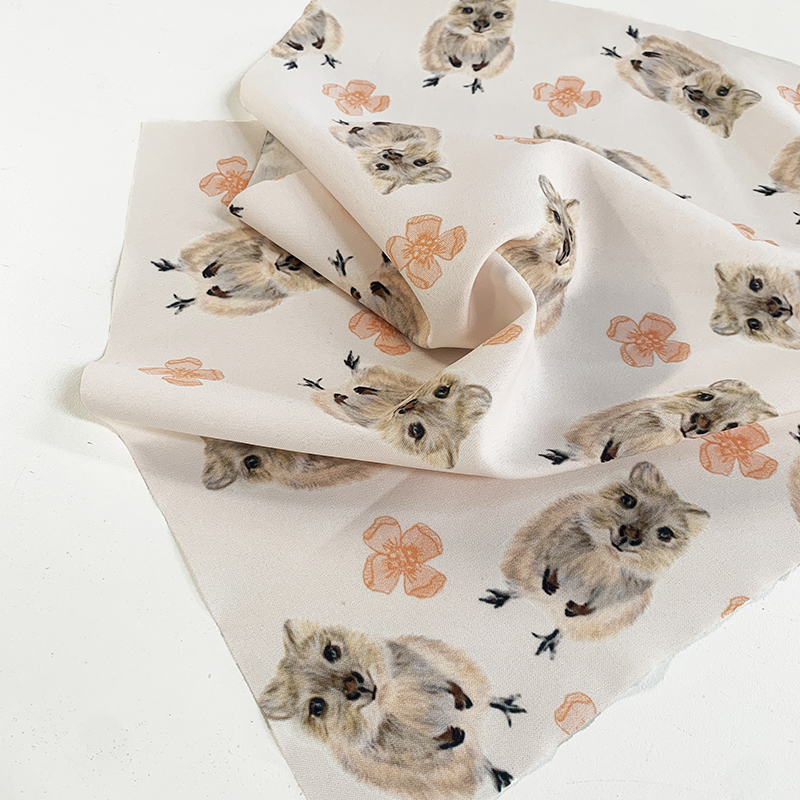
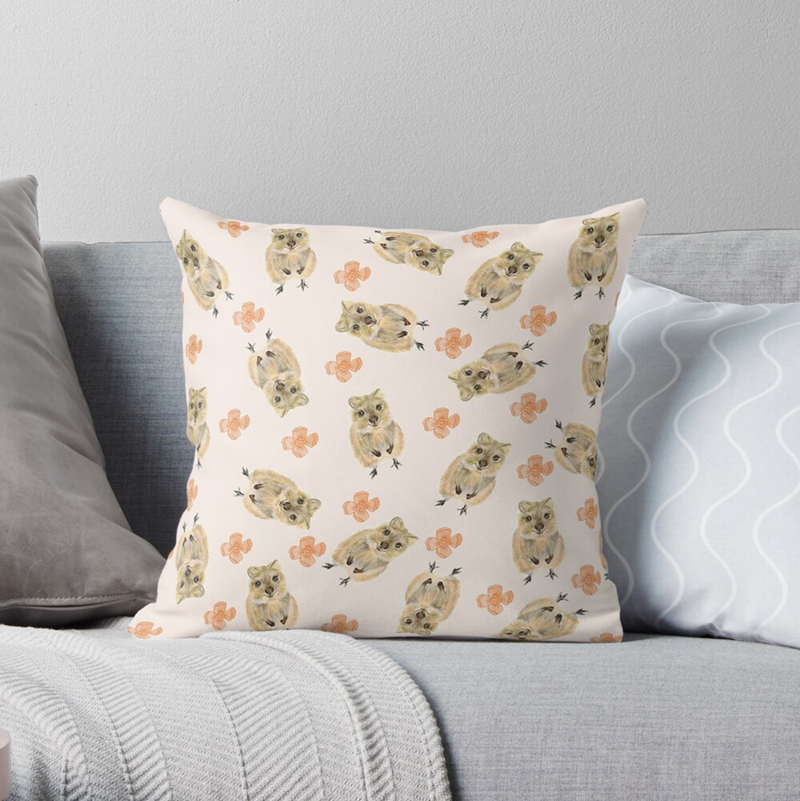
‘Quinn Quokka’, this cheerful, adorable print features the always smiling Quokka! The watercolour flower detail and warm colour palette make this such a joyful print that will make you want to smile too.
We think ‘Quinn Quokka’ would be an amazing design for home and interior projects such as Cushions!
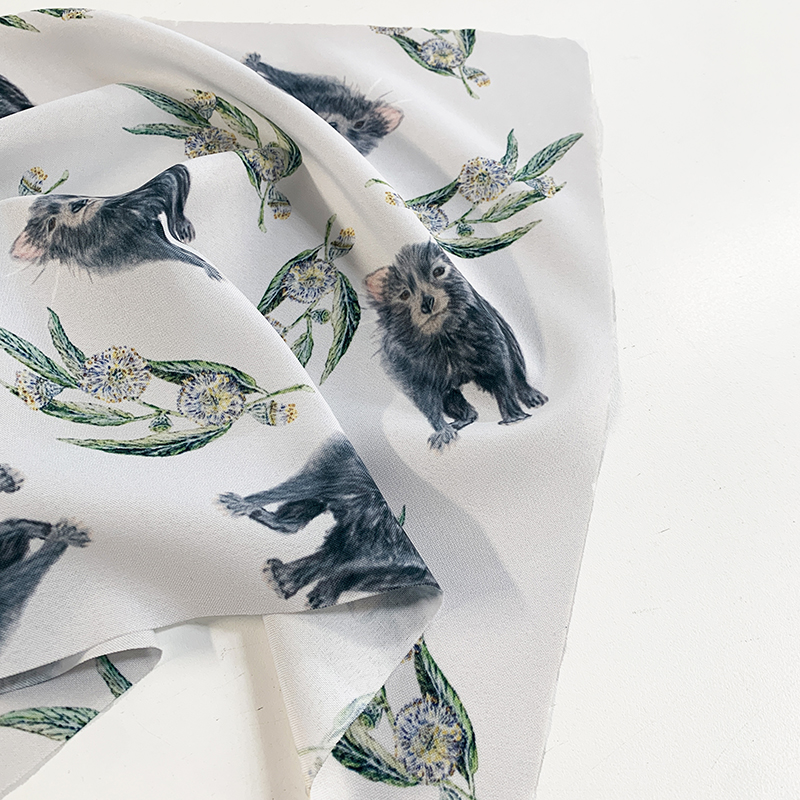
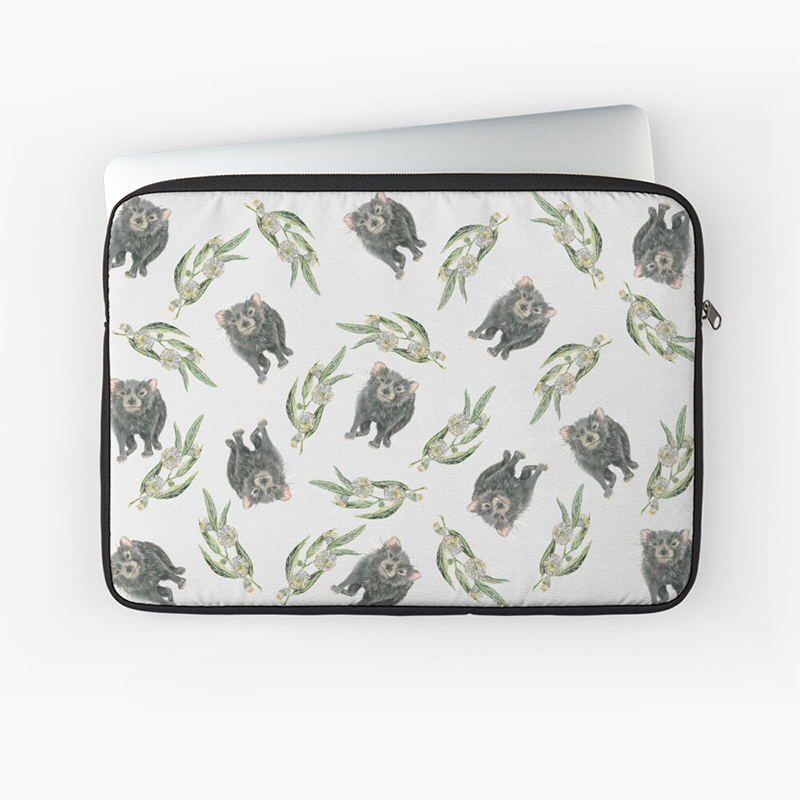
‘Titch the Tasmanian Devil’ is a celebration of all things Tasmanian! This lovely print features Titch the Tasmanian Devil together with the beautiful Tasmanian Blue Gum.
‘Titch the Tasmanian Devil’ is a super fun print that would be perfect for projects such as a DIY laptop case or homewares such as Tea Towels!
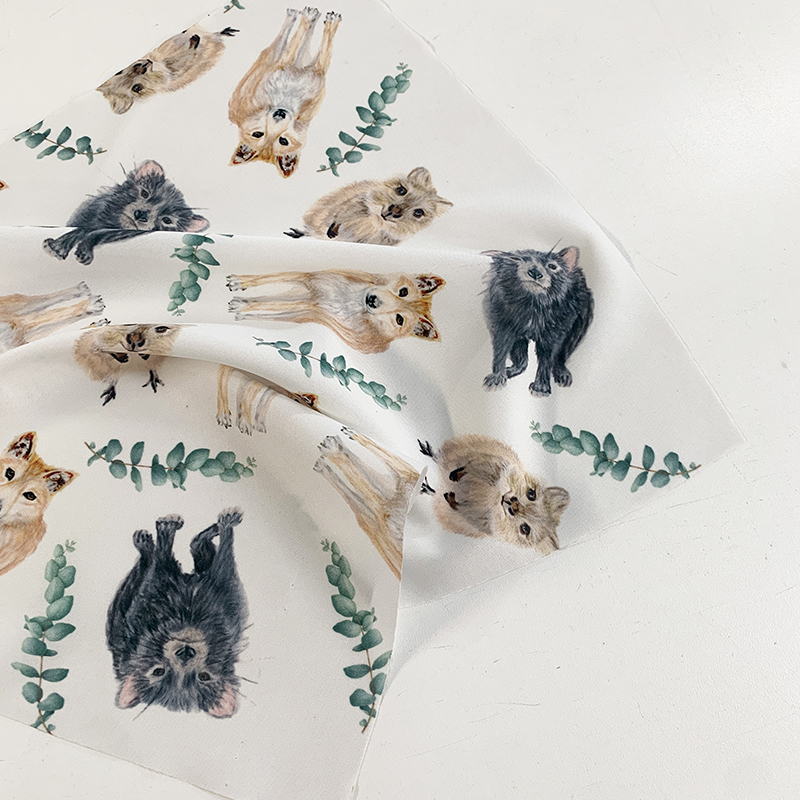
‘Native Cuties 2’ is a sweet print featuring three of our unique native animals: dingo, quokka and Tasmanian devil together with our beautiful blue gum leaves. The natural colours of the animals and the native foliage against the bright white background make the print come to life!
‘Native Cuties 2’ would work perfect for some cute fashion garments like an adorable skirt or even some kidswear!
All of our project ideas above are suggestions only as the sky’s truly the limit with Meredith’s adorable animal collection! Each of Meredith’s designs can be found in our Fabric Shop, so head on over to be inspired for your next DIY project!
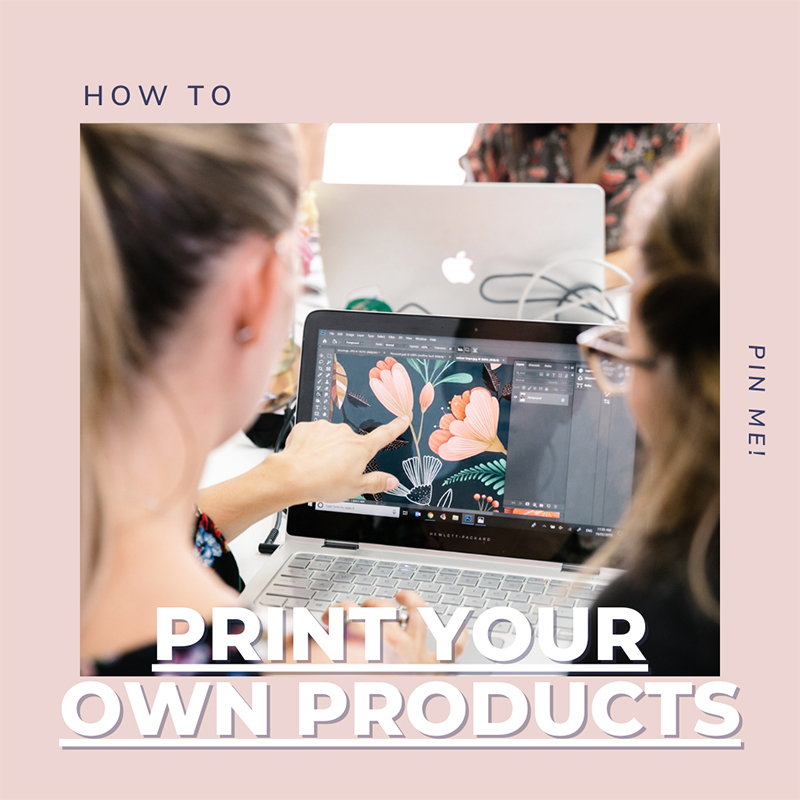
We understand designers put their heart and soul into their work, which is why we want to ensure we bring your vision to life in the most professional and efficient way possible.
Whether you are requiring beach towels, cushion covers or promotional banners – some of the most common reasons for delays are due to simple things such as submitting the incorrect file format or poor image quality.
Our mission is to bring your creativity into reality in a matter of days, not months, so below is your one-stop guide to printing your own products with Digital Fabrics.
Pre-Submission
Before you hit “save” for the final time, here are some handy tips to ensure you don’t have to do any more work and or spend any additional money on changes.
- Save your work in JPEG format. If you are using Adobe Illustrator- we recommend you “save as” a PDF first and then use Photoshop to save your file as a JPEG. This ensures you get the best possible image resolution. Whilst we can work with image resolution between 72dpi and 300dpi, we want to ensure you receive the best product possible so the higher the quality, the better.
- White is not a printable colour. Any areas in the image that are white or transparent will be the colour of the fabric.
- Black on your screen isn’t always black in print. If you are after a pure black colour ensure that all four CMYK options are set to 100%: C=100%, M=100%, Y=100%, K=100% in Adobe Illustrator and in Photoshop (Hex Code #000000, Decimal Code 0, 0, 0 ) when developing your artwork.
- Use the same software for your designs to ensure colour consistency (even within the Adobe suite). If you are using Photoshop for one design, use the same program for any additional artwork.
- Save your work in the same scale as you want it printed. If your finished product is 50x50cm, save your work as 50x50cm.
- Double check your margins and gaps. Add any allowances for cutting and making if needed, making sure you are providing your design with appropriate margins for cutting and sewing.
We love seeing the magic that our customers make with our product printing service. We see artists create beautiful custom printed scarves with their artwork, graphic designers releasing a product range for themselves or their clients, as well as corporate merchandise ideas. You can also create thoughtful gifts for your friends and family, capturing moments in time with children’s art printed onto tote bags, cushion covers and more.
Be inspired by some of our previous work
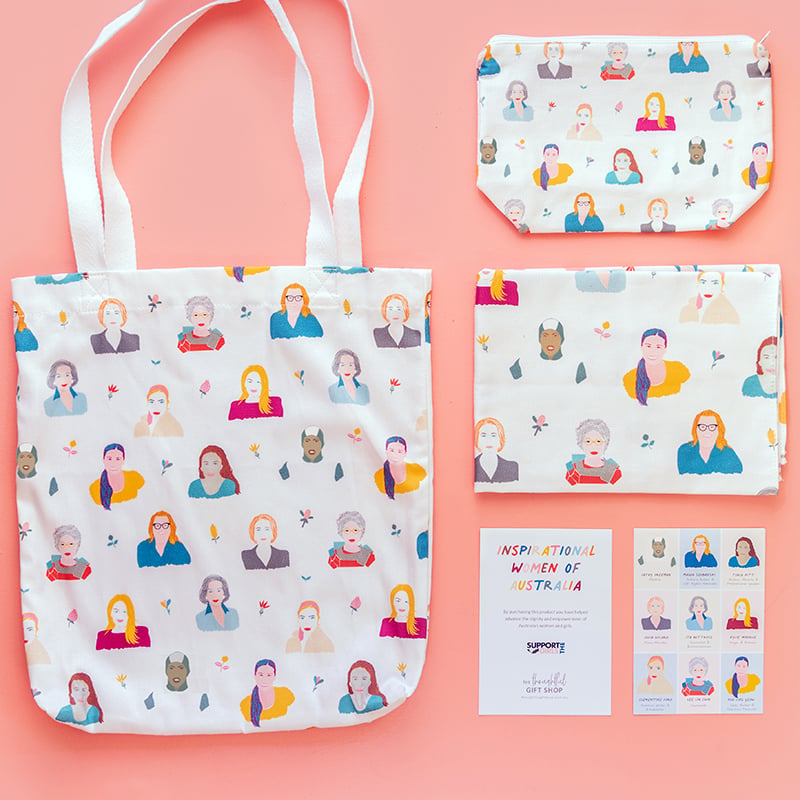
The Thoughtful Gift shop released a range of ‘Inspirational Women of Australia’ merchandise featuring Aussie icons, with profits going to Support the Girls, a charity that empowers and supports young women in Australia.
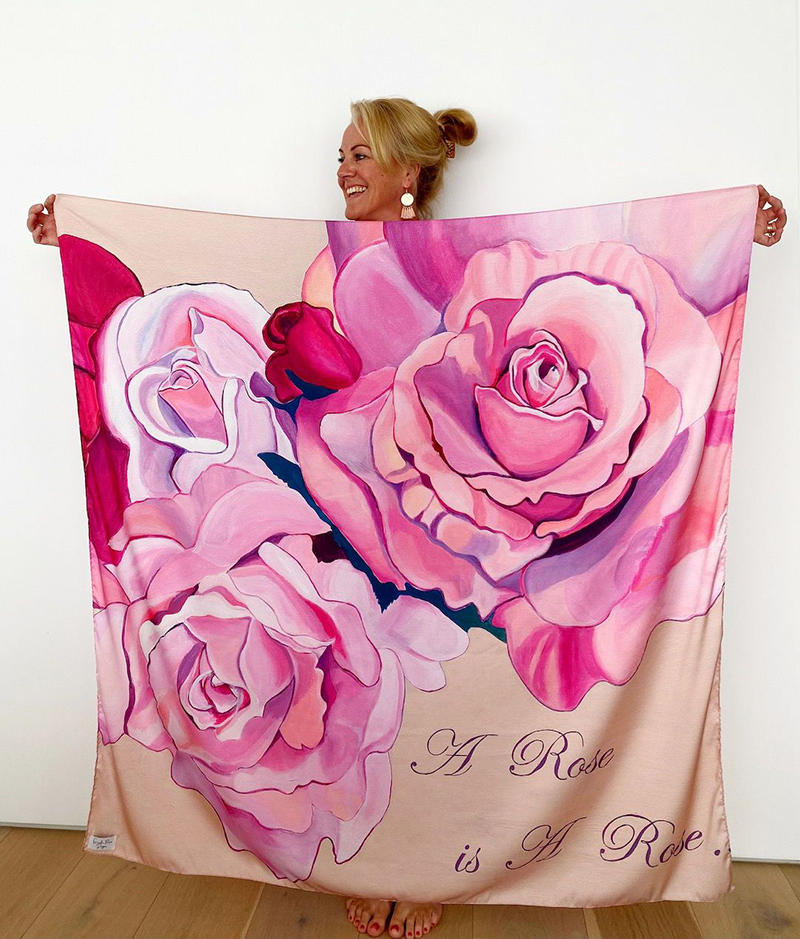
Sancha Prowse Art released a stunning ‘A rose is a rose’ custom printed scarf for her online store.
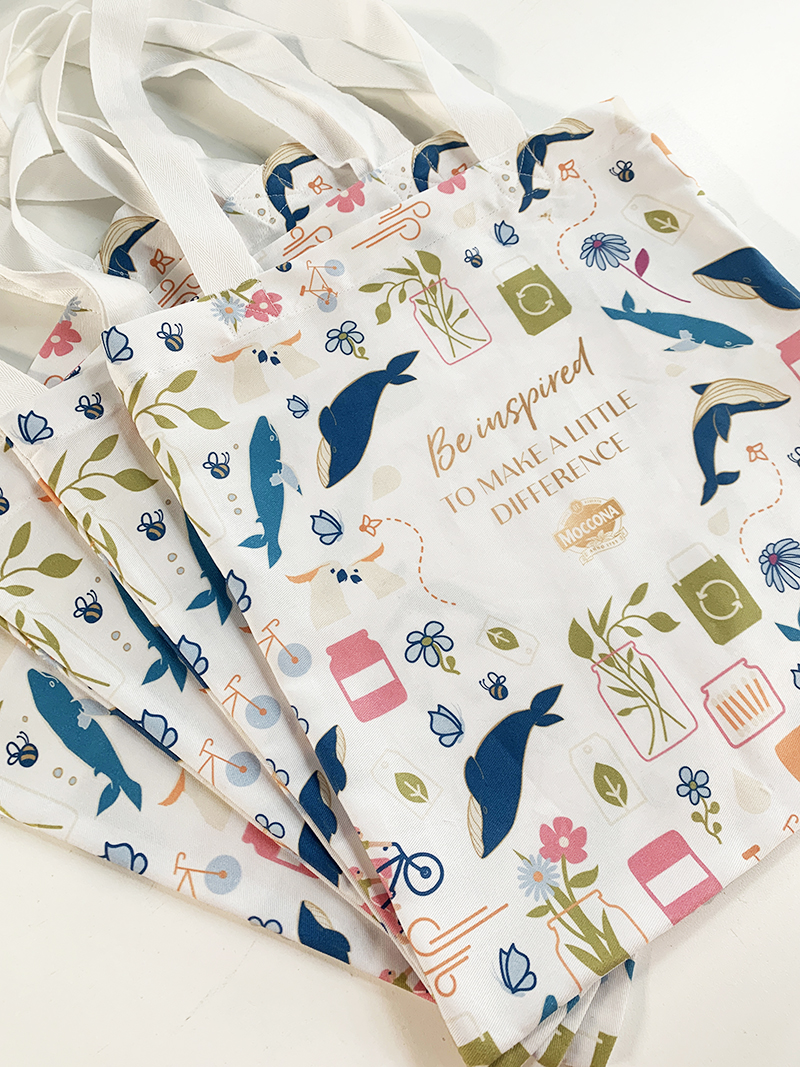 You can also get creative for your corporate or business merchandise needs, just like Moccona did through Mix Agency.

Thoughtful gift ideas starring your children’s masterpieces that friends & family will love.
To start bringing your ideas to life, head to our Make Your Own Product page, or contact us!
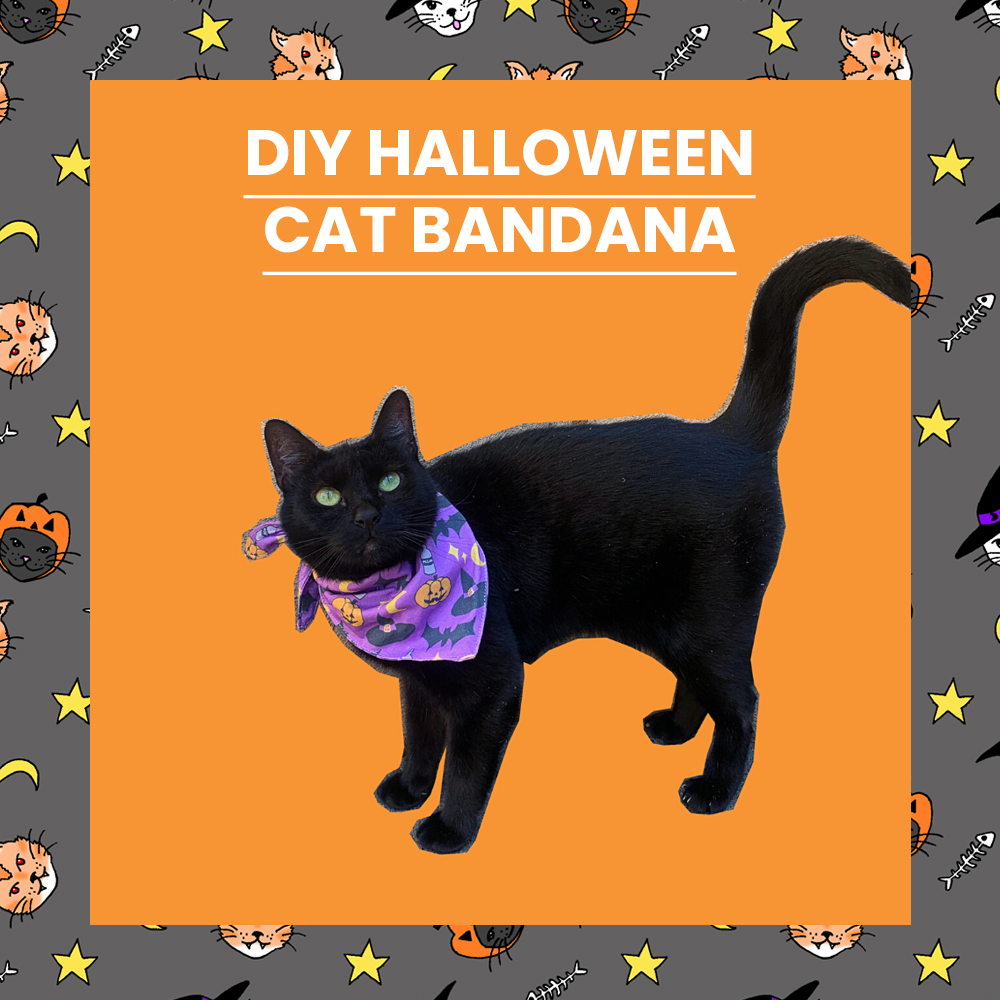 With Spooky Season well and truly on its way, we wanted to give you a fun little Halloween DIY project to make for your pets…well, cats specifically!
Everyone on our team is avid cat lovers and most of us have our own fur babies to dress up. We always see cute seasonal looks for dogs but where’s all the fun cat costumes, right? Well with this tutorial, you can create your own custom Halloween bandana for your cats this October!
Get creative, keep on reading to find out how you can make your own Spooky Cat Bandanas!
What you need:
- Custom Printed Fabric (we recommend our Ashton, Ebe, Oliver, Aerocorp and Cotton Poplin fabrics).
- Scissors
- Dressmaker Pins
- Sewing Machine or Sewing Needle
- Sewing Thread – you can match the colour of your fabric.
- A cat of course!
Introducing our cats: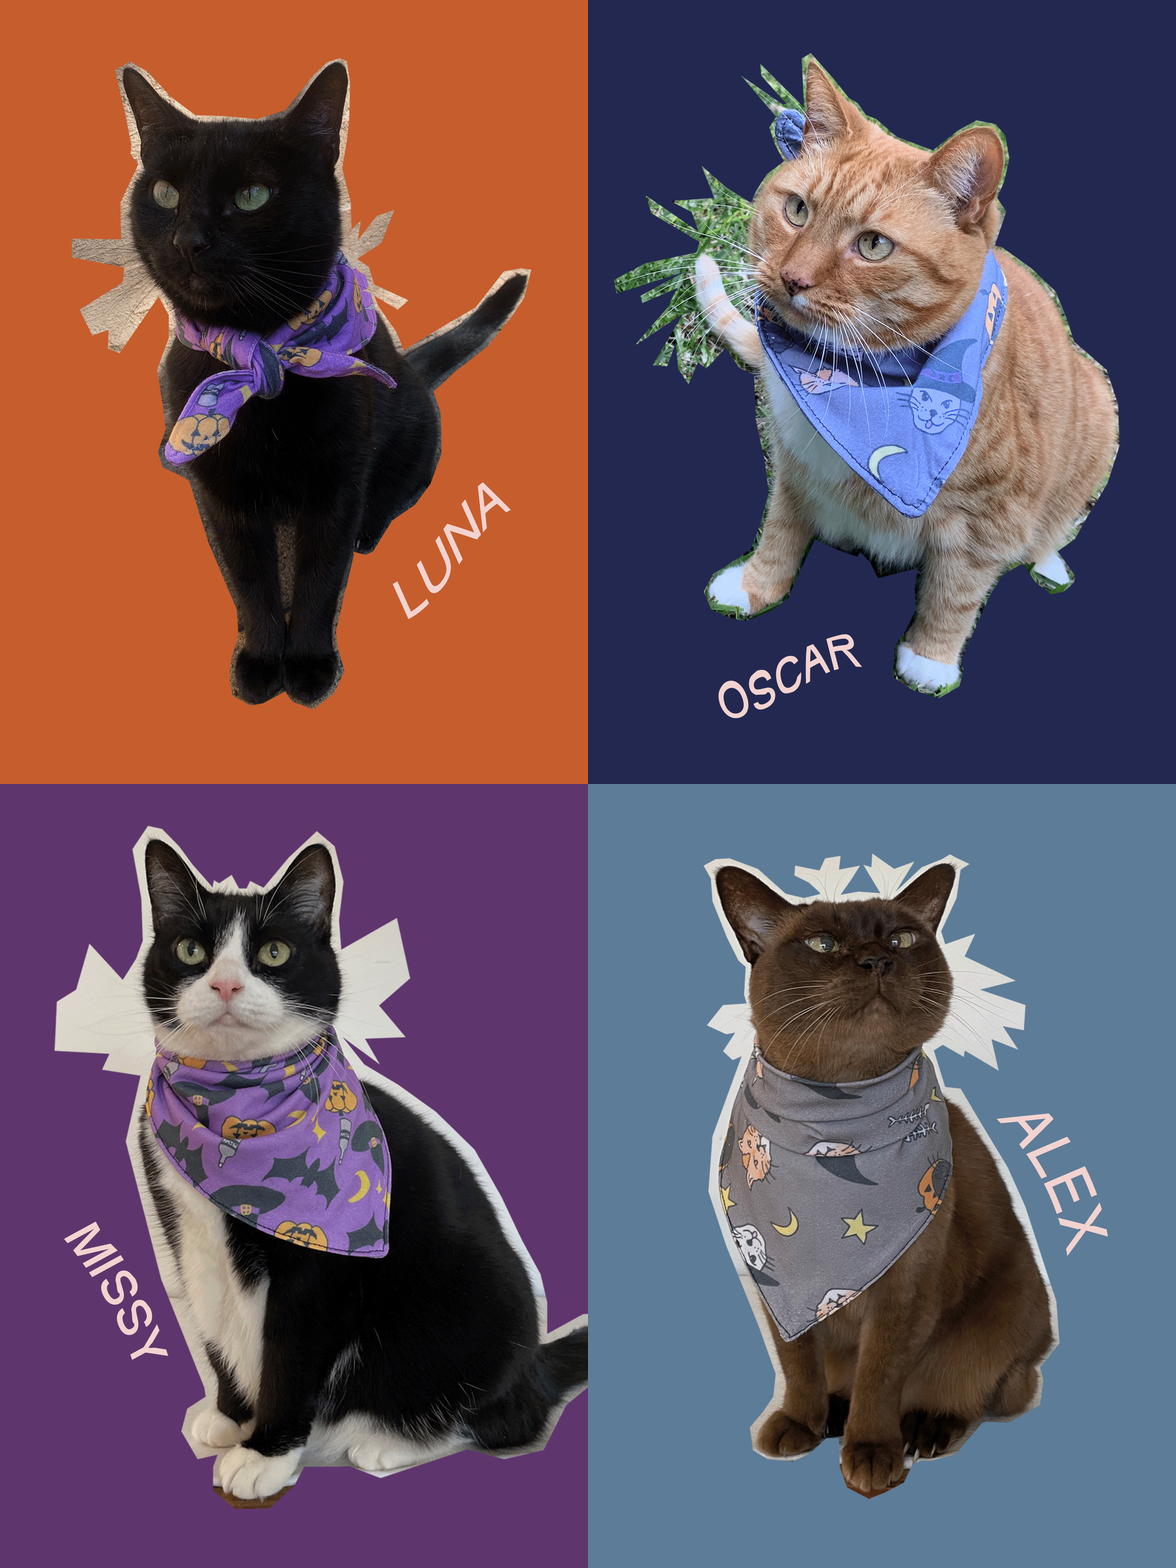
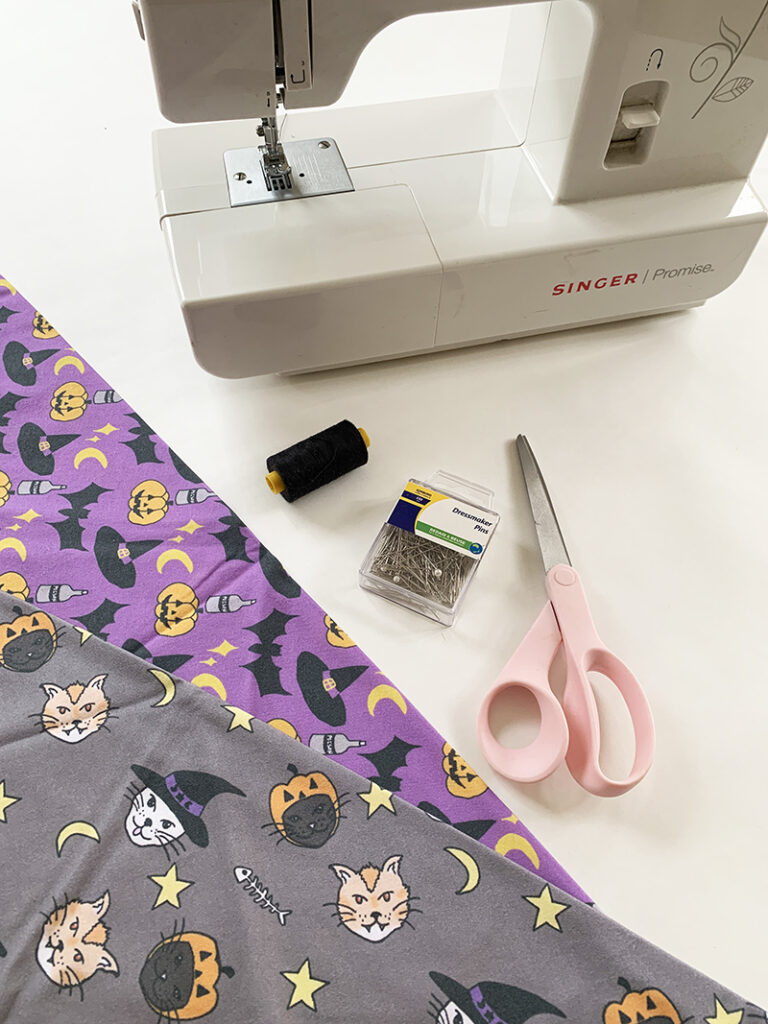
Method:
1. The most important step of all…order some wonderful custom printed fabric, you can design your own or order designer fabrics from our Fabric Shop. We recommend our Ashton, Ebe and Cotton Poplin for a natural fabric option or our Oliver and Aerocorp fabrics for a polyester (easy care) option! We’ve gone with our Ashton fabric which is a lovely lightweight Cotton Jersey.
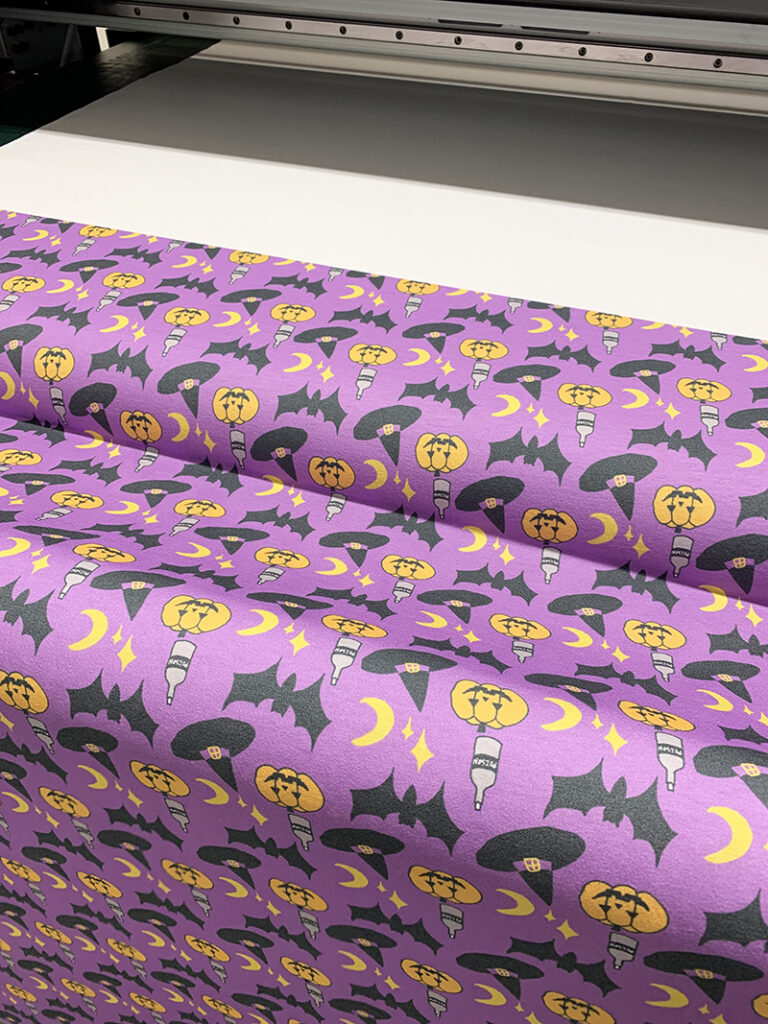
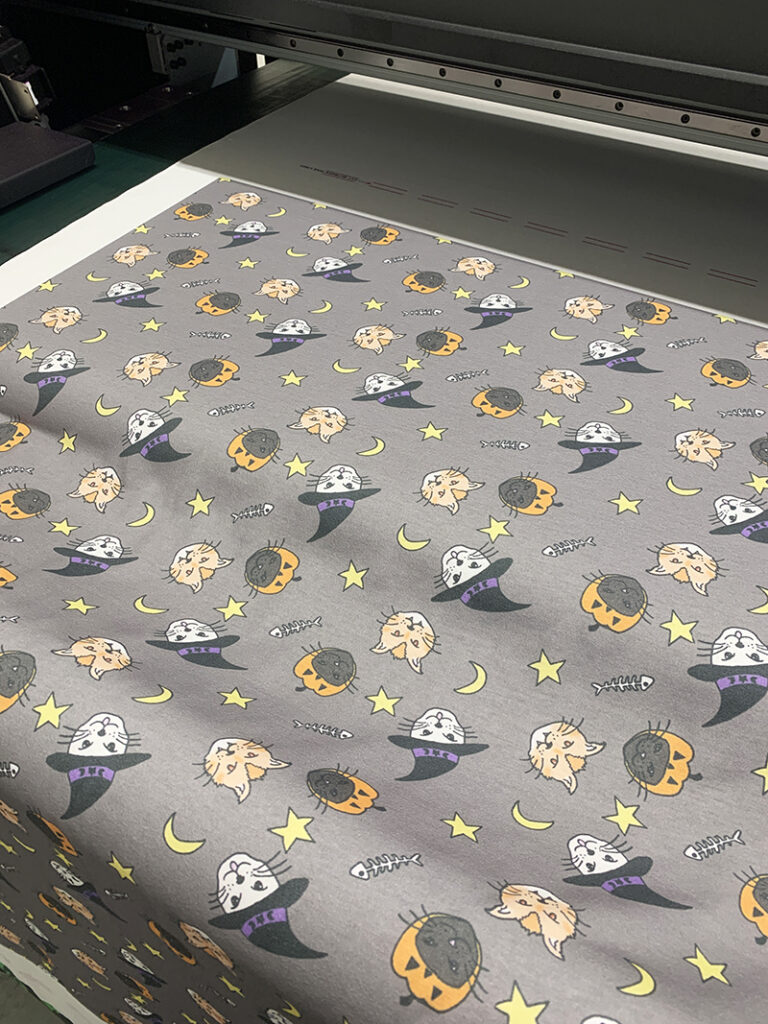
2. Using a pair of scissors cut out a square shape, we’ve gone with 40 x 40cm, but you can go smaller or larger depending on the size of your cat.
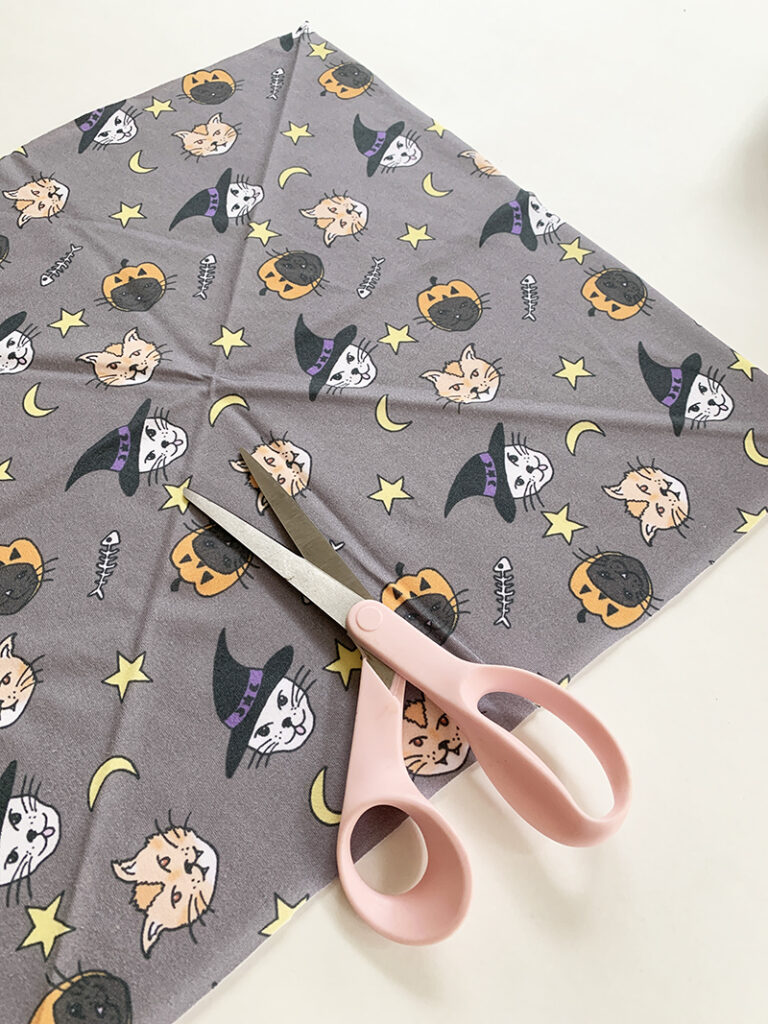
3. Once you’ve got an even square cut out, you’re going to fold over your fabric diagonally – printed side to printed side, corner to corner; to create a triangle shape.
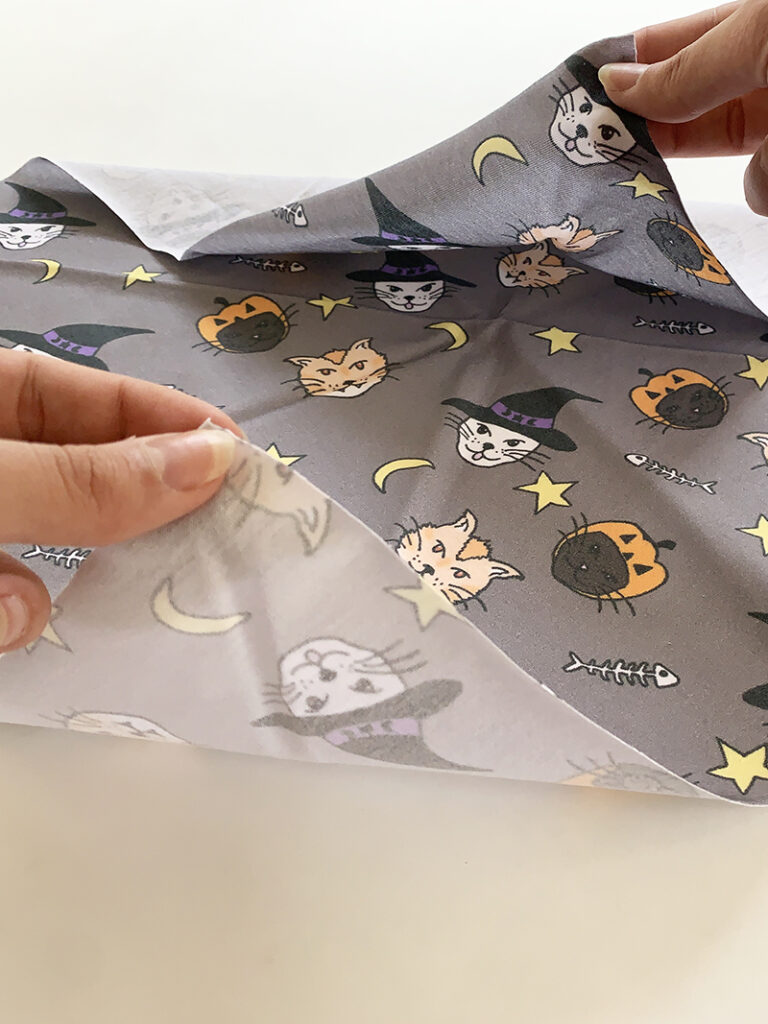
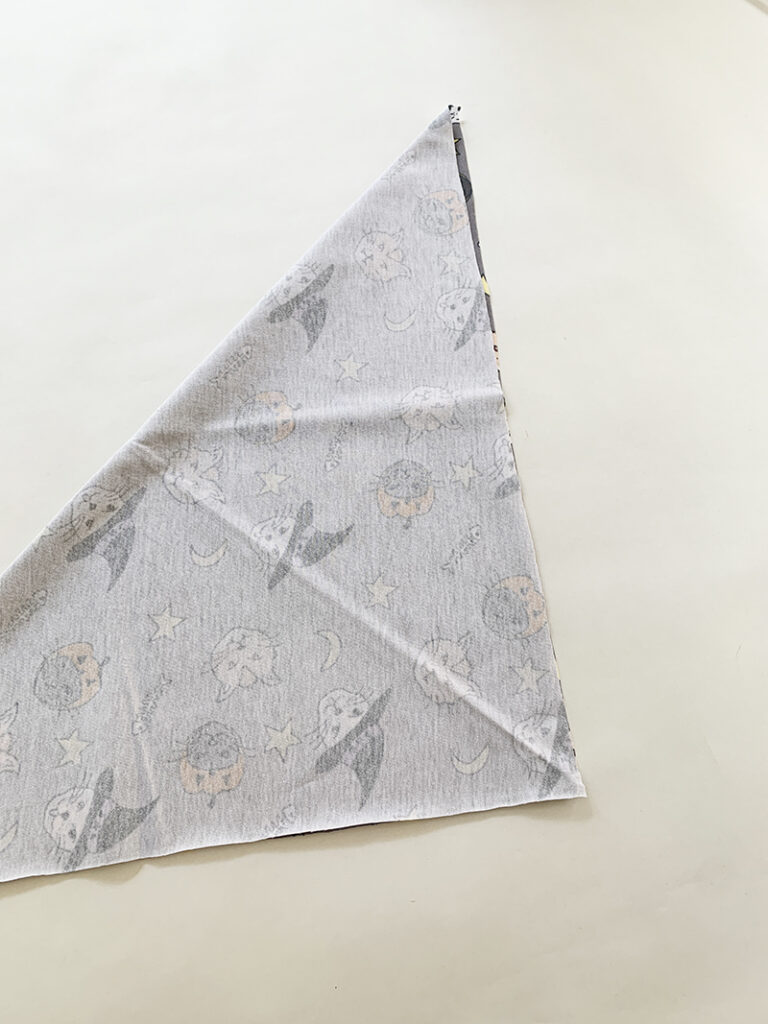
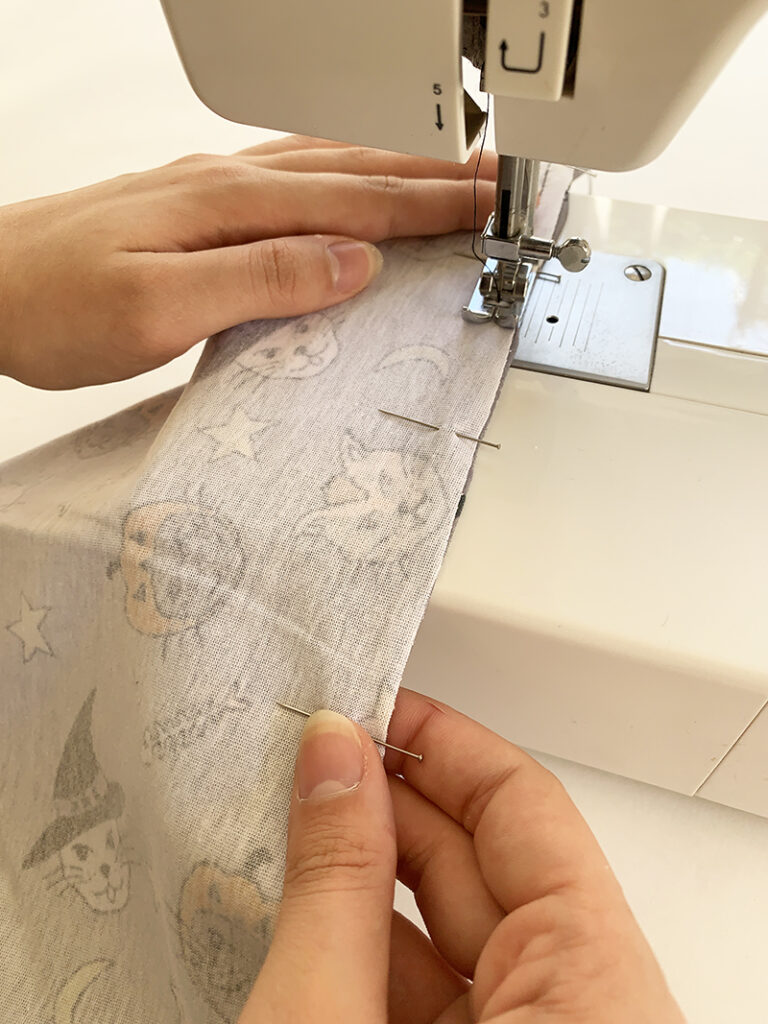
4. Once you have your triangle shape and all the edges match up, you’re going to pin together the edges so the fabric doesn’t move around when trying to sew.
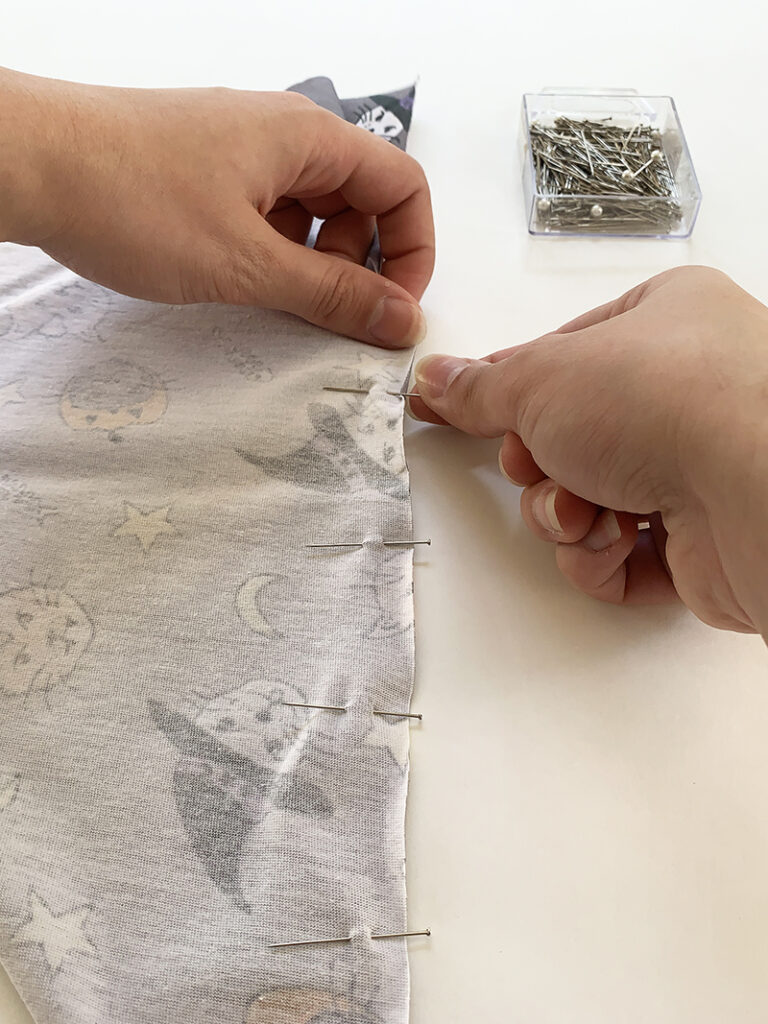
5. Now it’s time to sew! We’ve used a sewing machine for our bandanas but you can easily use a sewing needle as well. You’re going to stitch a straight stitch, 1cm in from the raw edge starting from one of the corners. Sew around the sides of your triangle angle shape, leaving a 6cm open gap so you can flip it right-way out when you’re done.
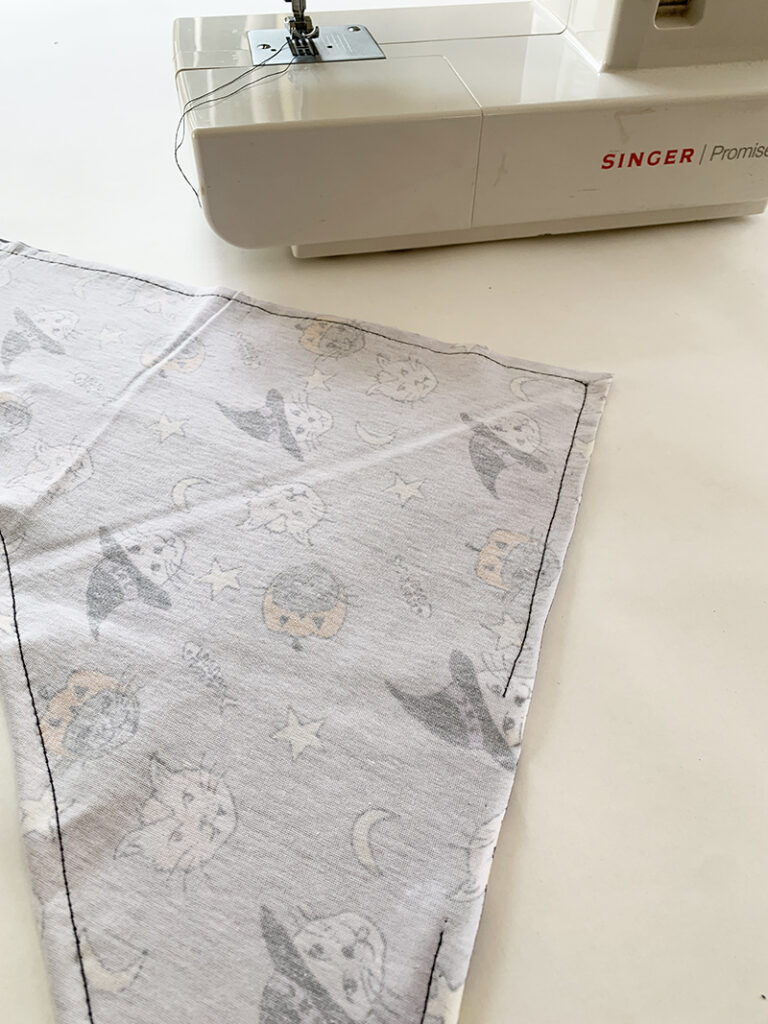
6. Once you’ve got your pieces stitched together, from the 6cm opening you’re going to pull the inside out. Make sure all the corners are completely pulled out and everything is lying flat, as we’ll be stitching around each edge again.
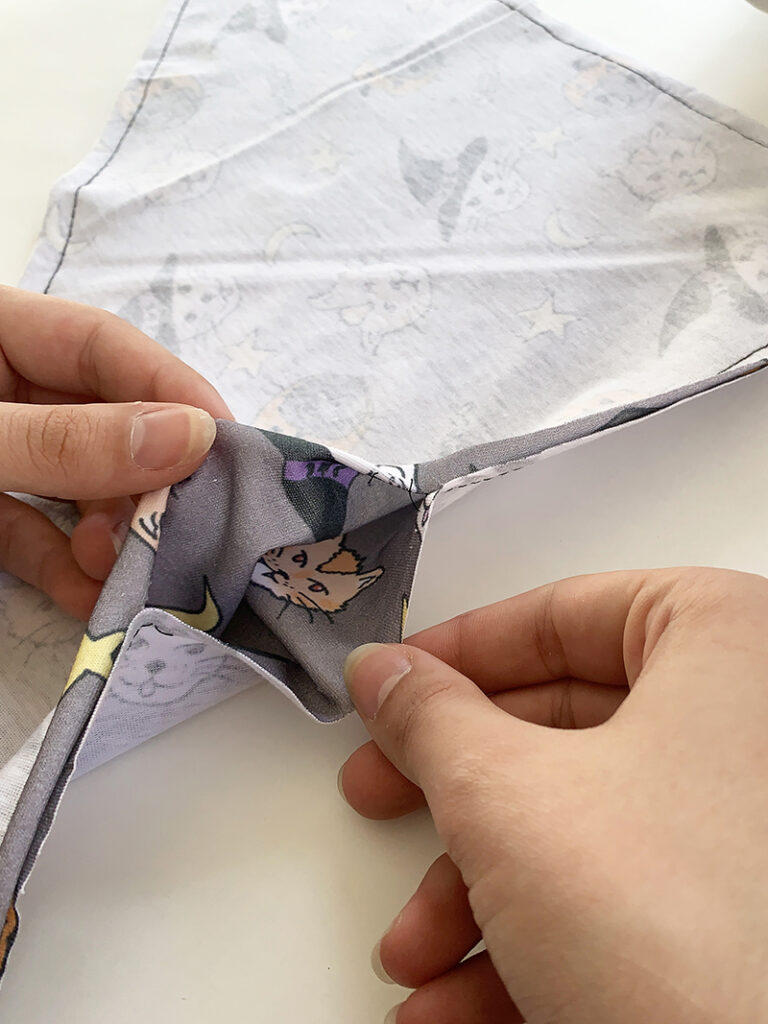
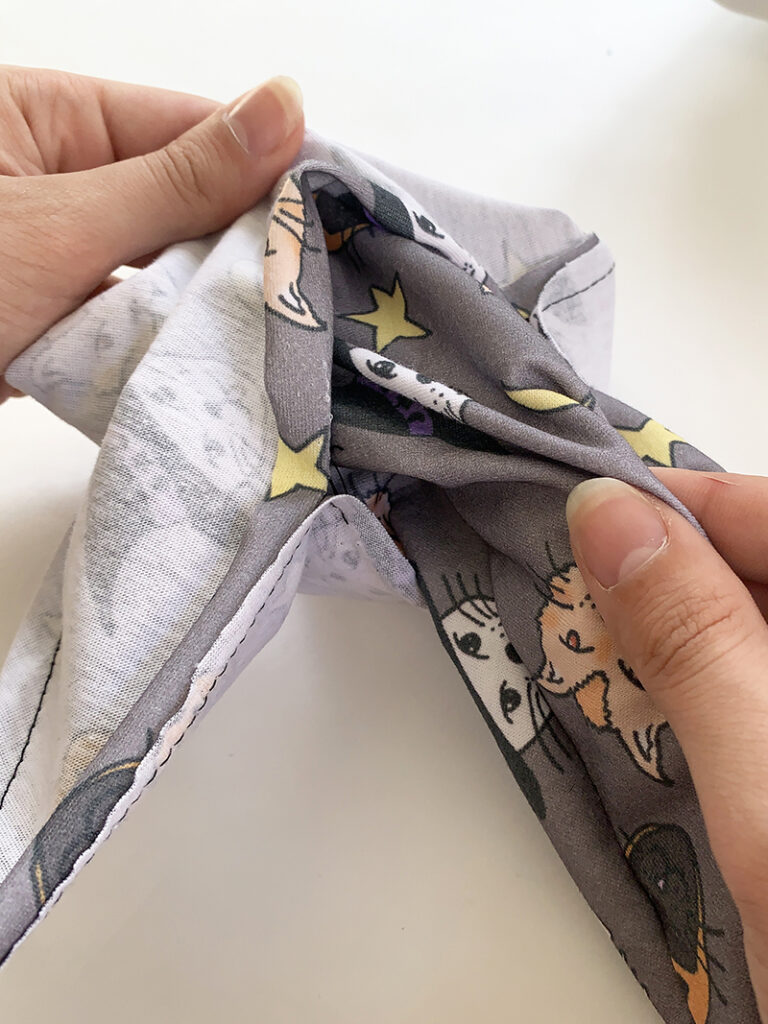
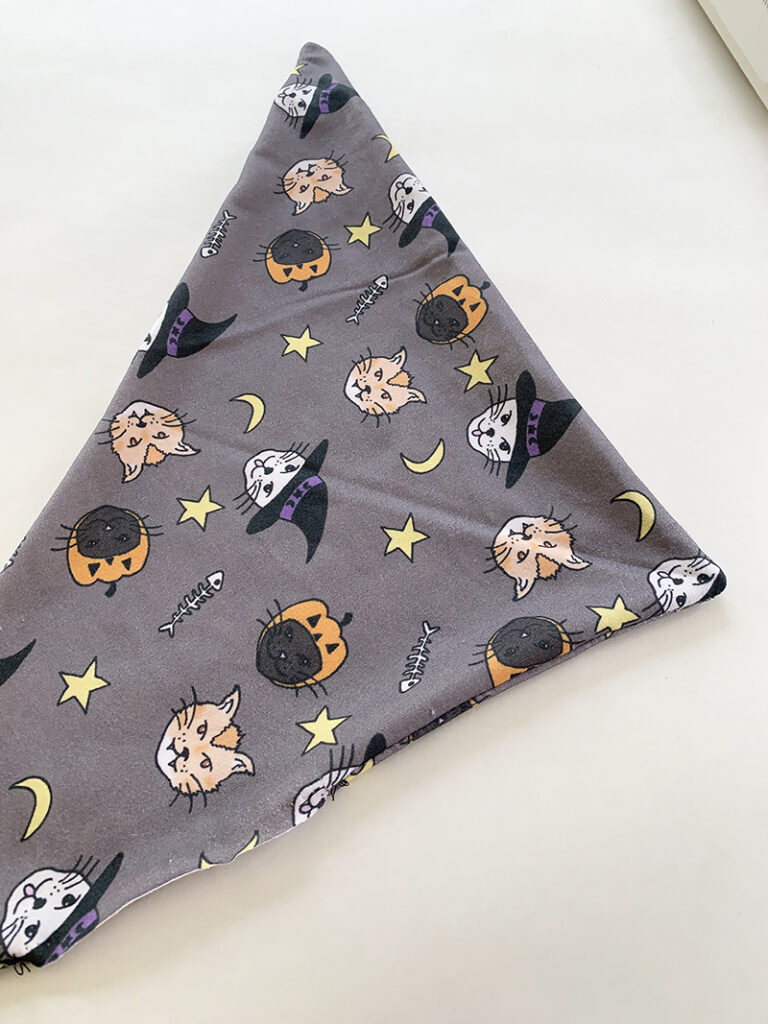
7. When you’ve got your Bandana completely pulled out, so that the print is now on the outside; you’re going to top stitch 0.5cm in from each side, the whole way around. Make sure to tuck in the raw edge of the 6cm gap, pin it and stitch over this part as well. This will create nice, flat edges around your Bandana and a stronger stitch for durability.
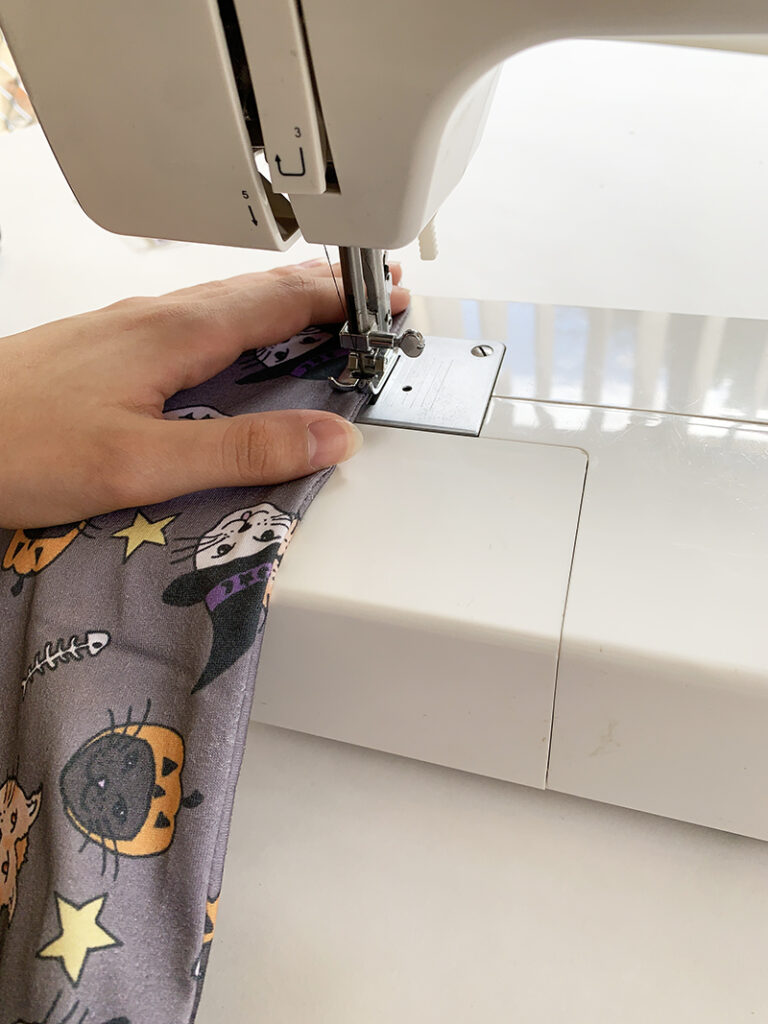
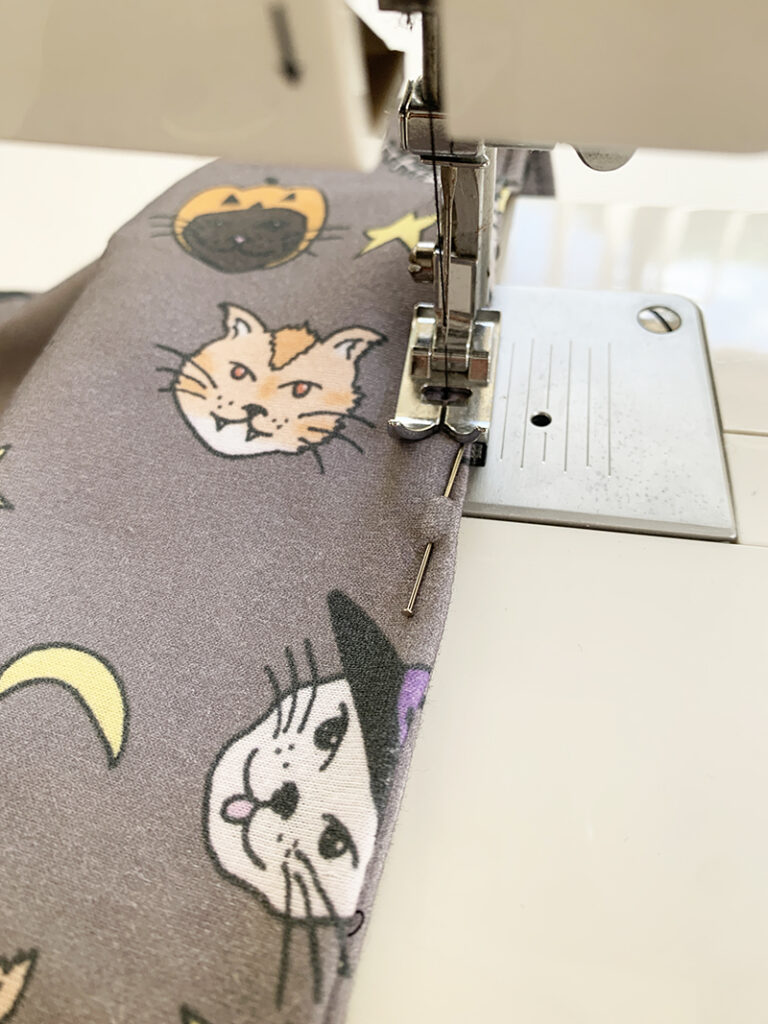
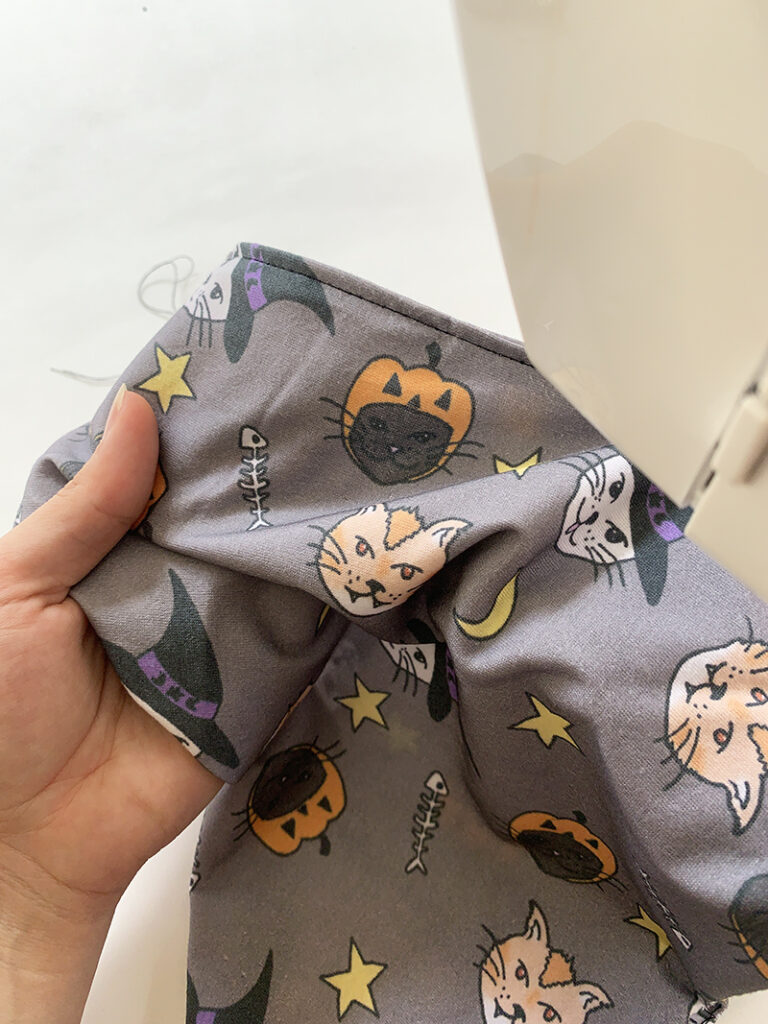
You now have an adorably spooky Cat Bandana to dress your cat in for the Halloween Season!
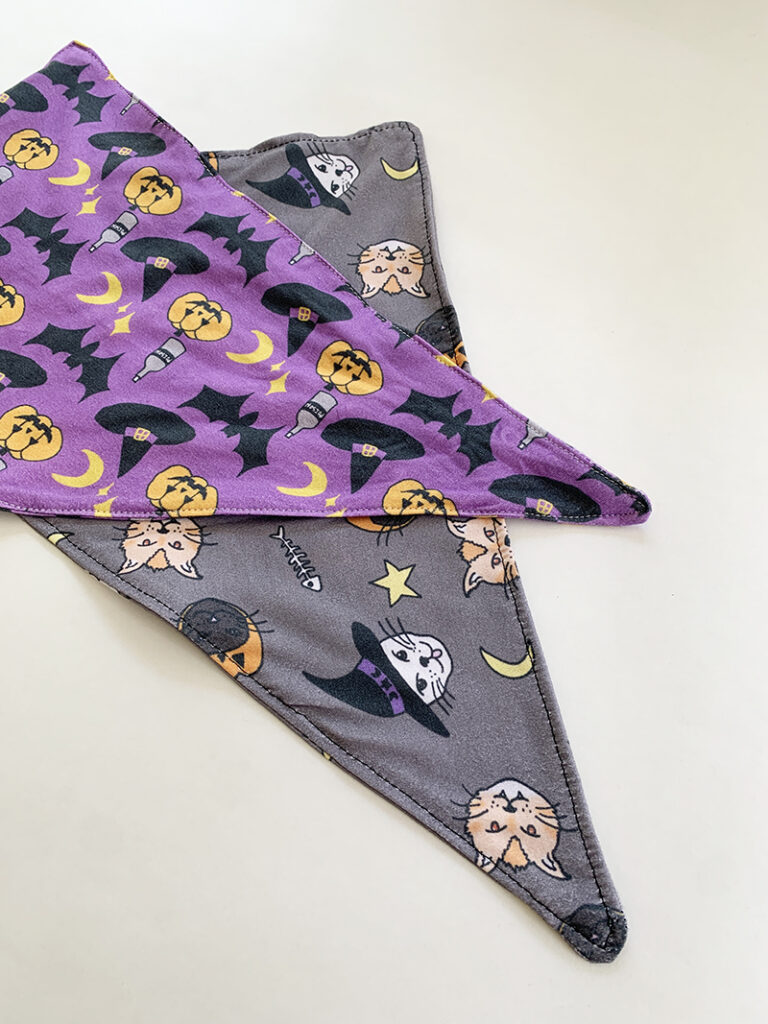
Keep on scrolling to check out some more fun Halloween Prints that are available now in our Fabric Shop. You can order any of these prints on our stock fabrics and create your own custom cat bandana or any Halloween themed DIY project!
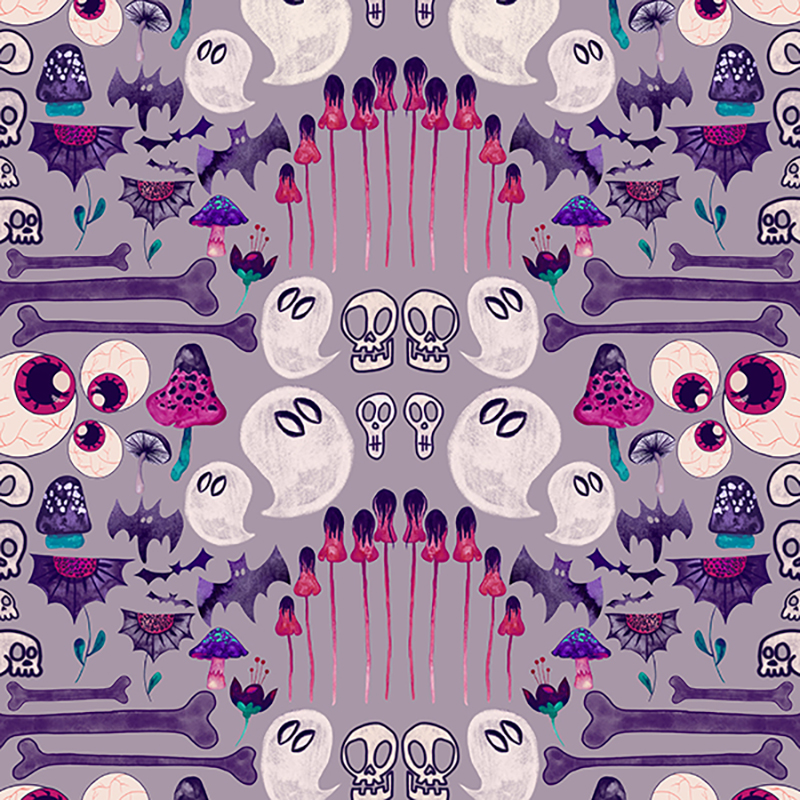 ‘Bone Collector’ by Sami Sparrow
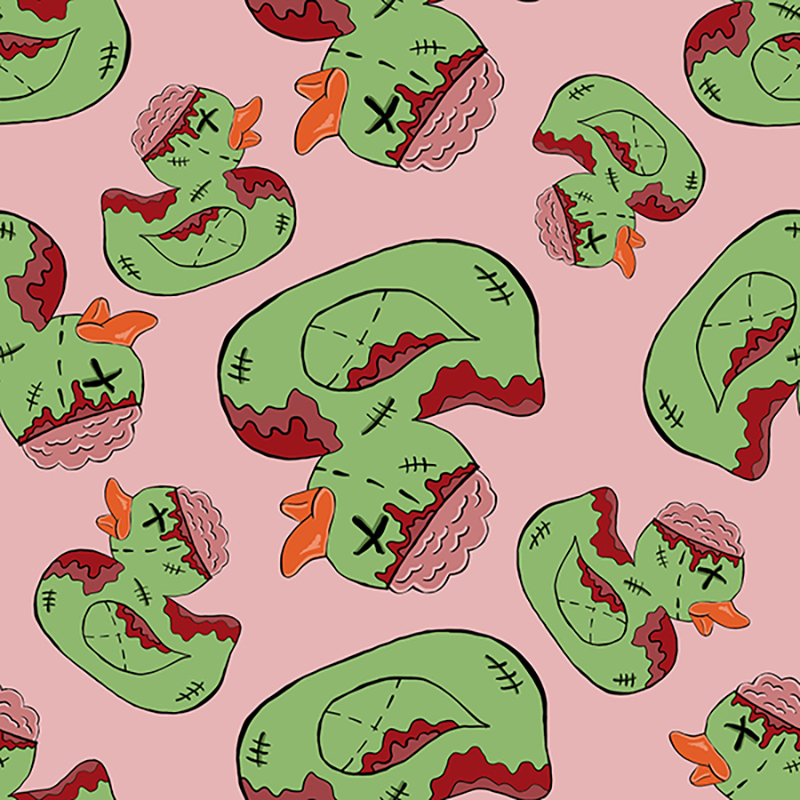 ‘Zombie Ducks’ by Krystal-Anne Knafl
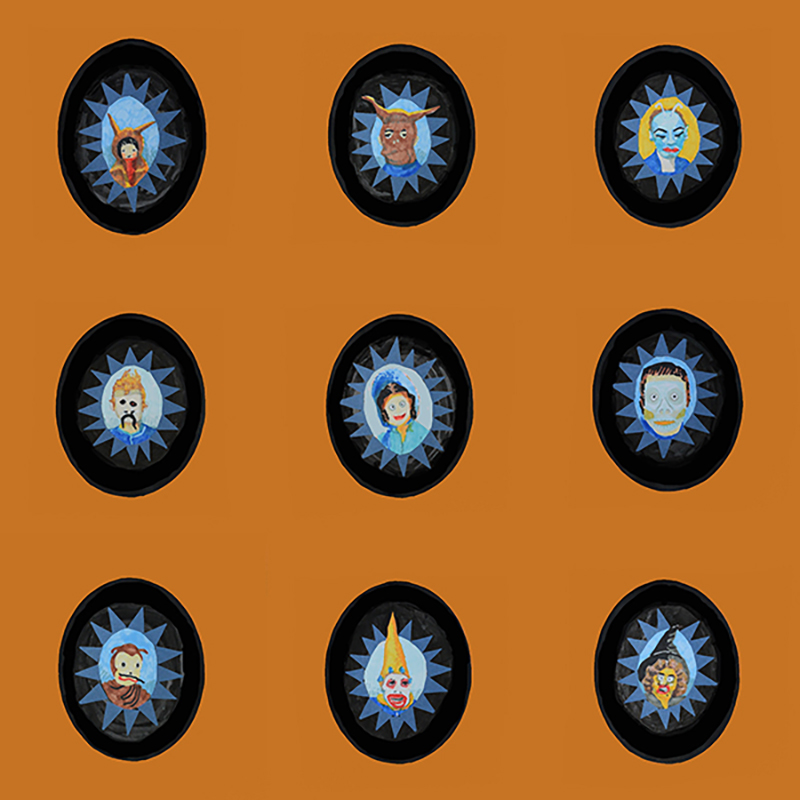 ‘Vintage Halloween Masks’ by Sue Michael
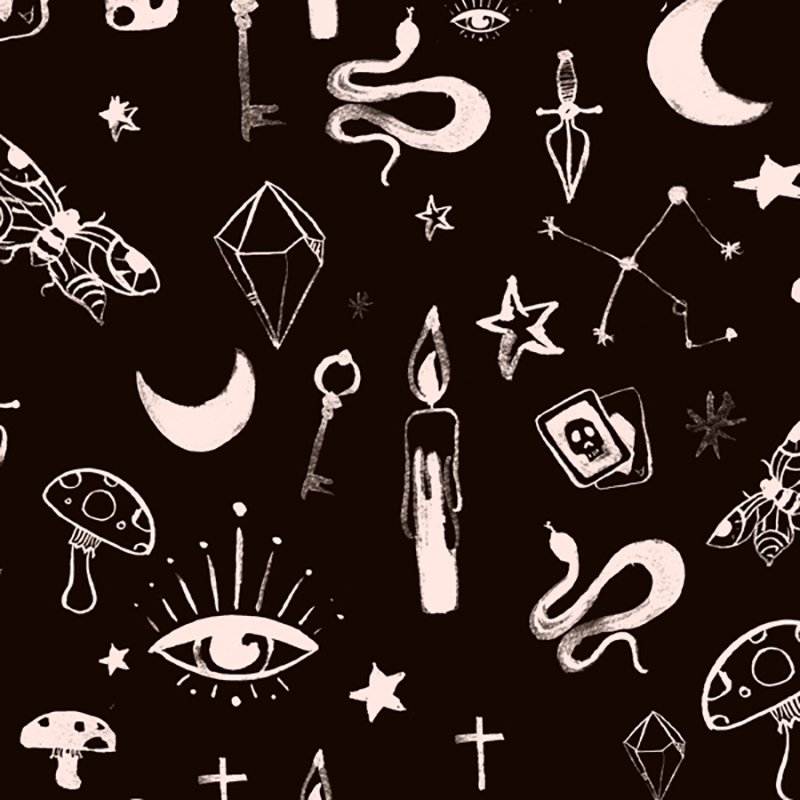 ‘Spooky Ink’ by Emilie Otto
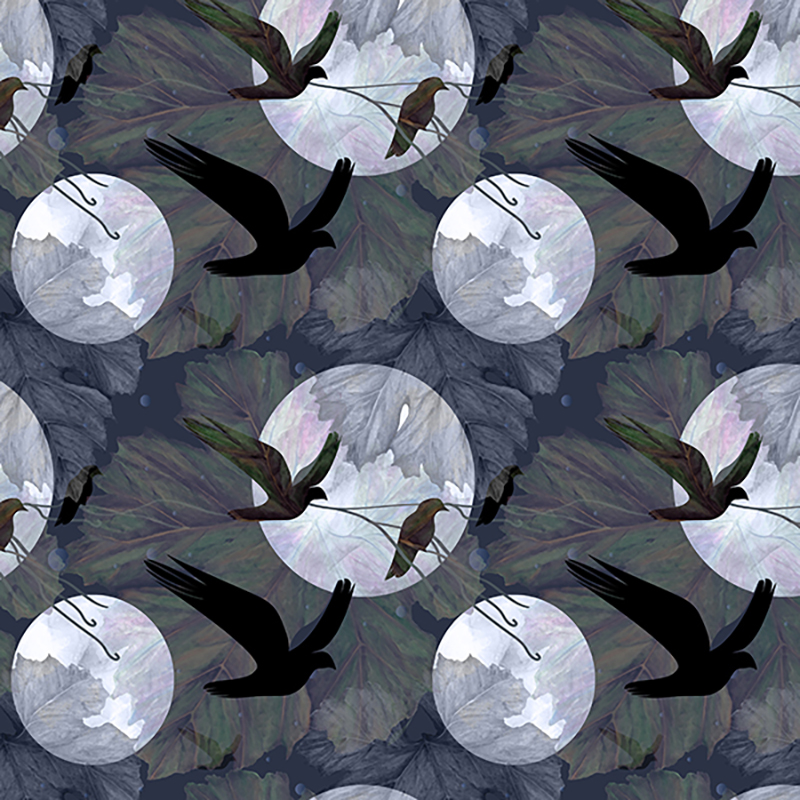 ‘Crows’ by Carly Westbye
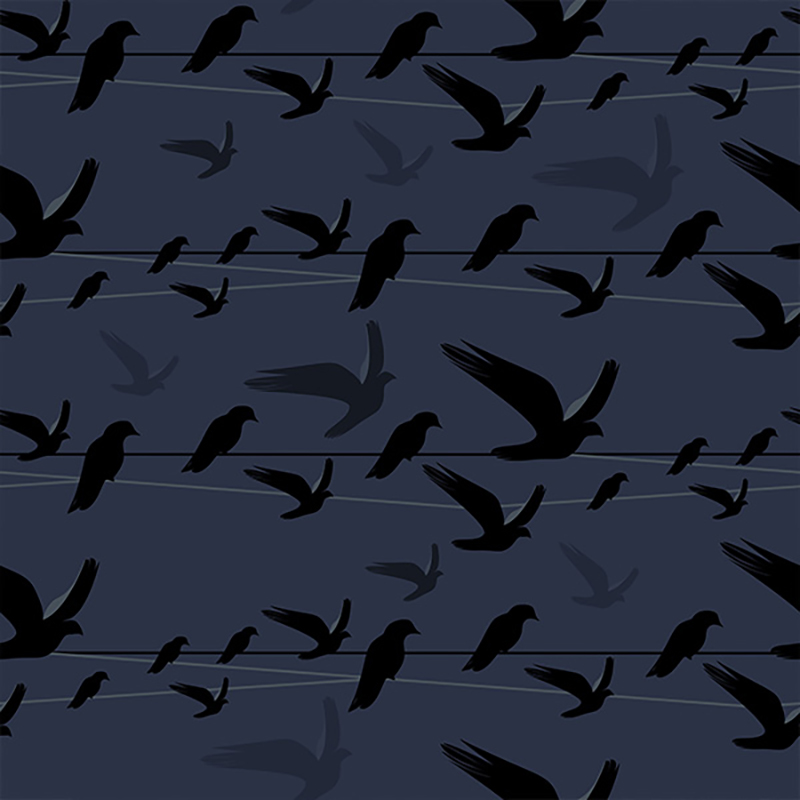 ‘Crows Gathering’ by Carly Westbye
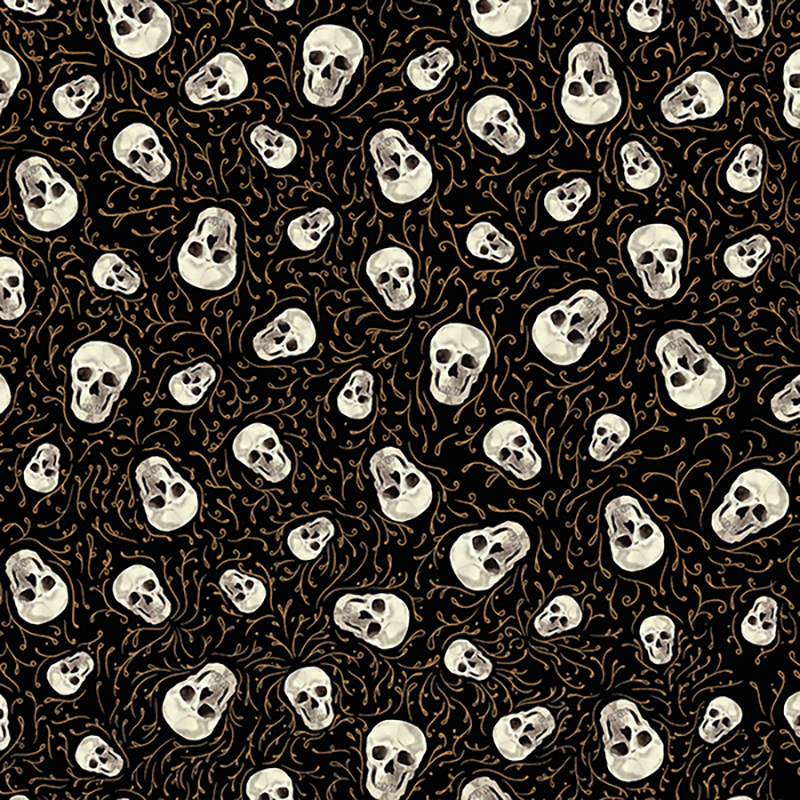 ‘Spooky Skulls’ by Ianny Bastos
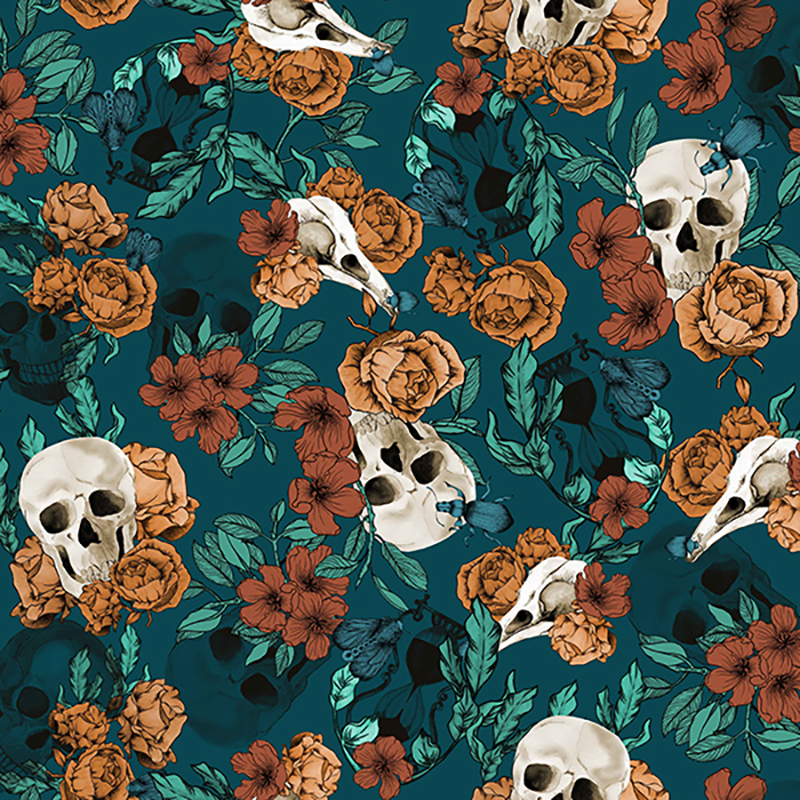 ‘Skulls and Roses’ by Ianny Bastos
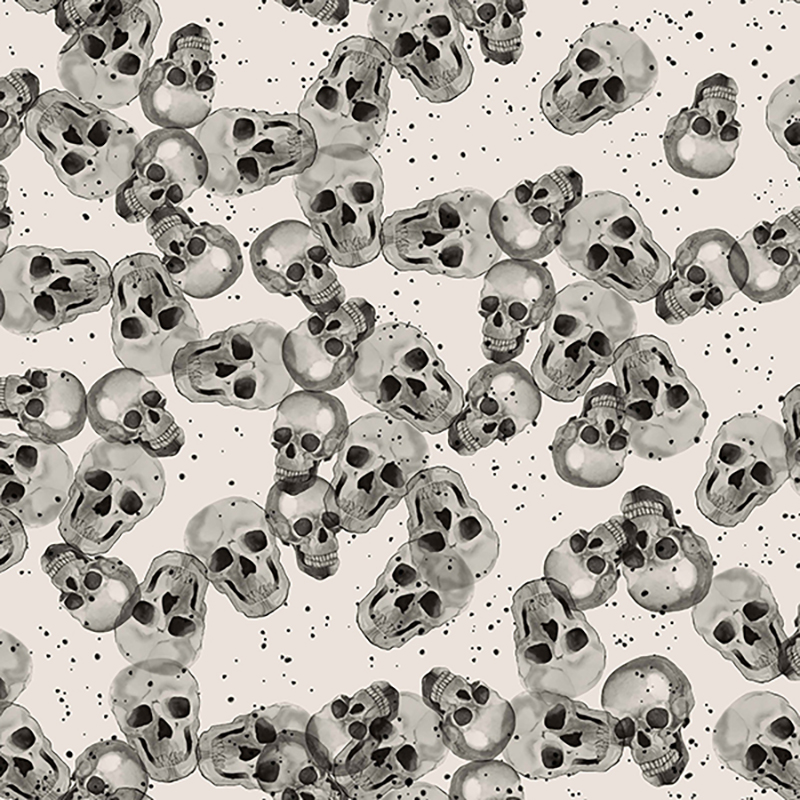 ‘Monochromatic Skulls’ by Ianny Bastos
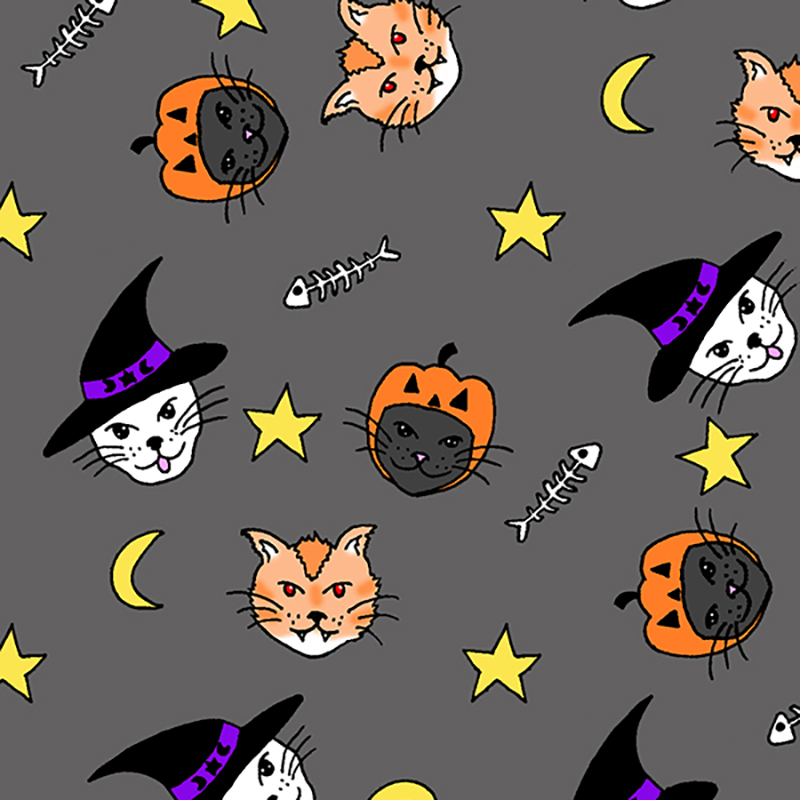 ‘Spooky Costume Cats’ by Ella Mackay
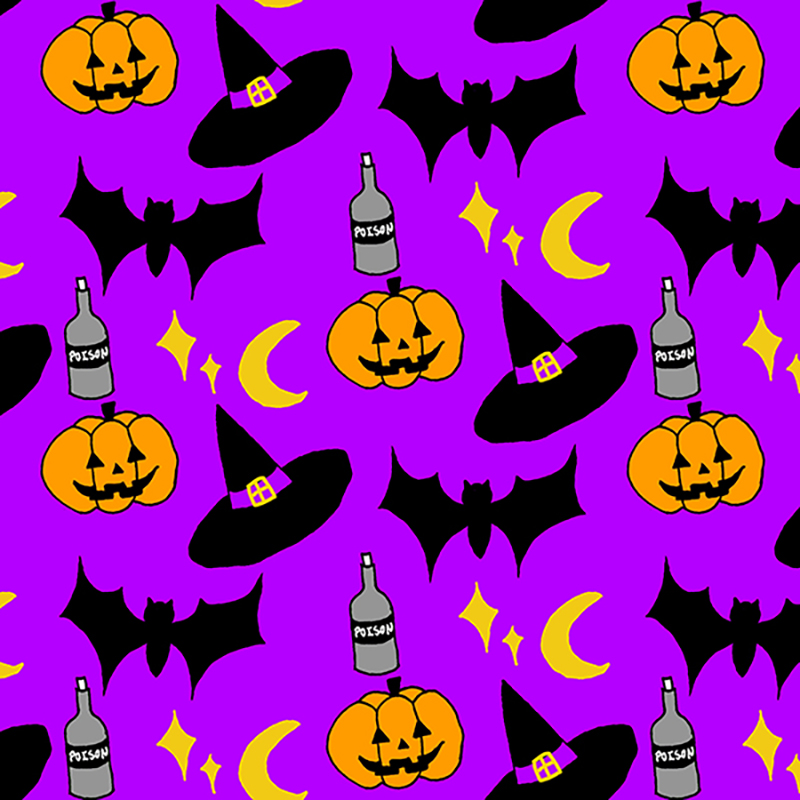 ‘Spooktacular Halloween’ by Ella Mackay
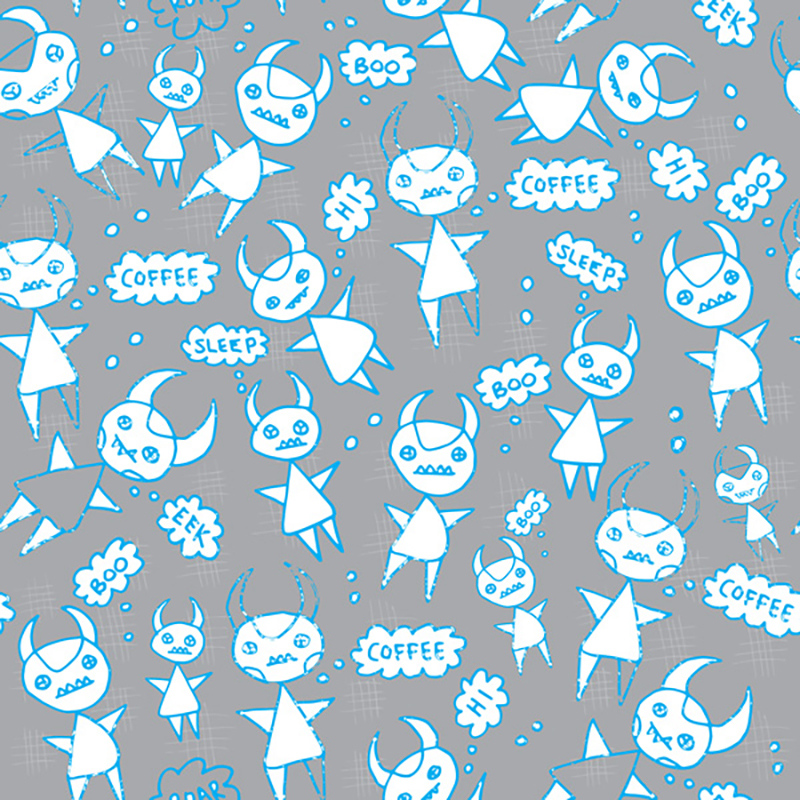 ‘Coffee Monsters’ by Louise Addison
We have absolutely loved sharing these fun loving designs by creative Emilie Otto and hope you’ve loved her designs as much as we have! To coincide with Emilie’s ‘Life of the Party’ collection being made available to all of our customers through our Fabric Shop online, the artist herself has put together a guest blog which further explains her one of a kind creative process and what inspires her work.
Keep reading to find out more about Emilie Otto and her unique design process!
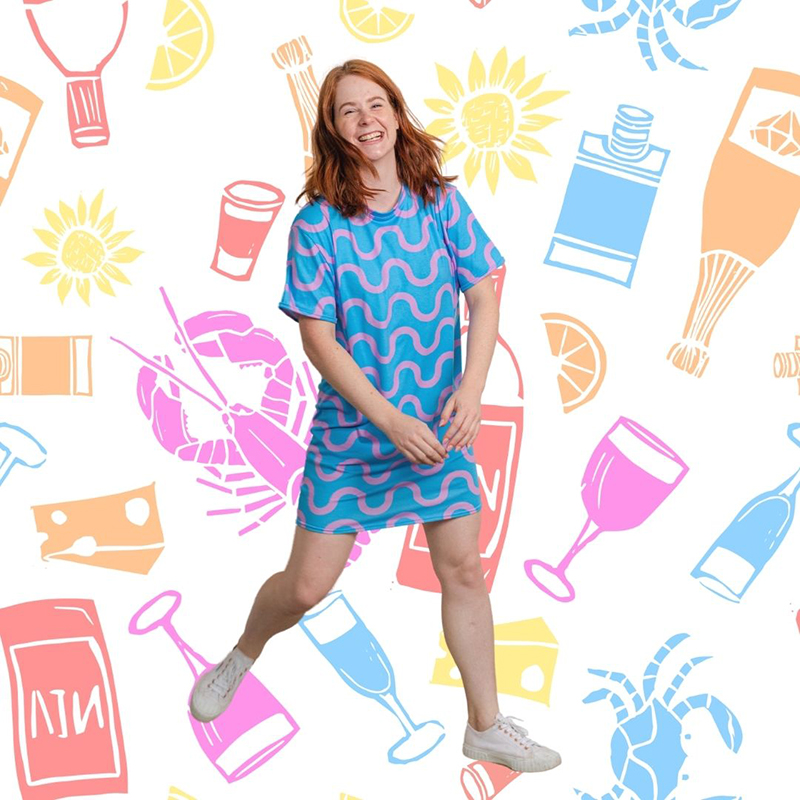 ‘Emilie Otto’
Hi, I’m Emilie Otto (aka Em).
Let’s get creative friends, I’m so excited to share these fun filled fabric prints with you all! It has been one of my wildest dreams since I can remember to create bold, eccentric and joy filled designs to inspire people to create and feel authentically themselves. I am never someone who likes to blend into a crowd or follow the leader and I wanted these designs to reflect this.
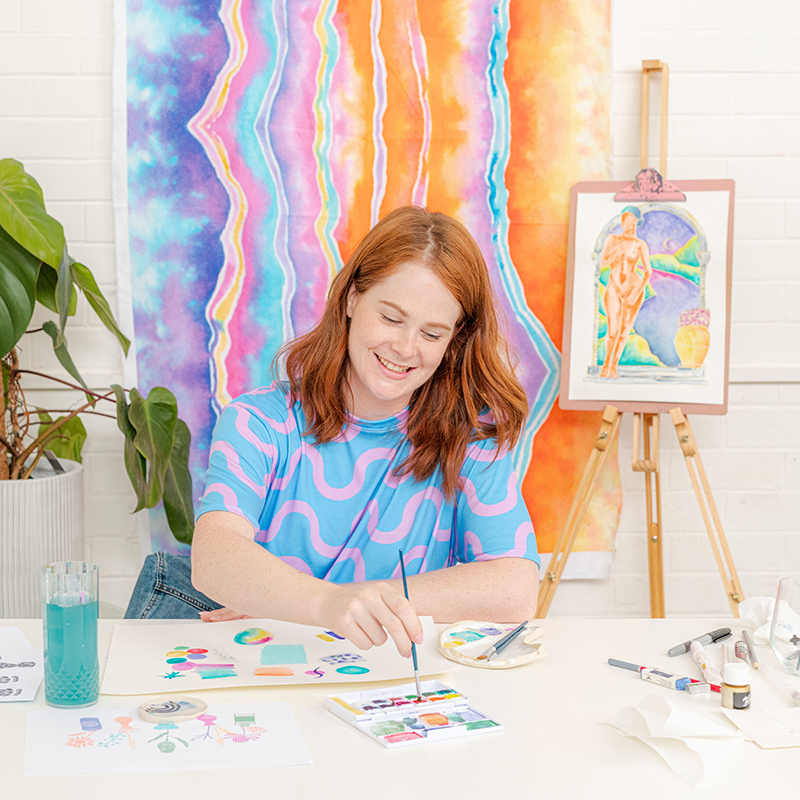 ‘Emilie painting in her studio’
This a slice of my first collection “Life of the Party” an eccentric mix of colourful coordinates. Curated for fun lovers, sun-seekers, and most importantly good times! These designs are created from hand carved stamps, which have been elevated using a variety of digital techniques. The bright colour palettes embody my favourite parts of summer. These designs where made to suit fashion and accessories projects, but the sky’s the limit.
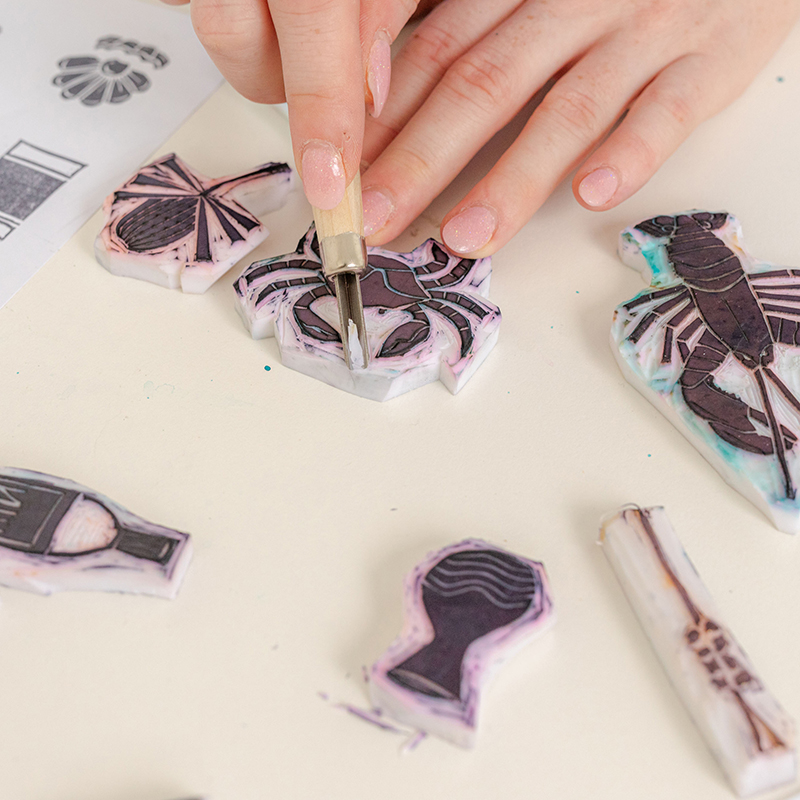 ‘Carving design stamps’
These designs didn’t come about in a conventional way, in fact it woke me up at 2am! I couldn’t stop thinking about carving little stamps and creating little still life artworks. It all happened within a matter of hours, I was listening to my favourite playlist hand carving wine bottles, crabs, lemons, and a range of flowers. I fell in love instantly and after finishing the carvings I could head back to bed for some more sleep.
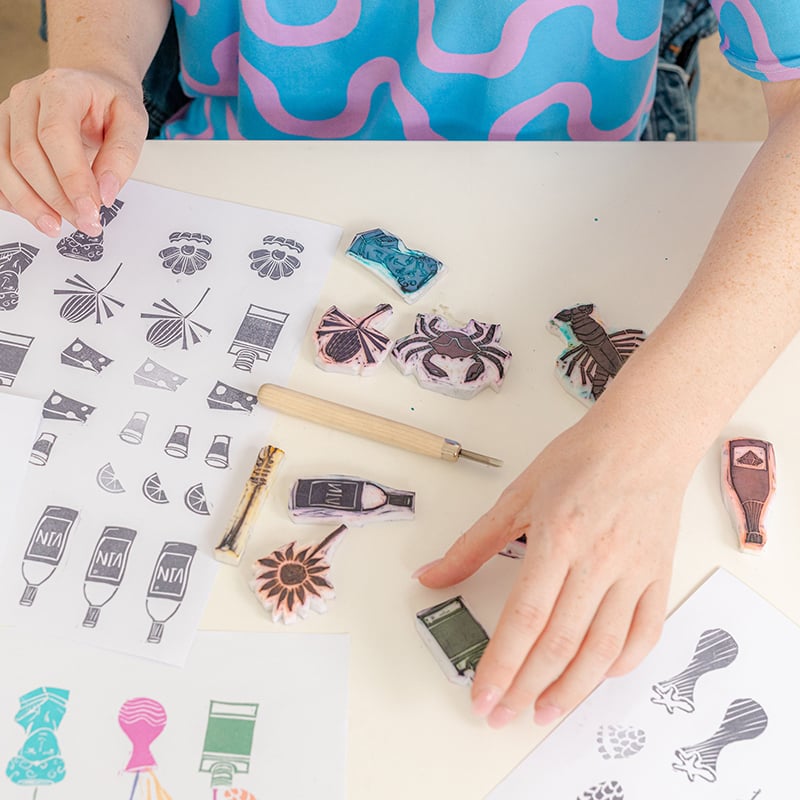 ‘Emilie using her handmade stamps’
Most of the designs are inspired by items I have in my studio, which spark happiness. Items have been collected from thrift stores, gifted, and saved to remind me of special moments. I love bright colours and love high contrast patterns, so these colour combinations feel very true to my style as a designer.
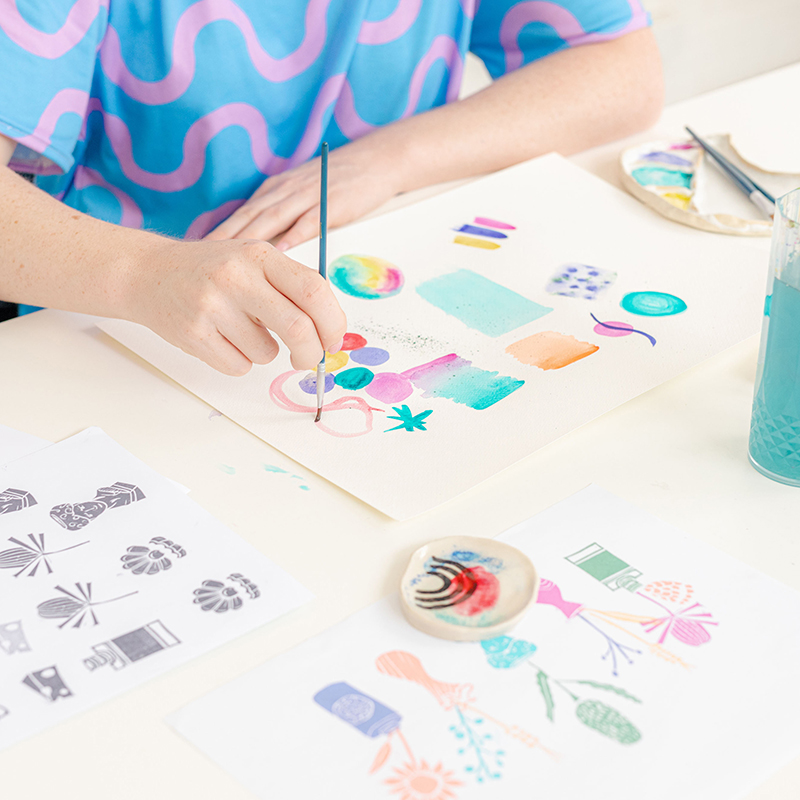 ‘Emilie painting in her studio’
All of the designs I create are something that I would love wearing, most of the time they don’t start out with a purpose in mind. I focus on enjoying the making process and more often that not they turn into whatever they were meant to be, these stamps started as card designs but evolved into statement fabric designs.
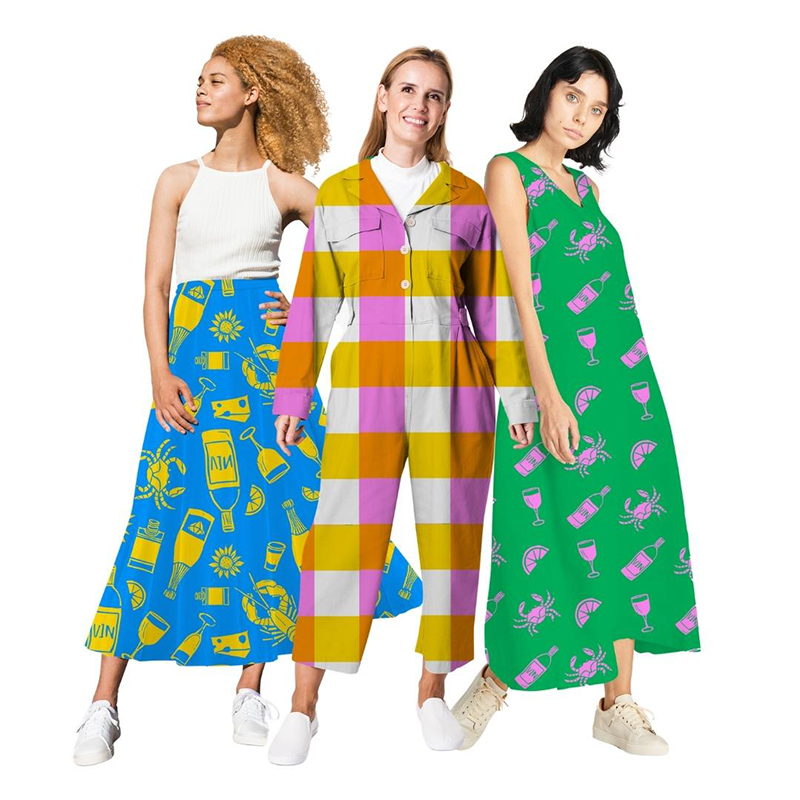 ‘Clothing Mockups of Designs’
Here are a few clothing examples that really get me excited, they have an element of comfort, are carefree and also let people’s personalities shine through. Any of the fabrics in this collection would work well on their own, they can also be mixed and match to really turn up the fun.
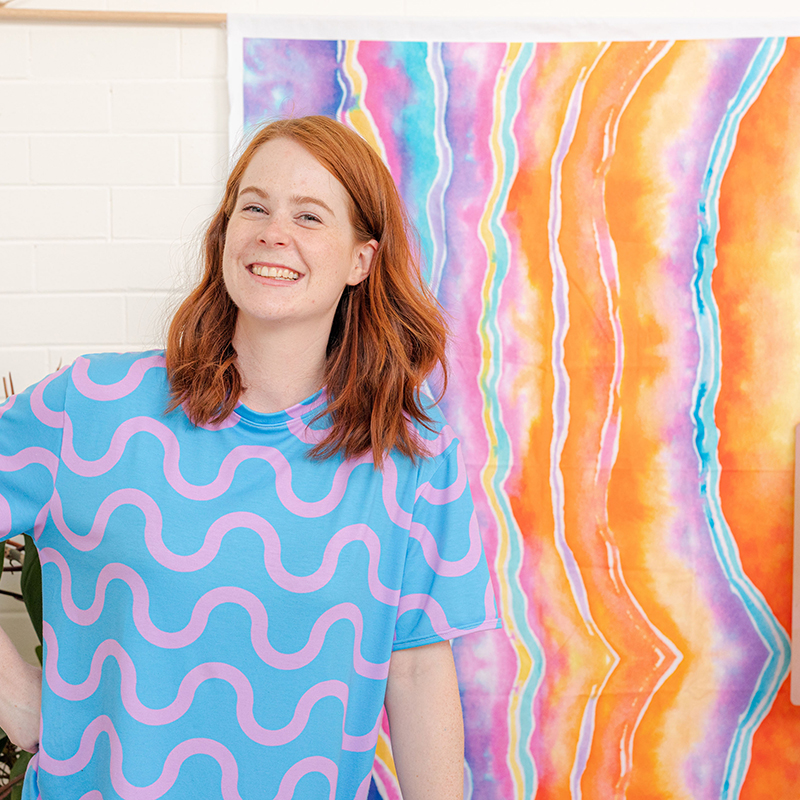 ‘Emilie Otto’
My studio space is full of dancing lights, disco balls and prims hanging from the windows along with artwork from other designers who inspire me. It’s a chaotic space, but I always feel so inspired when I sit down at my desk and start painting.
I hope that these designs bring some energy and fun into your next DIY project.
Em xo
If you want to collaborate with us on The Designer Project and become part of this creative club, please apply! Send us an email with your portfolio and why you would like to be part of this initiative, and we will be in touch!


 The Australian spring hasn’t quite begun the way we are used to. The sunny beach trips have turned into rainy weather days at home, meaning it becomes all that more difficult to keep the kids entertained. With a gloomy couple of months ahead, we understand the need to reduce screen time and find some indoor activities to keep the young ones busy. So, get ready to swap their iPads for some creativity as we have put together a list of really easy and simple fabric craft projects for kids to keep those rainy-day blues away!


 You can also get creative for your corporate or business merchandise needs, just like Moccona did through Mix Agency.
 With Spooky Season well and truly on its way, we wanted to give you a fun little Halloween DIY project to make for your pets…well, cats specifically!


