Tag Archives: design your own leggings

Nailed It: Q & A Style Interview With Stavroula Adameitis From Frida Las Vegas

Nailed It. Creative business success story

Here at Digital Fabrics we love finding a new and interesting success story on a brand or business that is inspiring to the creative community. We thought it would be useful and informative to find out how these creative businesses nailed it, lessons learned on the way and tips they might have. We have asked them to share important “How to’s” and growth hacking tips for start-ups and emerging designers. Read it, get motivated and nail it yourself!

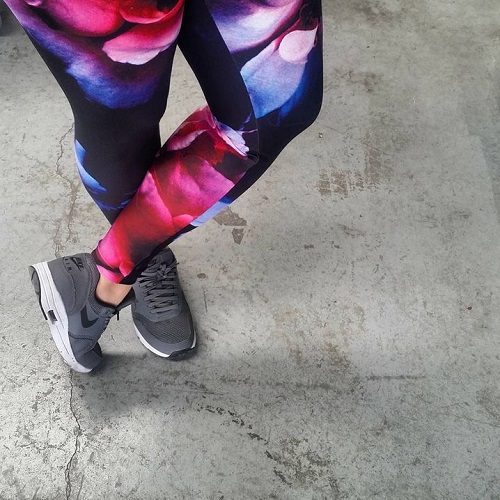
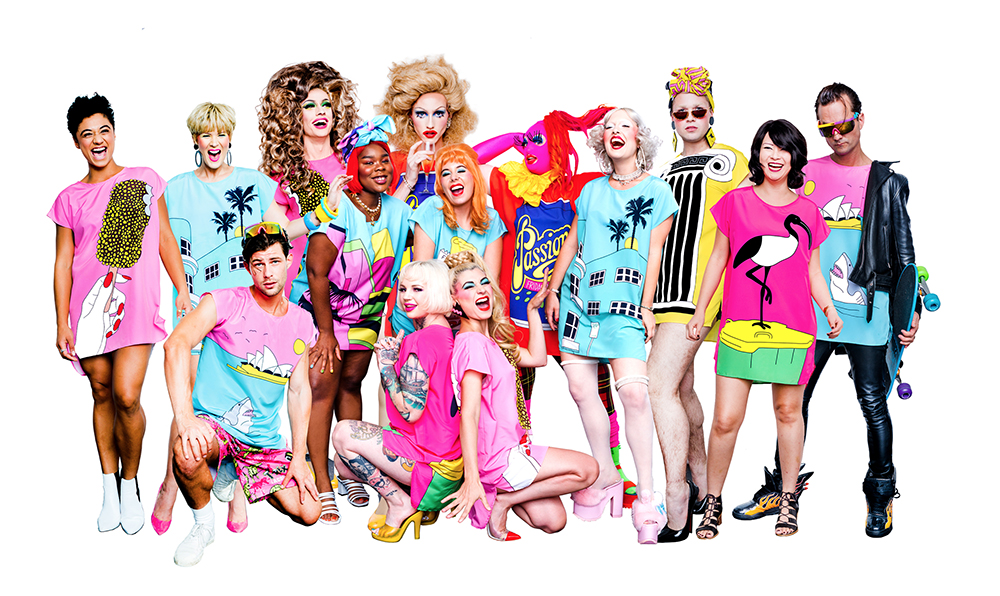
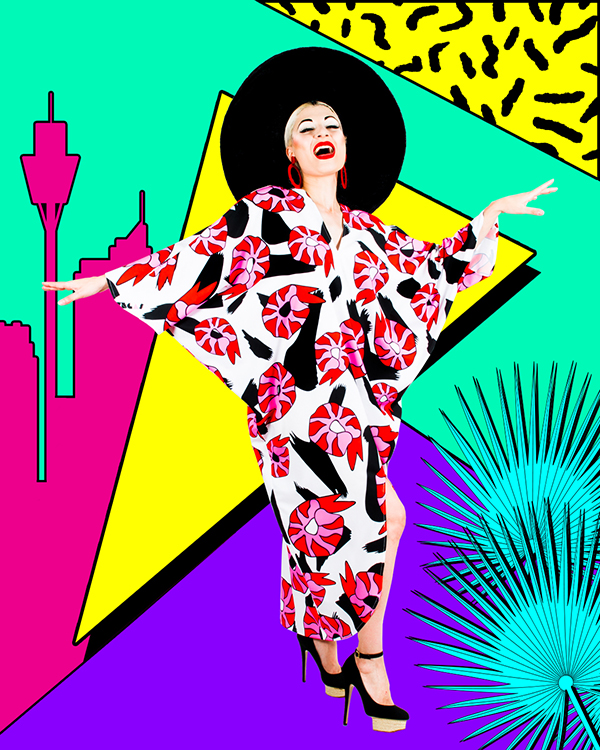
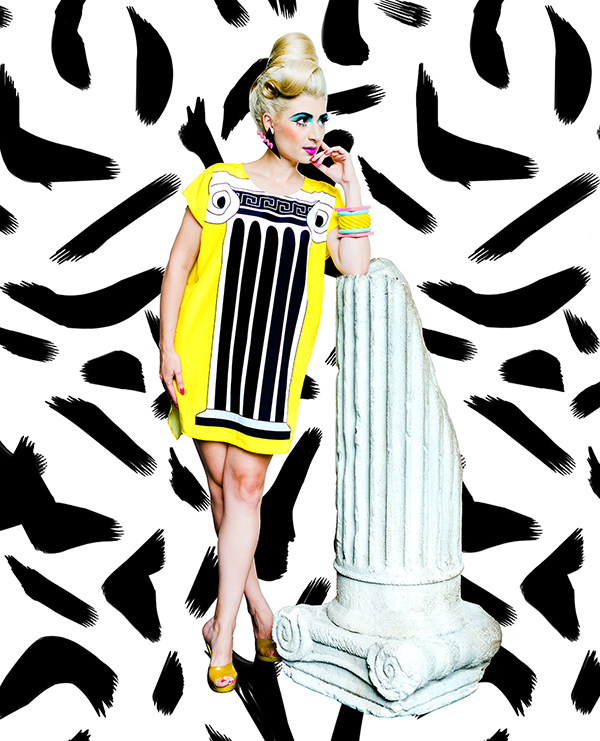
We are back for 2019 and we have a fabulous designer to get your creative juices flowing and your mind ticking!  To get the year going we are chatting to Stavroula Adameitis, the artist and designer behind the fabulous label ‘Frida Las Vegas‘ an Australian brand known for its bright colours, pop art themes and humorous work with a big kitsch kick and homage to the 80’s. We had the pleasure of asking her a few questions about how she is nailing it and what she has learnt along her journey so far.

Digital_Fabrics_Nailed_it_creative_interview_FridaLasVegas_5Firstly, please tell us about how Frida las Vegas was born and how you came up with the very fun name?

The name ‘Frida Las Vegas’ was given to me by a dear friend when I unceremoniously signed up for an OKCupid.com profile some time in 2012 and didn’t want to use my real name on screen. I stayed on the platform for a grand total of 10 minutes before getting creeped out and leaving the online dating world forevermore but I noted the name ‘Frida Las Vegas’ had a catchy ring to it. I felt the combination of artistic feminine expression a la Frida Kahlo with a side order of tack-a-rama Las Vegas glamour really summed up who I was and what I wanted to express, so it was perfect to create work under this name a year later!

Your artwork is uber unique! What messages are you trying to share and what does your brand represent?

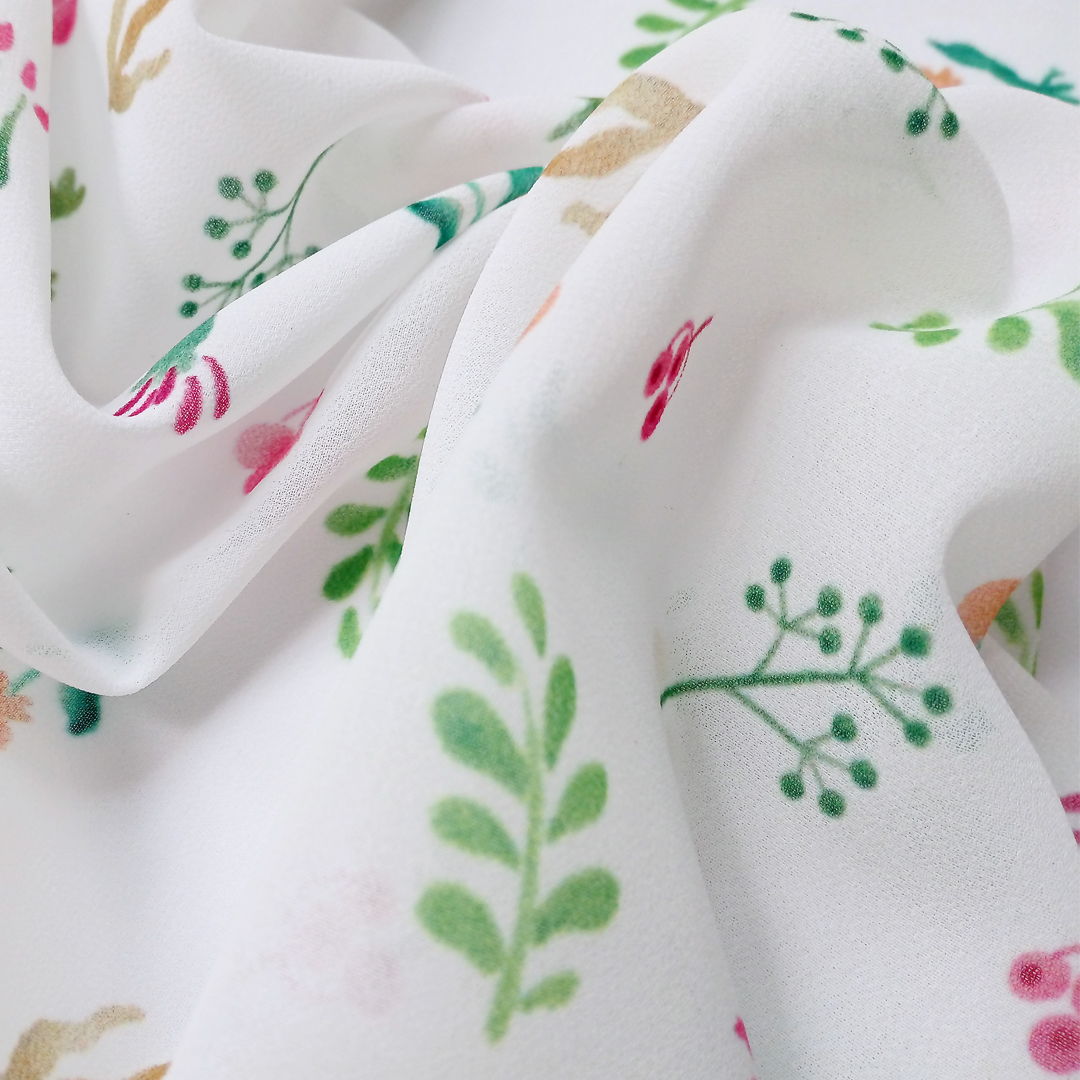
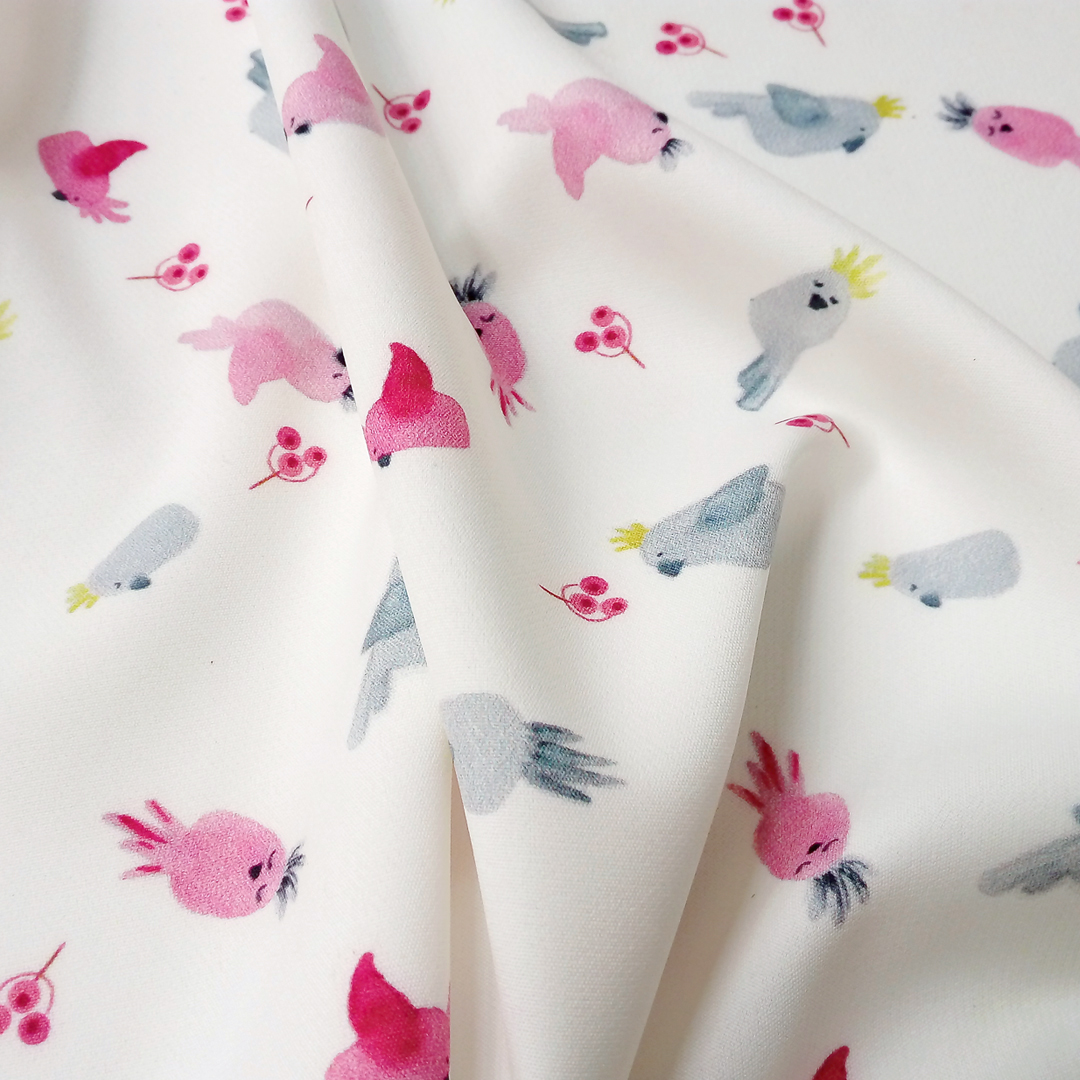
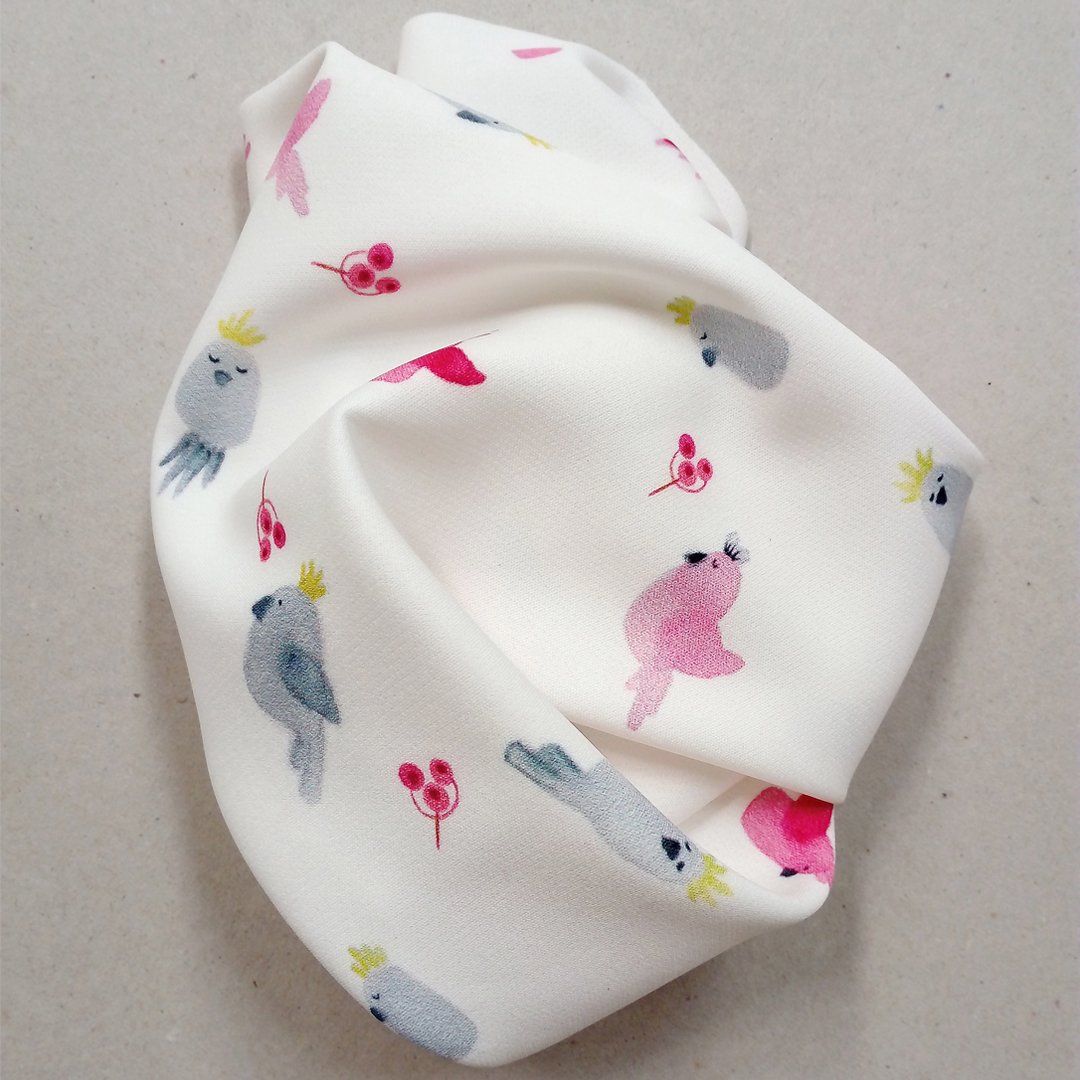
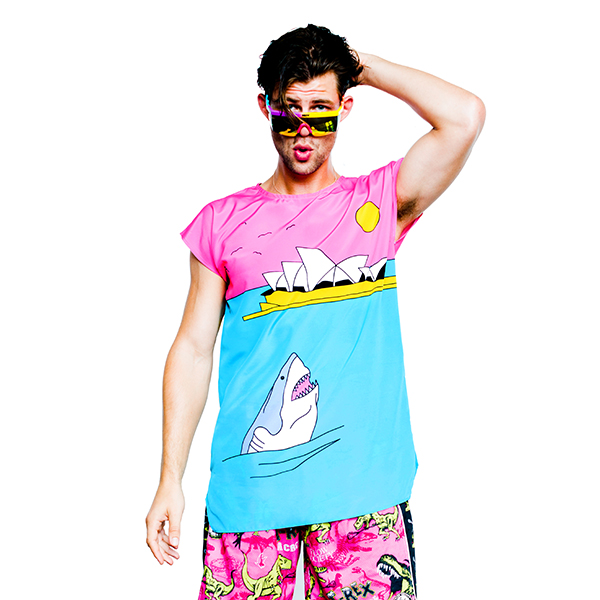
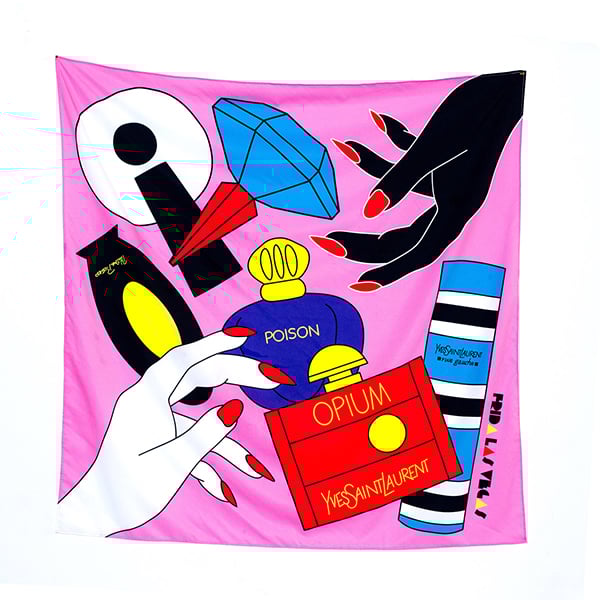
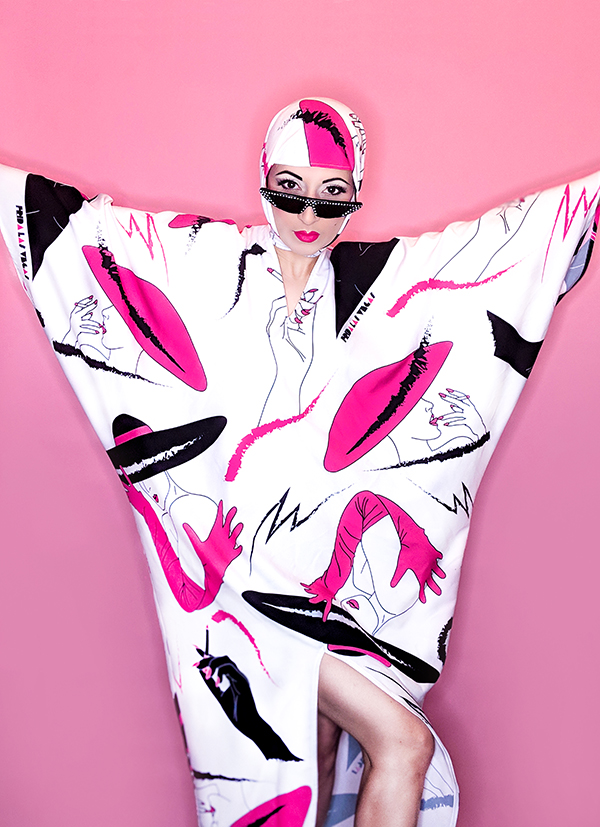
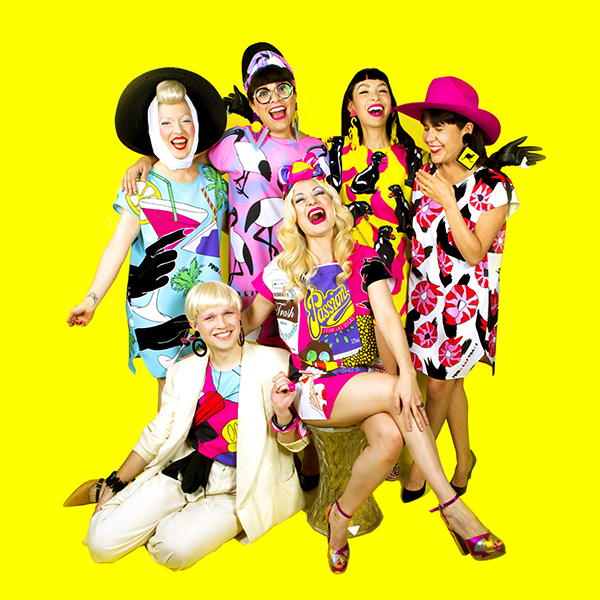
Thank you! My work is super nostalgic and reflects my personal obsessions with icons of popular culture, architecture, fashion and memory – many of which are distinctly Australian, which I feel is missing from the pantheon of Pop Art. Glamour and humour are central to the FRIDA LAS VEGAS ideology as these terms usually contradict themselves and I don’t think they necessarily should.

Visually, I’m interested in creating a universe that exists in its own timewarp, like a mash-up between art deco linework, 1980s Memphis Milano graphics and 1950s atomica. Ultimately my brand represents the self-actualising power of positivity, colour, confidence and humour.

Digital_Fabrics_Nailed_it_creative_interview_FridaLasVegas_9
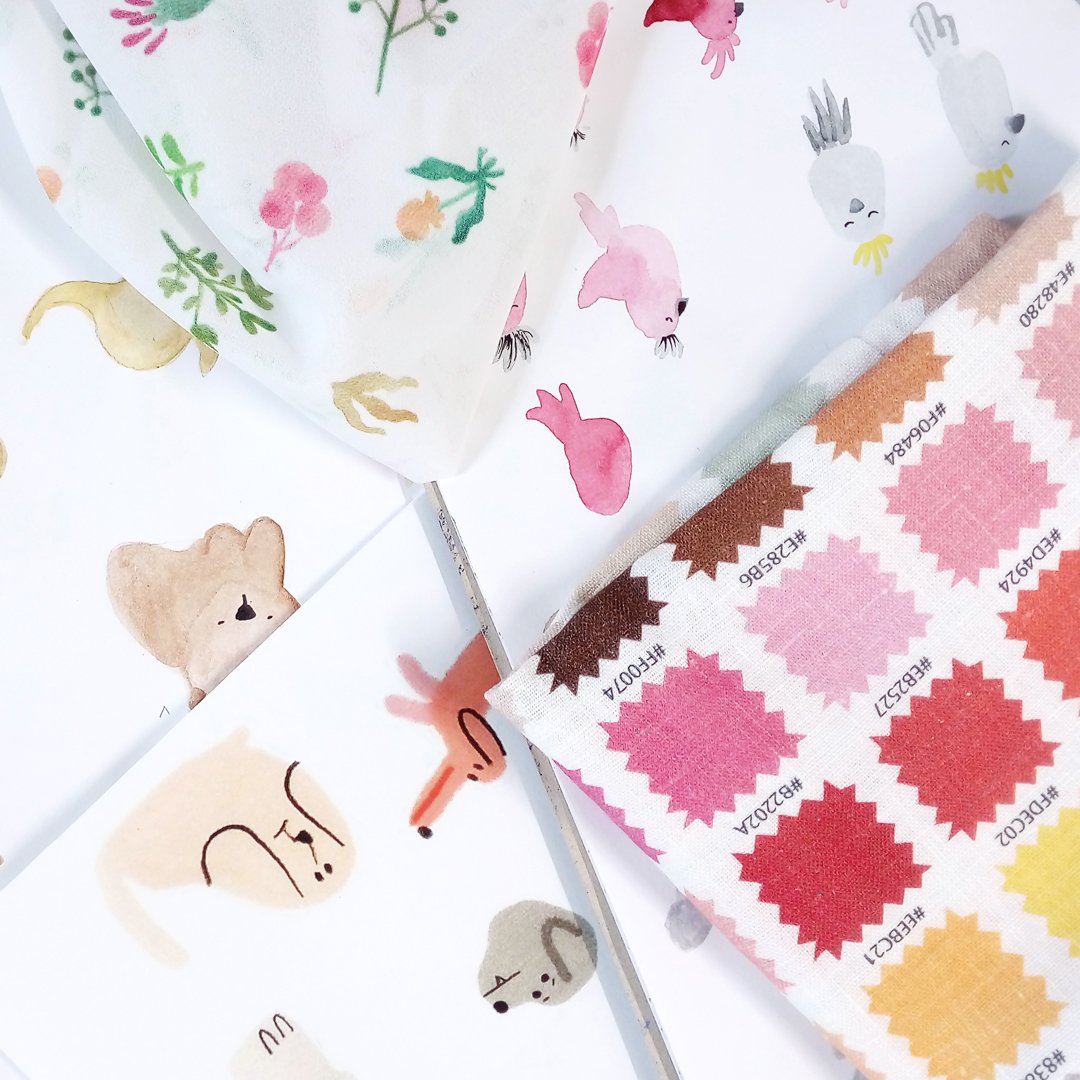
Your colour palette is bold and bright, do you ever see this changing or is it integral to your work?

My colour palette is somewhere between a Barbie Campervan and a bag of mixed lollies and I can’t see this changing too much across mediums. I connect with bright colours on a deep level as they give me energy.  If I ever use black as a major colour, I’m pretty sure will only be used as a background for multicoloured neon lights!

Do you work on Frida las Vegas full time? If so how did you make the transition and what experience have you found most valuable on the way? What advice can you give to fellow creatives thinking about making the leap?

Presently, I work freelance and split my time between clients, agencies and my own work under the FRIDA LAS VEGAS label. It’s all a juggle but I love constantly learning and evolving. There’s no roadmap through a career and I’m excited to see where the path twists and turns as new technologies and opportunities present themselves in the future. It’s important to stay open and flexible, regardless of your medium or industry.

Digital_Fabrics_Nailed_it_creative_interview_FridaLasVegas_8Do you think you have a specific demographic, if so who are they and what do you think they love most about your work?

Anyone who appreciates vintage-inspired styling, a keen sense of humour and a love of colour is probably going to connect with my work. I’ve been told by customers that wearing FRIDA LAS VEGAS makes them feel fabulous and confident, which is the ultimate double-whammy compliment in my books and also the reason I do what I do!

Sydney is a BIG source of inspiration for you (obviously, because she’s fabulous dahhh-ling). Can we expect to see any work inspired by any of our other glorious Aussie cities?

I adore Sydney and feel incredibly inspired to call Sydney home, but am equally pumped to explore the mythologies, signs, symbols, faces and places of other Australian locales – especially the Gold Coast (so gloriously tropical and tacky!) and Adelaide always holds a giant slice of my heart, as that’s where I grew up and spent my first 25 years on the planet.

Digital_Fabrics_Nailed_it_creative_interview_FridaLasVegas_10Who are your biggest inspirations and who tops your dream collaboration list?

I’d love to collaborate with Black & Gold or Home Brand, but this is definitely a pipe dream as they are both very elusive and exclusive! Fashion-wise, I love the work of Elio Fiorucci,  Jeremy Scott, Thierry Mugler, Gianni Versace and 80s Barbie, amongst others. Cinema is also a massive passion, especially costume and set design – which is truly creative across the spectrum and allows filmmakers and their teams to construct entire ‘worlds’, something I find really appealing.

Ethical manufacturing is clearly very important to you (yass!). As another local business supporting the ethical fashion movement we’d love to hear what your motivations with this cause are.

Ethical manufacturing makes perfect sense. From a production perspective, it’s more efficient to foster relationships with local suppliers whom you can jump on the phone and workshop ideas with in the same timezone rather than dealing with overseas companies by email. My artwork celebrates Australia in all its forms, so it’s only fair my clothing truly reflects that celebration in how it is produced and constructed. I’m a big believer in practicing what you preach!

Digital_Fabrics_Nailed_it_creative_interview_FridaLasVegas_7You recently entered the world of fashion with a product list growing fast! What led to you designing and creating these pieces and what might be next?

I’m always motivated to design what I personally want to wear and can’t find on the market. I’m not interested in trying to reach a mass audience, which gives me freedom to follow my instincts and design without boundaries. Presently I’m on the hunt for the perfect swimsuit that is fun AND flattering, with no luck from what’s on the market – so I’m working on making that happen!

What projects are on the horizon for Frida Las Vegas for 2019? Can you share any juicy plans or new product launches?

I’m working on an exhibition of neon and acrylic art that I’m MEGA pumped about, which is shaping up to be an extravaganza of extreme 80s glamour!

What is your advice for creatives at the beginning of their journey? Perhaps they are not sure on the product to create or the path to go down. If you could go back and give yourself advice, what would it be?

The best way to do is by doing. Skill up. Tool Up. Bar a few established professions, the concept of a career with a capital C is 100 per cent in flux right now – so stay ahead of the game with real, practical, hands-on skills that render you valuable and flexible for a changing world.

Find your own unique style. Don’t seek to emulate the work of one or two of your favourite artists. Instead, find inspiration from the random things that TRULY speak to you. Aim to ‘channel’ your influences rather than ‘copy’. Creating a style is all about how you mix up the mediums, styles, symbols and feelings of the things you love to create a product that is more cohesive than the sum of all its parts. Do this with your own personal flourishes.

Digital_Fabrics_Nailed_it_creative_interview_FridaLasVegas_1Social media now consumes so much of our time and mental space, how do you manage this area and do you have any tips on how to stay relevant and fresh?

Social platforms are purposefully addictive by the nature of their interface design. With minimal ‘exit points’, it’s important to maintain boundaries with yourself and not get lost ‘in the scroll’. I strive to share my work in a tone that is authentic, relatable and not-too-serious. If a photo or video takes more than a minute to write a caption, I don’t post it because it means I’m probably thinking about it too much. Ultimately it’s important to not take social too seriously or let it define you – we are all human, not numbers!

As a business owner these days you have to have the ability to wear lots of hats, what is your favourite and least favourite hat to wear and why?

Posting orders at the post office isn’t my favourite part of the process but I’m trying to find beauty in the banal and see it as a chance to leave the computer and stop ‘n’ smell the (Cadbury) Roses!

Digital_Fabrics_Nailed_it_creative_interview_FridaLasVegas_4Thanks Stav, what a fun and inspiring read!

You can follow along with what Stavroula from Freda Las Vegas is upto Website, Instagram,

Textile Collection Native Whimsy

The end of year break is almost upon us! It’s a time that feels undeniably Australian for many of us, with road trips to the beach, seafood on Christmas Day and the annoying song of a mosquito to keep you up at night. We let this drive our creativity for our latest textile range, and have produced a range of prints inspired by the uniqueness of Australian flora and fauna. We’re excited to introduce our last range of prints for 2018, our Native Whimsy Collection.

Digital Fabrics_custom fabric printing_native whimsy_sprinkled gumnut_3

Sprinkled Gumnut

Digital Fabrics_custom fabric printing_native whimsy_process_2

We feel like the magic of Christmas invited our inner child to take control of our approach to this range as were drawn to naïve, rounded forms, reminiscent of the images found in children’s books. This sweet illustrative style gave a soft finish to typically jagged plants and bushy animals.

Digital Fabrics_custom fabric printing_native whimsy_rustled feathers_3

Ruffled Feathers

Digital Fabrics_custom fabric printing_native whimsy_rustled feathers_4

Ruffled Feathers

The elements which feature in the Native Whimsy Designs were first drawn with pencil before being brought to life with watercolour paints. The inky textures of watercolours suited the sweet drawing style we has embraced. The hand-painted nature of the designs provides textural balance for otherwise simple motifs.

Digital Fabrics_custom fabric printing_native whimsy_sprinkled gumnut_4

Sprinkled Gumnut

Digital Fabrics_custom fabric printing_native whimsy_sprinkled gumnut_2

Sprinkled Gumnut

Native Whimsy pairs big bold colours, such as hot pink and emerald green with plenty of white negative space and earthy neutrals. The result is a set of prints which makes wearing colour, or introducing statement hues into the home, a breeze.

Digital Fabrics_custom fabric printing_native whimsy_eucalyptus_2

Eucalyptus

Digital Fabrics_custom fabric printing_native whimsy_eucalyptus_3

Eucalyptus

Digital Fabrics_custom fabric printing_native whimsy_1

The Native Whimsy Collection is a celebration of the wildlife that doesn’t make the regular ‘animal print’ or ‘floral print’ cut. We’d love to know what you think of these designs and how you think they would best be used so get in touch! Prints are available in our Fabric Shop now.

Simple Repeat Pattern Tutorial For Beginners

It would be safe to say that most of us are creative, we might love to doodle, paint, and create collages. Whilst these are all wonderful and inventive practices, what if you wanted to start developing these crafts into textile designs but didn’t have the digital design software skills to get your file prepared for fabric printing. What we would say is “learn it’!  Learn digital textile design in small bites. Start slowly, from converting your art into a digital format and getting to know basic Photoshop tools. Everything new can be overwhelming, but if you take one step at a time and slowly build your confidence, you will get the hang of it in no time. Below are some simple steps that will help you prepare your art for digital seamless repeat printing.

how to make a repeat patern_how to print fabric_rose fabric design_11

DIGITIZING – CONVERTING YOUR ART INTO A DIGITAL FORMAT

Start with an artwork painted onto a flat, one colour background that surrounds the artwork. For this tutorial we used a simple white plain background for the purpose of being easy, but any colour is fine.

To convert your artwork into a digital format you need to scan or photograph the artwork. Scanning at a resolution of 300 dpi is preferred. However, if you don’t have a scanner, photograph your artwork laid out flat, indoors with plenty of light (natural day light if best), holding the camera directly above the artwork, making sure there are no shadows of any kind interfering with the artwork.

CLEANING – DELETING UNWANTED ELEMENTS FROM AN ARTWORK

Open your artwork in Photoshop by selecting MAIN MENU > FILE > OPEN > CHOOSE YOUR ARTWORK FILE.

how to make a repeat patern_how to print fabric_rose fabric design

Using MARQUEE TOOL select the object or image that you want to repeat.

how to make a repeat patern_how to print fabric_rose fabric design_2

Now let’s bring the artwork or image that you want to repeat into a new document so you can start playing with it. While MARQUEE TOOL selection is active, (this will appear as ants running around the selected area) go to MAIN MENU > EDIT > COPY to copy selected area and FILE > NEW to open new document. NOTE: Photoshop is a very smart software. The area that you have selected will now determine the file size of the new document being opened. Click OK.

how to make a repeat patern_how to print fabric_rose fabric design_3

how to make a repeat patern_how to print fabric_rose fabric design_4

Whilst in the newly opened document select MAIN MENU > EDIT> PASTE to bring your selected artwork into the new document. It should paste by default in the middle of the new document fitting artwork well within the new document space. Nothing should be cropped out or hidden from view.

Now to clean your artwork. If your white background is slightly messy or the texture of the paper is visible, you will need to clean this up, since whatever you see on the screen will be printed onto fabric. To quickly ‘deep-etch’ or in other words ‘clean-up’, select the layer that you just brought in.  Then select the MAGIC WAND TOOL. Change the tolerance to low (we selected a tolerance measure of ‘4’ but you might need to adjust this number as it is based on your artwork). Tolerance is the rate at which the same or similar colours are selected when using the MAGIC WAND TOOL. The higher the tolerance the more of that colour will be found and therefore selected within the artwork.

Make sure the CONTIGUOUS box is ticked, this will ensure that only space around your artwork is being selected, and not that which is inside or a part of the drawn objects. Now once everything is prepared for selection click on the white background to select it. You can see on the image below that only the white background area is selected. While it is selected hit the DELETE button on your keyboard. This will remove the white selected background.

how to make a repeat patern_how to print fabric_rose fabric design_5


As you can see there is a little bit of another flower peaking through on the left side. Lets clean this up by using the simple ERASER TOOL. You can adjust the size of the eraser as needed at the top left of the screen. You can make the background layer invisible (this will then appear as little white and grey squares as seen below) to check that you have cleaned up all of the image. Simply zoom in to check the edges of your artwork and any potential unwanted marks left behind.

how to make a repeat patern_how to print fabric_rose fabric design_6

how to make a repeat patern_how to print fabric_rose fabric design_7

ADJUSTING COLOURS

The image is now clean, but colour wise the artwork is not strong enough. To brighten and intensify the colours of the image select MAIN MENU > IMAGE > AUTO CONTRAST.

how to make a repeat patern_how to print fabric_rose fabric design_8

You are almost done! To flatten your image select MAIN MENU > LAYER > FLATTEN IMAGE. All layers have now merged into one. Save the image as a JPG high quality file MAIN MENU > FILE > SAVE AS > SAVE.

Now you are done and ready to upload your file to print on to a fabric of your choice!

ROSE TUTORIAL IMAGE

REPEATING A PATTERN USING OUR FABRIC UPLOADER

Open the Fabric Uploader page.

Drag & Drop your image or click on the SELECT button to upload your ready to print artwork. Once your file is uploaded, you’ll be able to see it in the fabric preview window. You can scale your artwork up or down, simply by typing in and adjusting the artwork to the size you want.  Keep an eye on the DPI! This is the resolution and quality of your file. If your artwork is low resolution and is scaled up, the print result can be blurry.

Next step is to choose your Repeat type. This is the fun part! Play around with the different options and see how the variations impact your artwork in the preview window. Compare how the different options distribute your artwork across the width and the length of the fabric. Pick the one that suits your design idea best!

FULL DROP REPEAThow to make a repeat patern_how to print fabric_rose fabric design_10

MIRROR REPEAThow to make a repeat patern_how to print fabric_rose fabric design_9

Choose how many meters you wish to print simply by typing it into the quantity box and then select the fabric you want to print on. Remember that each fabric stock has a different width so be sure to check that the fabric you choose meets your needs.

how to make a repeat patern_how to print fabric_rose fabric design_11

P.S. This tutorial is designed to be very basic. If you are still struggling to prepare your artwork files, we recommend you attend one of the workshops on offer at our Digital Textile Design School to help you nail those Photoshop basics!

5 Ways To Wear Leggings

If you had to pick just 10 items for your wardrobe, leggings would definitely be part of it. From Spring to Winter, leggings are a wardrobe staple and you can style them many ways. Dress it up for a fancy occasion or wear them during your workout. And to make sure your leggings reflect your personality and style Digital Fabrics is organizing a workshop where you learn how to design your own print for your custom made leggings on December 3rd!

If you need inspiration on how to wear leggings, here are 5 stylish examples for you to rock!

5 Ways To Wear Leggings design you own leggings workshop 5 Ways To Wear Leggings design you own leggings workshop 5 Ways To Wear Leggings design you own leggings workshop 5 Ways To Wear Leggings design you own leggings workshop 5 Ways To Wear Leggings design you own leggings workshop

Photo credits: Polyvore.com

How to prepare a layout legging pattern for fabric printing in Photoshop

Garment making and production can be daunting and a complicated process especially placement or engineered printing. A lot of time and effort goes into research and understanding where to start. We have put together tutorials on how to design, work with and prepare legging pattern for digital placement fabric printing. For this tutorial  you need to be proficient in Illustrator or at least have basic knowlage. Our tutorial is based on industry standards. This technic can be applied to printing other products such as bikinis, t-shirts, singlets , dresses etc.

How to prepare a layout/mark up legging pattern for fabric printing in Photoshop

Once you’ve completed the steps in the tutorial ‘How to use legging pattern in Photoshop’ You may want to print more than 1 design or more than 1 size, the most economic way to do this is to create a mark up/placement layout to have printed.

The following are instructions on how to set up in Photoshop, but could easily be done in Illustrator.

Start off by renaming the pattern layers to insure that you always have a pair of leggings.

layer_photoshop_markup_design_fabric_legging_printing

If you are only wanting the same size with different designs you can just Duplicate the leg layers. If you’d like to bring in different sizes you will need to repeat the steps in ‘How to use legging pattern in Photoshop’

In this tutorial we will be using the same size 10 but printing in new designs.

On the same artboard move files to the left hand side. you will notice that you can only comfortable fit 1 pair within the 147cm width with the current orientation; however there is a lot of wastage as illustrator below.

legging_layout_printing_fabric_design

Like a Jigsaw puzzle you will now need to start moving the patterns, you will need to make sure that you keep in mind that your grain line is parallel to the selvage. To do this, select the leg you’d like to rotate (select both layers) press Ctrl+t to open up the transform tool and while holding down shift rotate the image 360′ and make sure to move the pattern piece as close as possible to other leg (zoom in to make sure it is not overlapping)

tutorial_layout_markup_printing

markup_fashion_layout_tutorial_leggings_bold_rose

You can now start bringing in the other size 10 designs and play around with the layout. It’s best that you make the art board slightly longer than needed and once you’ve set up all the designs crop the excess.

Make sure you zoom in and double check that you haven’t overlapped any areas, when you are happy with the layout save as a JPG, TIFF or PDF.

layout_legging_tutorial_polish_abstract_orchid_black_white_bold_rose_floral_sports_luxe

You’re now on your way to have custom printed fabric which you will be able to make into comfy leggings.

design-your-own-leggings-digital-fabrics-class create-your-own-activewear-design-leggings-digital-fabrics-classes

Save

Save

Design your own leggings – How to prepare legging pattern for fabric printing in Photoshop

Garment making and production can be daunting and a complicated process especially placement or engineered printing. A lot of time and effort goes into research and understanding where to start. We have put together tutorials on how to design, work with and prepare legging pattern for digital placement fabric printing. For this tutorial  you need to be proficient in Photoshop and Illustrator or at least have basic knowlage. Our tutorial is based on industry standards. This technic can be applied to printing other products such as bikinis, t-shirts, singlets , dresses etc.

How to prepare legging pattern for fabric printing in Photoshop

Open the PDF file in Illustrator. You can purchase our digital leggings pattern on our website or use your own.

Copy and paste the size you would like to use within the same file, we have selected size 10.

Photoshop_design_pattern_fabric_printing_leggings

Delete all details and notches within the pattern piece and select the pattern shape and fill in black.

fashion_legging_design_digitalfabrics_printing

while legging is selected copy and take note on the sizing.

selection_legging_size_prints_fabric_lycra

Open Photoshop and select a new artboard, keep the pixels and resolution the same, just make sure you’ve selected RGB color mode. Click OK and Paste pattern piece as a smart object, click enter to place.

Double check that the sizing is correct by selecting Image>image size, in this case it is only a few points off which will be fine.

Design_tutorial_fashion_legging_black

Next you’ll need to increase your artboard size to fit the other leg, change the width of your artboard to the width of the fabric you’d like to use and select the anchor points to extend from corner.

tutorial_design_fabric_digitalfabrics_legging

Copy Layer and while selected transform (Ctrl+t), while still selected right click on top of the layer and select Flip Horizontally, you know have a pair.

fabric_printing_tutorial_design

photoshop_tutorial_legging_fabric

With both layers selected you will need to select transform again (ctrl+t) and while select cover over to rotate, when rotating make sure you hold down shift to make sure it rotates correctly.

Right_photoshop_design_legging_tutorial

Copy and paste the design you would like on your leggings and place layer on top of the one of the pattern legs.

pattern_legging_fashion_design_printing

Right click on the design layer and in the drop down menu select create clipping mask.

layers_photoshop_design_fabric

clipping_mask_design_legging_luxe_sports

Repeat for other leg

Group all layers and centre.

Your file is now ready to print!

leggings_sportsluxe_fintess_sport_fit_fashion

Soon you’ll have your printed fabric which you’ll be able to whip up into these comfy leggings

legging_sports_luxe_design_fasion_rose_print


Save

Design Your Own Leggings – How to prepare legging pattern for fabric printing in Illustrator

Garment making and production can be daunting and a complicated process especially placement or engineered printing. A lot of time and effort goes into research and understanding where to start. We have put together tutorials on how to design, work with and prepare legging pattern for digital placement fabric printing. For this tutorial  you need to be proficient in Illustrator or at least have basic knowlage. Our tutorial is based on industry standards. This technic can be applied to printing other products such as bikinis, t-shirts, singlets , dresses etc.

How to prepare legging pattern for digital fabric printing in Illustrator

Open the PDF file in Illustrator. You can purchase our digital leggings pattern on our website or use your own.

The top left square will help you determine if the scaling of your patterns are correct, this square should always be 10x10cm.

Select the size you’d like to have printed (we have selected size 10) and while holding shift also select the scale square. Copy selection

leggings_design_pattern_tutorial_printing_digitalfabrics_1

You’ll now have to create a new document. Make sure to set up to the width of the fabric (we’ve chosen to proceed with matte Lycra which as a printable width of 147cm)  x the length of the print, this size legging will not exceed the 1 metre.

Design_tutorial_digitalfabrics_printing_2

Paste the pattern piece and square scale into new artboard. The left and right hand side is where the selvage of your fabric will be, make sure you always keep the grain line (line within Patten) parallel to the selvage.

Tutorial_fashion_legging_fabric_printing_3

You can now double check the square scale which should remain 10x10cm and delete or move off the artboard and position the legging where you’d like.

fabric_printing_pattern_legging_fashion_4

Rotate your leggings so that they are the right way up, make sure that the centre line (grain line) is always parallel to the selvage (left and right sides of your artboard). Select the pattern including all notches details and grain line and rotate while holding down the shift key to ensure it rotated exactly how you need it.

right_legging_pattern_design_tutorial_diy

To make a pair,  copy this leg pattern by selecting the shape of the pattern and once selected go to Object>transform>reflect and select vertical Axis and click copy.

layout_tutorial_design_fabric_printing_5

You now have a pair.

Leggings_ pattern_design_fabric_printing

You can now delete the grain line and text, but keep all notches, you will need them for making. For this tutorial we’ve left the text from one of the legs to print, if you are thinking about printing several sizes it will very helpful to have this information next to each size to avoid confusion. Notches are the little nicks which are around the patterns which will help when constructing the leggings.

Copy all notches and paste into new layer for later use.  Make sure you select all notches and if for any reason you are moving the legging pattern make sure you select the notches layer so that they move together.

Notches_design_tutorial_leggings_patterns

layers_legging_pattern_digitalfabrics

Open up the design you would like to use, make sure the design has been setup slightly larger than the legging pattern size roughly 110cm long x 65cm wide and copy and paste into the artboard.

Select design >object>arrange>send to back.

arrange_layout_setup_legging_print_fabric

With both the artwork/design and legging pattern selected Object>clipping mask>make. Now you can only see your design in a shape of a leg pattern.

clipping mask_ilustrator_tutorial_diy

Repeat for other leg.

Select all notches in other layer and change the colour so they become visible.

notches_fabricprinting_design_print_leggings

Group all layers including leggings and notches and centre, your file is now ready to submit to have printed.

group_fabric_printing_legging_tutorial


Save

Save

Save

Save

Save

Designing Fabric: How To Make A Repeat Pattern – Full Drop Repeat in Illustrator

Get your math skills ready for this fabric repeat pattern tutorial in Illustrator. We would recommend to start with repeating simple objects first to understand the concept of repeating pattern in Illustrator, once it is understood nothing will stop you to create!

Full Drop Repeat in Illustrator

Either open up an existing illustrator file or begin by developing your vector image that you desire to repeat. We have started with a basic spot, varying the size and colour to add variety and this will form the base of the repeat.

full drop 1

Set up your art board to your desired repeat size. This depends on your end product, but to start off with, work with squares to help with calculations. We have set up my repeat to be 32 x 32 cm. For interested sake, this is a standard rotary repeat set up. Place your initial artwork to the top left corner of the art board, letting it hang over the edge.

full drop 2

Select all objects (sometimes helpful to group them so you don’t miss any when duplicating). Double click on the black selection tool in the tools panel and a dialogue box will appear.

full drop 3

This is how you can move objects an exact amount i.e. the repeat size and know that all objects within that repeat will align perfectly.

First duplicate the selected objects the repeat size down or vertically. This repeat is 32 cm, so they are moved 32 cm vertically.

Make sure the horizontal value is 0. Click COPY.

full drop 4

full drop 5

Now repeat horizontally by selecting both groups of objects along the left side. When in the move dialogue box make sure the horizontal value is the repeat size and the vertical value is 0. Click COPY.

full drop 6

full drop 7

Now is the time to fill in the blank space in the middle with additional objects.

Tip: Lock the three extra sides of the repeat or put them on a separate locked layer so they can be easily deleted in a following step. This may require some more advance knowledge of illustrator, but don’t let this deter you if you are new, it could be helpful in mastering the program! The level of difficulty here will greatly depend on the style and type of original artwork you are using and will call into play several design elements and principles such as space, balance and unity. Watch out for anything that forms a definite line or track mark through your design. You may need to shift or adjust parts of your original artwork to make the repeat work, in which case is can be a good idea to work in layers (with a copy of the original locked) in case you want to jump back to the beginning.

Work towards filling in the edges, duplicating them down/across to the repeat edges, till all you have is the middle to fill.

full drop 8

Continue until you are happy with the flow and feel of the design.

full drop 9

Now delete the three extra sides that were locked or moved to another layer. Then repeat the duplicating sequence with all the added areas/dots of the design. This will help you check anything that may have doubled up or just doesn’t look right in the repeat.

full drop 10

full drop 11

full drop 12

full drop 13

full drop 14

When you are satisfied with your repeat tile, you can set it up for digital fabric printing. Position two repeat tiles (vertically) so they hang over the left side of the art board. Increase the artwork WIDTH to the width of the fabric (in this case 147cm), keep the height of the art board as the repeat size.

full drop 15

Duplicate the selected objects across the width of the art board so it is covered completely. Tip: Once you have used the move tool to move the exact repeat size and clicked copy, ctrl D to duplicate the exact last action.

full drop 16

Save As a PDF. Even though there are objects hanging off the edge of the art board, because they have been moved the exact repeat size, they will all meet up when printed seamlessly. This is now your Full Width Repeat Tile which repeats top and bottom you can use it for digital custom fabric printing.

full drop 17

Save

Save

Save

Save

Save

Design Your Own Leggings Workshop – August 20 2016

design your own legging workshop digital fabrics
Imagine designing your own leggings, learning the process and receiving your custom made leggings with your own design?

Make this fashion dream come true & click HERE to participate in the Digital Fabrics Design Your Leggings workshop August 20th!

Get Leggings Inspiration with our Pinterest board

In this Design Your Own Leggings workshop you will transform into a fashion print designer where you will start from the beginning and develop your own leggings design with photographic print. You will be photographing floral inspired collage/layout and transferring your photography to a pair of leggings!After the workshop you will receive printed and made pair of leggings in your size with your own design!

Full day workshop style class will provide you with knowledge on digital textile design for placement printing of leggings.

Click here to participate and learn what we will teach you at the Digital Fabrics Design Your Own Leggings workshop.