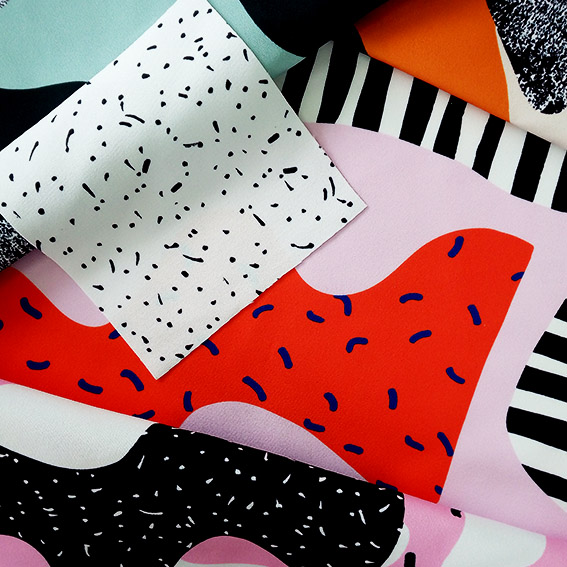
Tag Archives: diy with digital fabric

Textile Collection Babushka

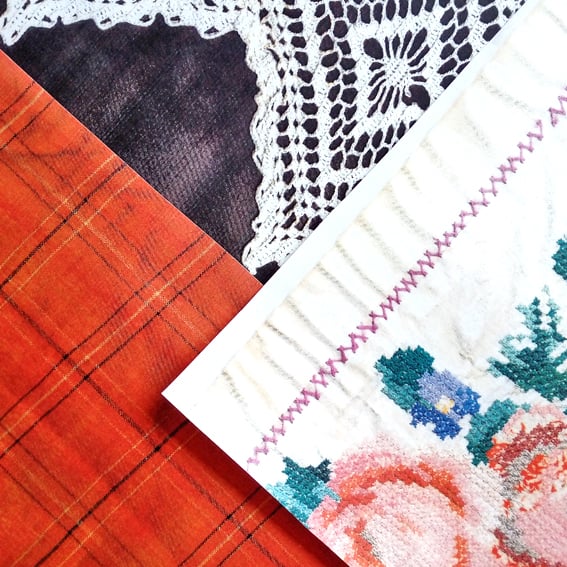
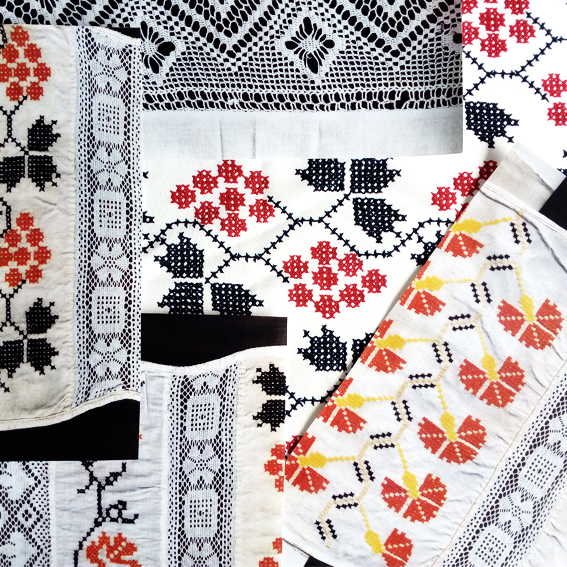
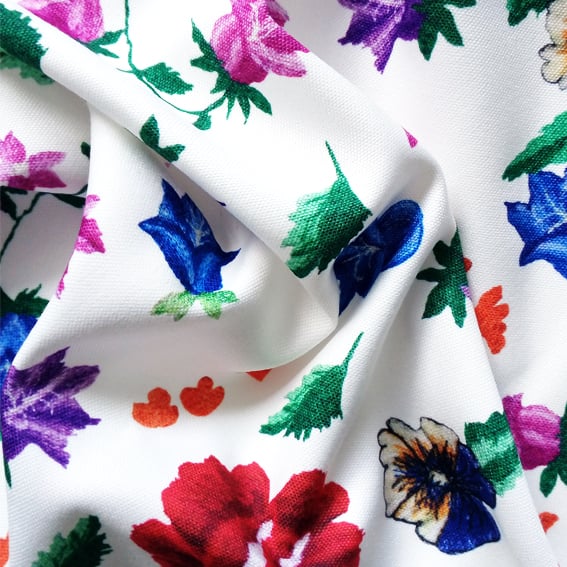
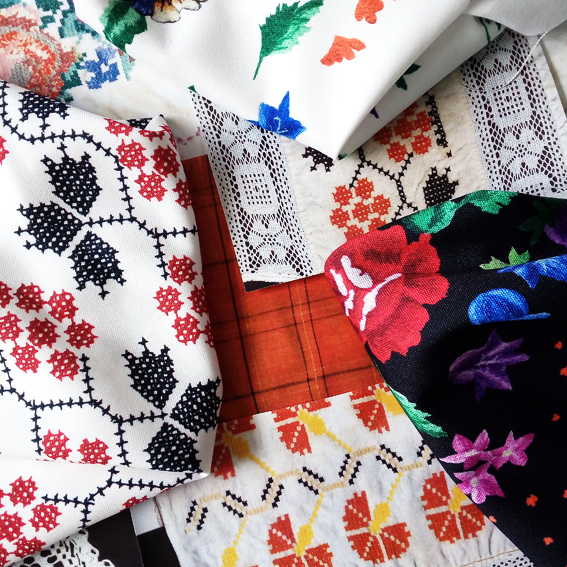
Exciting news from us at Digital Fabrics, we have launched a new textile collection! This time we dove head first into a private collection of vintage European textiles and found just the inspiration we needed! The Boho-Chic trend is one that pops up time and time again, and it’s for good reason. We just can’t get enough of bohemian patchwork, colours and textures, and have designed a range of prints heavily inspired by collected embroidery treasures.

Bohemian Fabric_Folklore Fabric_Custom Fabric Printing_Digital Fabrics_1Bohemian Fabric_Folklore Fabric_Custom Fabric Printing_Digital Fabrics_3

Whilst the boho design aesthetic is undoubtedly fabulous, the statement style can be a little overwhelming for some. We wanted to create timeless re-imaginings that pared-back the heavily embellished designs typical of bohemian textiles, resulting in versatile and accessible designs.

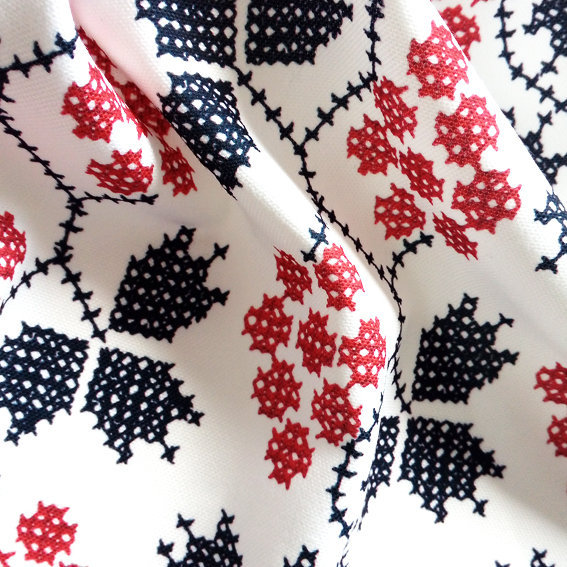
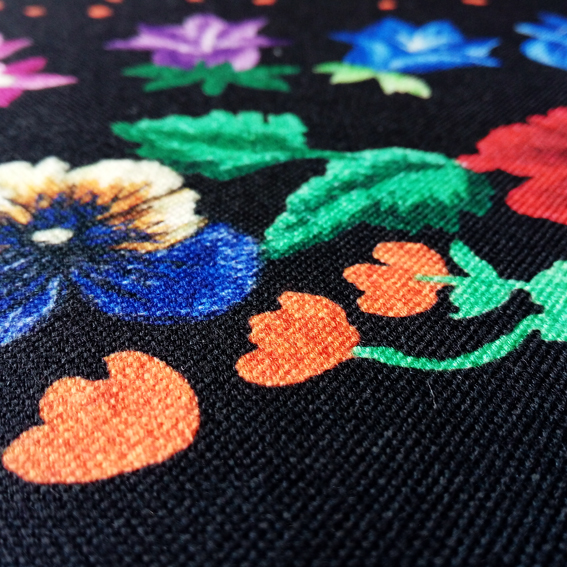
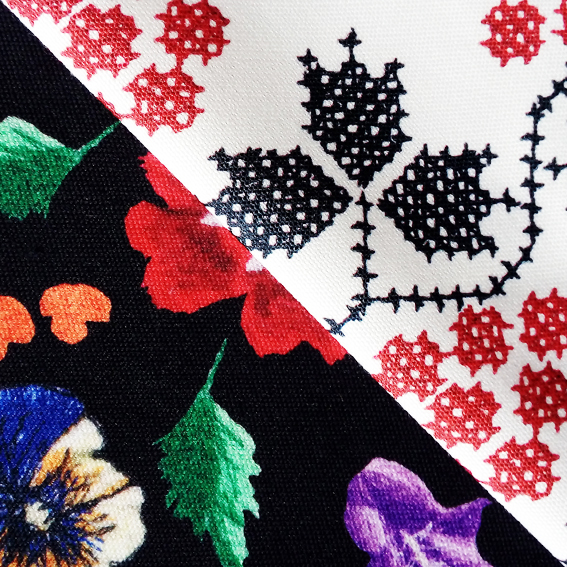
Bohemian Fabric_Folklore Fabric_Custom Fabric Printing_Digital Fabrics_Cherry Stitch_2Bohemian Fabric_Folklore Fabric_Custom Fabric Printing_Digital Fabrics_Boho Rose_2Bohemian Fabric_Folklore Fabric_Custom Fabric Printing_Digital Fabrics_4Elements of vintage textiles were scanned, redrawn and redesigned to create the Babushka collection. Finding the balance between streamlined design and textured details was key in maintaining the essence of folk embroidered pieces whilst still giving them a more contemporary feel, and negative space became as important a feature to focus on as the motifs and designs themselves.

Bohemian Fabric_Folklore Fabric_Custom Fabric Printing_Digital Fabrics_6

Bohemian Fabric_Folklore Fabric_Custom Fabric Printing_Digital Fabrics_7The collection features both flirty, feminine motifs and minimal, geometric design elements, whilst using bold contrasting colours to maintain a crisp aesthetic throughout the range. The range revamps vintage embroidered textiles, resulting in elegant, graphic designs that can be used for so much more than the blouses and table-wear that we so often associate with the bohemian style. We cannot wait to see what you create with these prints!

The Babushka Collection is available for purchase in our Design Library!

Simple Repeat Pattern Tutorial For Beginners

It would be safe to say that most of us are creative, we might love to doodle, paint, and create collages. Whilst these are all wonderful and inventive practices, what if you wanted to start developing these crafts into textile designs but didn’t have the digital design software skills to get your file prepared for fabric printing. What we would say is “learn it’!  Learn digital textile design in small bites. Start slowly, from converting your art into a digital format and getting to know basic Photoshop tools. Everything new can be overwhelming, but if you take one step at a time and slowly build your confidence, you will get the hang of it in no time. Below are some simple steps that will help you prepare your art for digital seamless repeat printing.

how to make a repeat patern_how to print fabric_rose fabric design_11

DIGITIZING – CONVERTING YOUR ART INTO A DIGITAL FORMAT

Start with an artwork painted onto a flat, one colour background that surrounds the artwork. For this tutorial we used a simple white plain background for the purpose of being easy, but any colour is fine.

To convert your artwork into a digital format you need to scan or photograph the artwork. Scanning at a resolution of 300 dpi is preferred. However, if you don’t have a scanner, photograph your artwork laid out flat, indoors with plenty of light (natural day light if best), holding the camera directly above the artwork, making sure there are no shadows of any kind interfering with the artwork.

CLEANING – DELETING UNWANTED ELEMENTS FROM AN ARTWORK

Open your artwork in Photoshop by selecting MAIN MENU > FILE > OPEN > CHOOSE YOUR ARTWORK FILE.
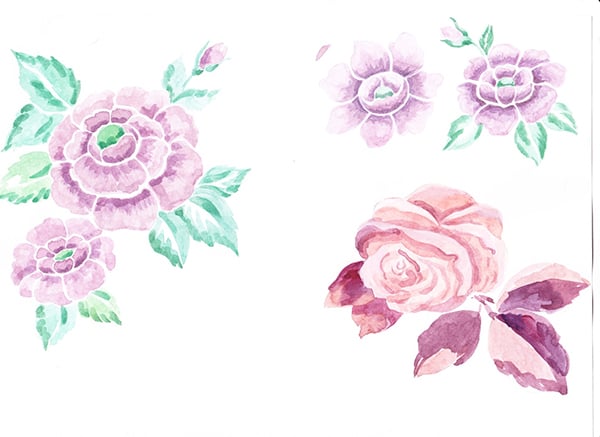
how to make a repeat patern_how to print fabric_rose fabric design

Using MARQUEE TOOL select the object or image that you want to repeat.
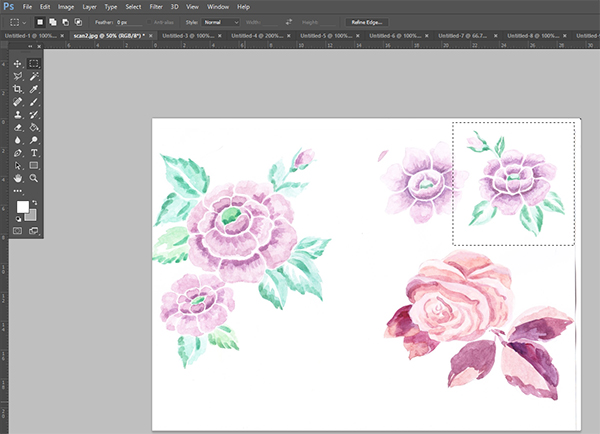
how to make a repeat patern_how to print fabric_rose fabric design_2

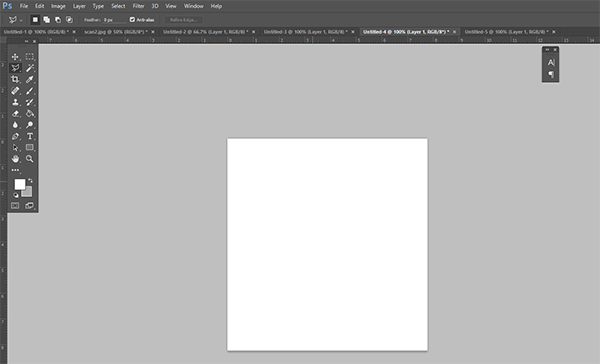
Now let’s bring the artwork or image that you want to repeat into a new document so you can start playing with it. While MARQUEE TOOL selection is active, (this will appear as ants running around the selected area) go to MAIN MENU > EDIT > COPY to copy selected area and FILE > NEW to open new document. NOTE: Photoshop is a very smart software. The area that you have selected will now determine the file size of the new document being opened. Click OK.
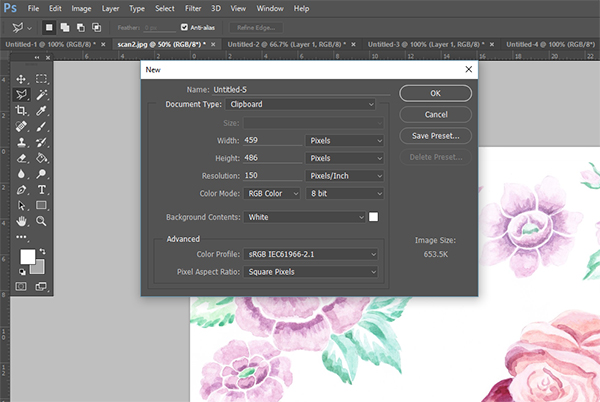
how to make a repeat patern_how to print fabric_rose fabric design_3

how to make a repeat patern_how to print fabric_rose fabric design_4

Whilst in the newly opened document select MAIN MENU > EDIT> PASTE to bring your selected artwork into the new document. It should paste by default in the middle of the new document fitting artwork well within the new document space. Nothing should be cropped out or hidden from view.

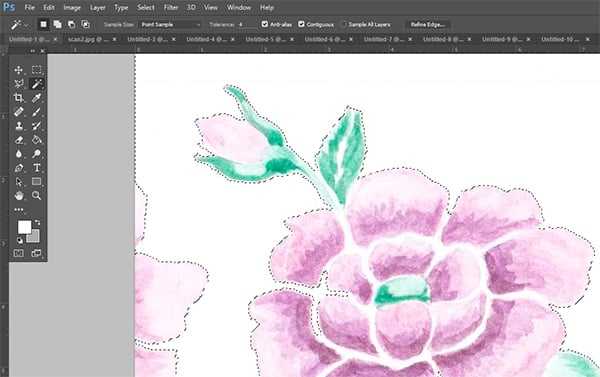
Now to clean your artwork. If your white background is slightly messy or the texture of the paper is visible, you will need to clean this up, since whatever you see on the screen will be printed onto fabric. To quickly ‘deep-etch’ or in other words ‘clean-up’, select the layer that you just brought in.  Then select the MAGIC WAND TOOL. Change the tolerance to low (we selected a tolerance measure of ‘4’ but you might need to adjust this number as it is based on your artwork). Tolerance is the rate at which the same or similar colours are selected when using the MAGIC WAND TOOL. The higher the tolerance the more of that colour will be found and therefore selected within the artwork.

Make sure the CONTIGUOUS box is ticked, this will ensure that only space around your artwork is being selected, and not that which is inside or a part of the drawn objects. Now once everything is prepared for selection click on the white background to select it. You can see on the image below that only the white background area is selected. While it is selected hit the DELETE button on your keyboard. This will remove the white selected background.
how to make a repeat patern_how to print fabric_rose fabric design_5


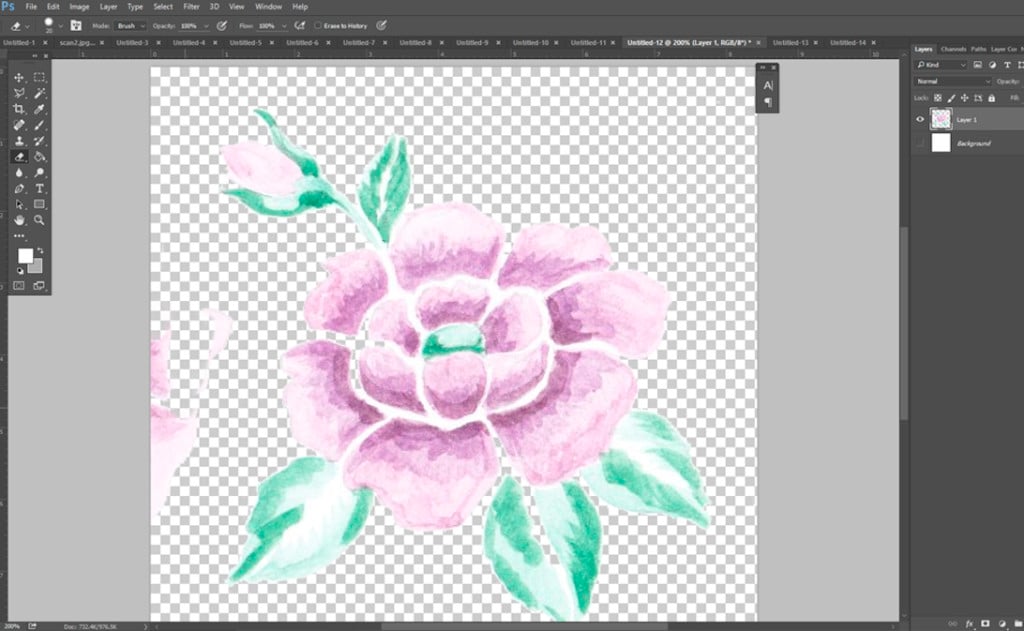
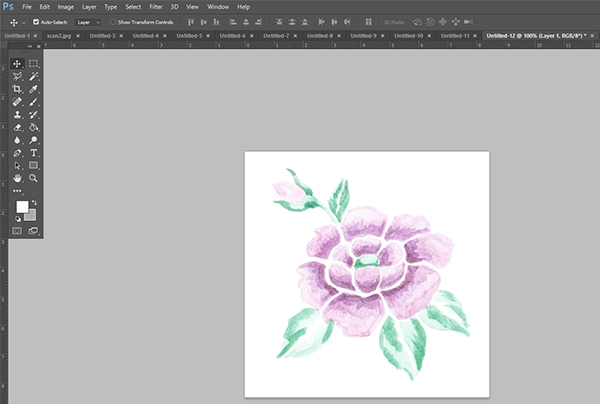
As you can see there is a little bit of another flower peaking through on the left side. Lets clean this up by using the simple ERASER TOOL. You can adjust the size of the eraser as needed at the top left of the screen. You can make the background layer invisible (this will then appear as little white and grey squares as seen below) to check that you have cleaned up all of the image. Simply zoom in to check the edges of your artwork and any potential unwanted marks left behind.
how to make a repeat patern_how to print fabric_rose fabric design_6

how to make a repeat patern_how to print fabric_rose fabric design_7

ADJUSTING COLOURS

The image is now clean, but colour wise the artwork is not strong enough. To brighten and intensify the colours of the image select MAIN MENU > IMAGE > AUTO CONTRAST.
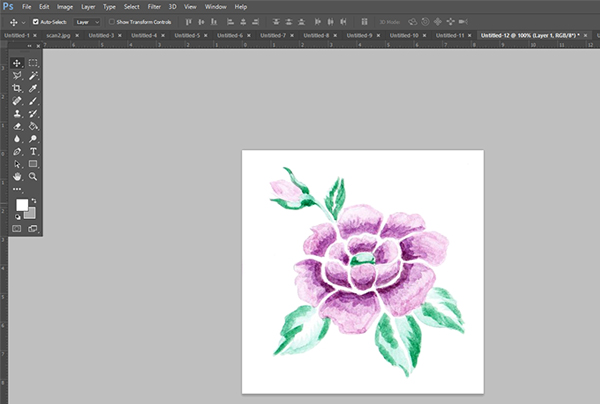
how to make a repeat patern_how to print fabric_rose fabric design_8

You are almost done! To flatten your image select MAIN MENU > LAYER > FLATTEN IMAGE. All layers have now merged into one. Save the image as a JPG high quality file MAIN MENU > FILE > SAVE AS > SAVE.

Now you are done and ready to upload your file to print on to a fabric of your choice!
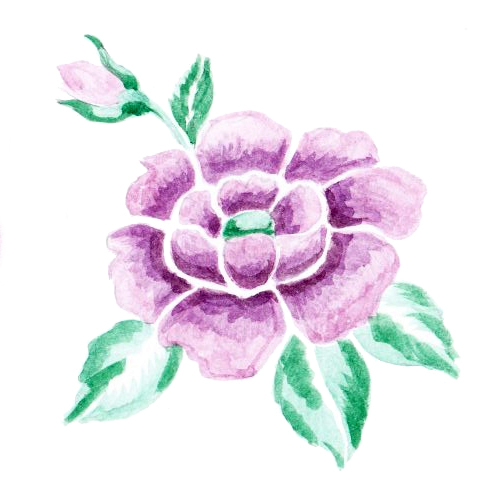
ROSE TUTORIAL IMAGE

REPEATING A PATTERN USING OUR FABRIC UPLOADER

Open the Fabric Uploader page.

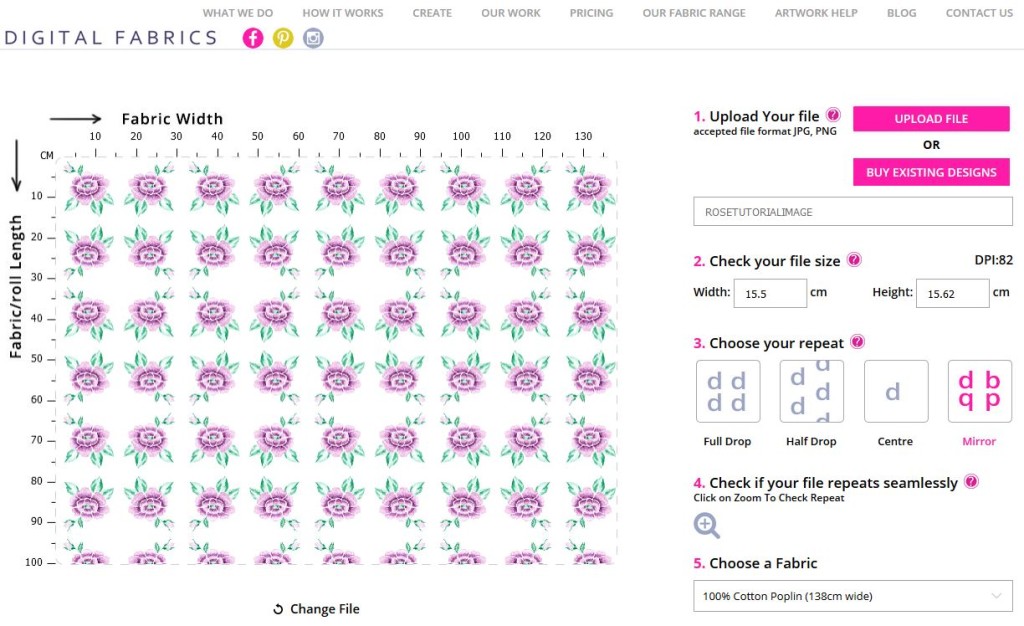
Drag & Drop your image or click on the SELECT button to upload your ready to print artwork. Once your file is uploaded, you’ll be able to see it in the fabric preview window. You can scale your artwork up or down, simply by typing in and adjusting the artwork to the size you want.  Keep an eye on the DPI! This is the resolution and quality of your file. If your artwork is low resolution and is scaled up, the print result can be blurry.

Next step is to choose your Repeat type. This is the fun part! Play around with the different options and see how the variations impact your artwork in the preview window. Compare how the different options distribute your artwork across the width and the length of the fabric. Pick the one that suits your design idea best!

FULL DROP REPEAThow to make a repeat patern_how to print fabric_rose fabric design_10
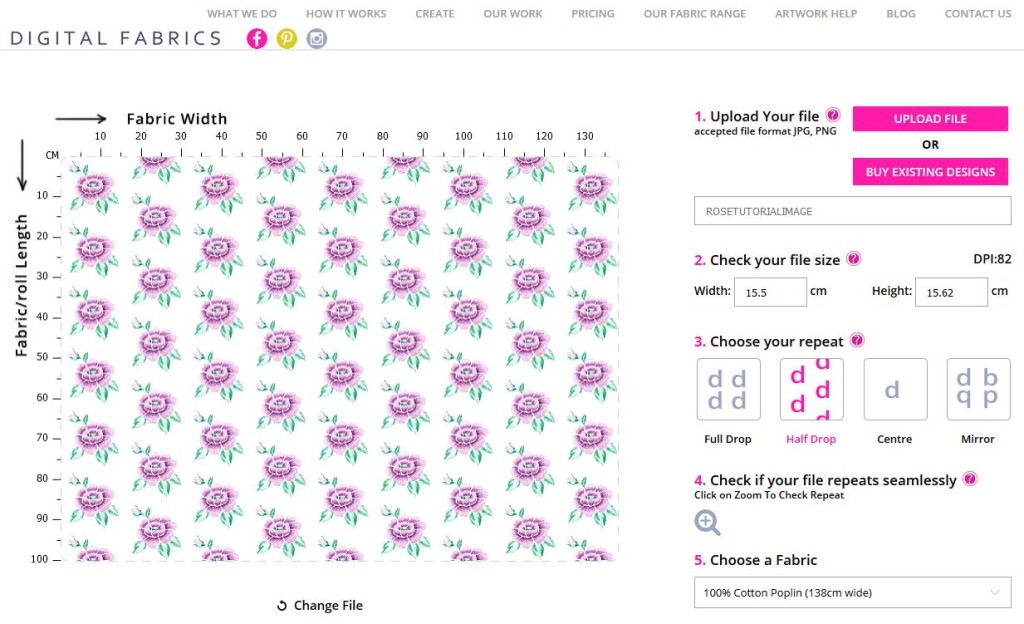
MIRROR REPEAThow to make a repeat patern_how to print fabric_rose fabric design_9

Choose how many meters you wish to print simply by typing it into the quantity box and then select the fabric you want to print on. Remember that each fabric stock has a different width so be sure to check that the fabric you choose meets your needs.

how to make a repeat patern_how to print fabric_rose fabric design_11

P.S. This tutorial is designed to be very basic. If you are still struggling to prepare your artwork files, we recommend you attend one of the workshops on offer at our Digital Textile Design School to help you nail those Photoshop basics!
Check your artwork repeats seamlessly with Offset Filter in Photoshop.

  • Open your file in Photoshop. Main menu > File > Open
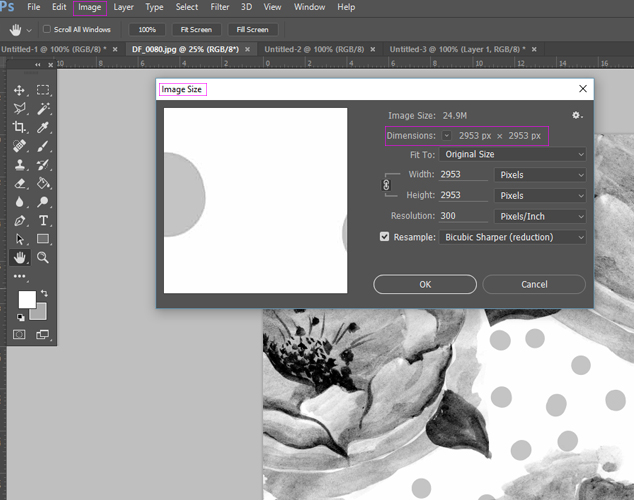
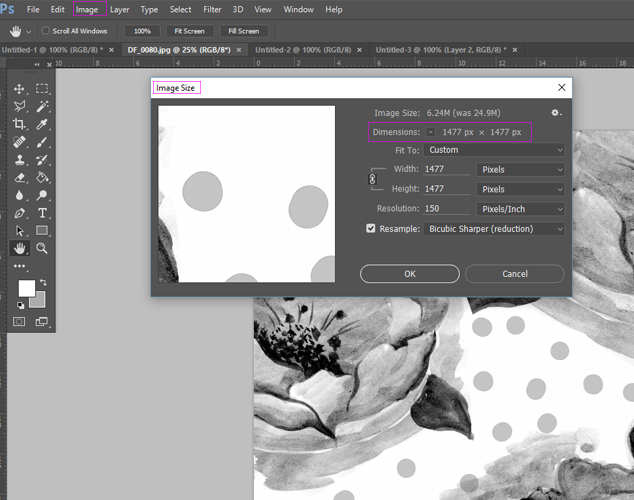
  • Check size of your image. Main menu > Image > Image size. Take note of the pixel dimension (PX) at the full resolution size.

How to design fabric_Digital Fabrics _textile design

  • Change the resolution to half of its value and take note of the changed pixel dimension. Keep these numbers handy as you will need them to offset your artwork. Don’t click OK at this stage, as you don’t want to change the resolution size, you only need the pixel information.

How to design fabric_Digital Fabrics _textile design tutorial

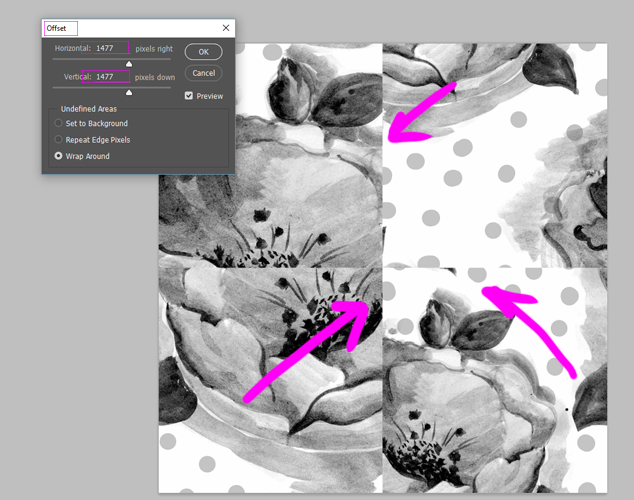
  • Once you have pixel dimensions noted you can offset and check your file for seamless repeat. Go to Main menu > Filter > Other > Offset. In the open box enter that half pixel values that you have noted down. Select option Wrap Around and tick the Preview option, so you can preview what is happening to your artwork. The side edges of the artwork will now be visible in the middle and the middle will become the sides. In other words the artworks sides got folded into the middle.

How to design fabric_Digital Fabrics _textile design_surface pattern

  • If your artwork in not in seamless repeat, you will see it in the middle of your artwork, through vertically and horizontally missed joins and miss matched lines. In some artwork this will not be obvious and you will need to zoom right in to the joining pixels to spot the issue.

How to design fabric_Digital Fabrics _textile design_surface pattern_pattern bank

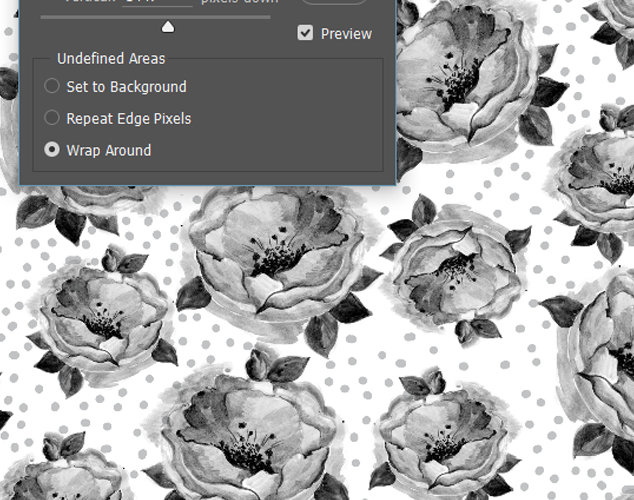
  • When your artwork repeats seamlessly, there is no miss matched lines and elements of the artwork flows seamlessly.

________________________________________

If you are at the beginning of your textile and surface design journey you might want to consider our workshops and classes on offer or continue learning more online through our available tutorials.

Textile Collection Memphis Summer

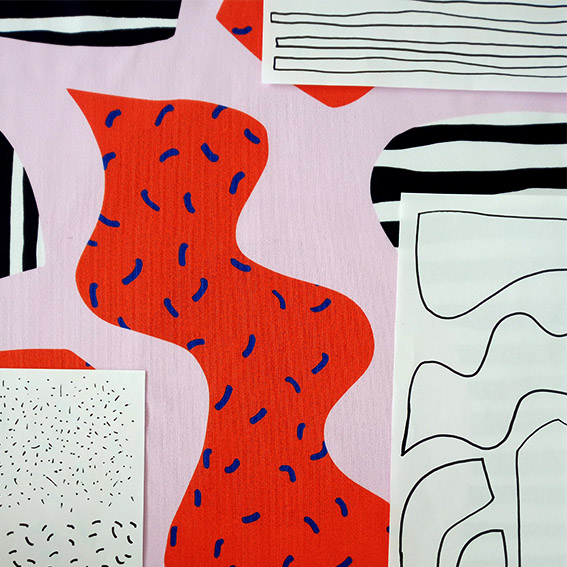
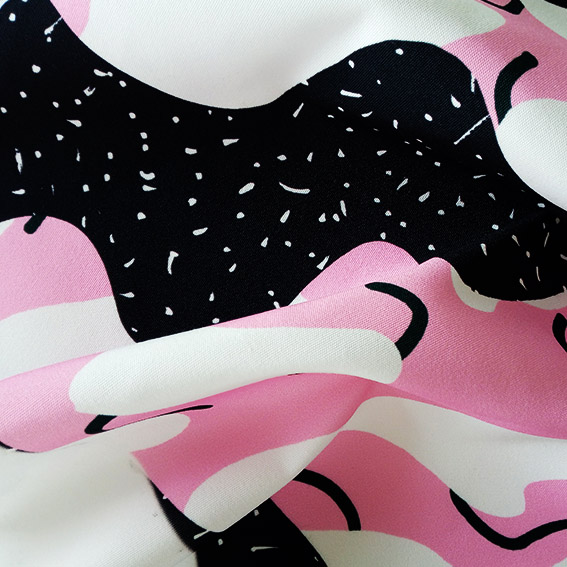
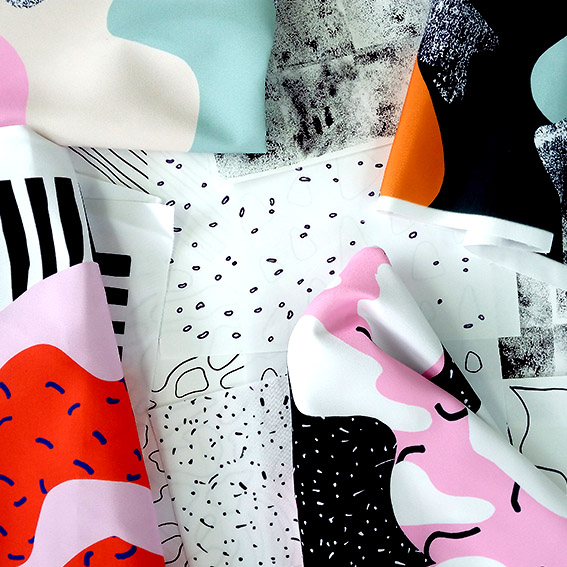
Here at Digital Fabrics we have a very exciting textile collection to launch just before the end of the year, with a really fun range of fabric prints to get you through Summer. The designs are inspired by dynamic and quirky Memphis design surface patterns and uses contrasting colours, shapes and textures to create playful designs that can be used together or on their own.  

BoldTextileCollection_DigitalFabrics_BrightFabricDesign_1

BoldTextileCollection_DigitalFabrics_BrightFabricDesign_2

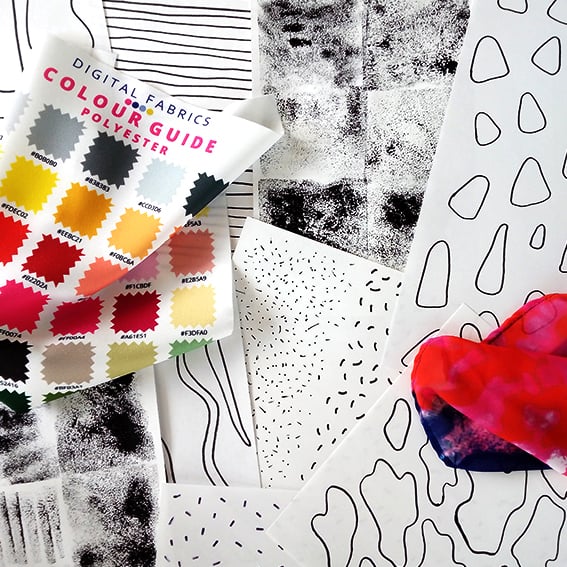
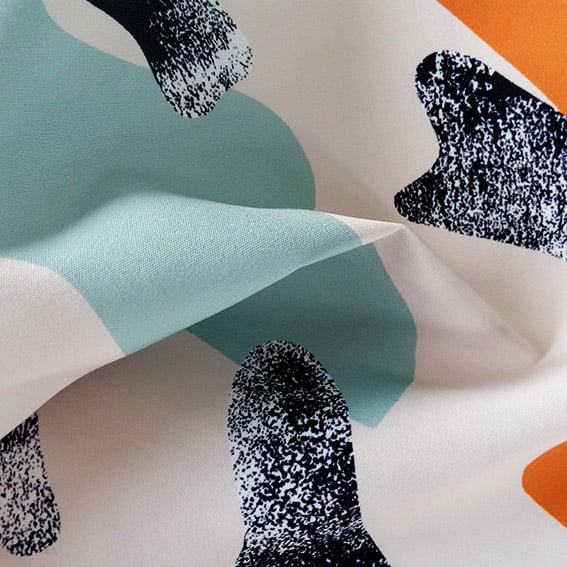
All of the print designs started out on paper! By using different mark making processes with a variety of materials such as markers, paints, pens and sponges, graphic shapes and surfaces began to emerge. These were then dissected and collaged together to create interesting designs with lots of energy.

BoldTextileCollection_DigitalFabrics_BrightFabricDesign_5

BoldTextileCollection_DigitalFabrics_BrightFabricDesign_7

Colour is such a key component of this collection and it was really important to get them right. We combined very on trend pastel shades, with timeless neutrals, and whites to contrast with bold blacks and splashes of electric warm colours. 

BoldTextileCollection_DigitalFabrics_BrightFabricDesign_9

BoldTextileCollection_DigitalFabrics_BrightFabricDesign_8

The Memphis Summer Collection is perfect to get those creative juices flowing over the next few months! Whether it’s making something in time for an event over the festive season or it’s because you’ve finally some free time to work on a DIY project, Digital Fabrics can help out with your fabric printing needsWe see these designs working for both interiors and fashion, with statement cushions and fabulous Summer dresses being the first things that come to mind! 

The Memphis Summer Collection is available for purchase in our Design Library!


Textile Collection Artful Simplicity

We’re very excited here at Digital Fabrics to be dropping another range of yummy prints! This time we’re inspired by bold earthy colours and organic forms, bringing to you a collection of hand painted, textural abstract designs.

DigitalFabrics_CustomPrinting_Moodboard_Inspiration_ArtfulSimplicity

HandpaintedGeometrics_DigitalFabrics_FabricDesigns_3

Our Sunset Gum design is a small scale abstract print with bold contrasting colours. Who doesn’t love a splash of red?

BlushPebble_CustomFabricPrinting_DigitalFabrics_HandpaintedGeometricDesigns

Our Blush Pebble design is a medium scale graphic print. We just can’t get enough of pink!

HandpaintedGeometrics_DigitalFabrics_FabricDesigns_5


OchreScatter_CustomFabricPrinting_DigitalFabrics_HandpaintedGeometricDesigns

Our Ochre Scatter design is a small scale print with a fabulous burnt vermilion colourway, able to liven up any space or outfit!

HandpaintedGeometrics_DigitalFabrics_FabricDesigns_6

Our Clay design is a medium scale print with bold geometric shapes and a deep warm colour palette.

The Artful Simplicity collection is available for purchase in our Design Library. We can’t wait to see what you do with them!

How to prepare a layout legging pattern for fabric printing in Photoshop

Garment making and production can be daunting and a complicated process especially placement or engineered printing. A lot of time and effort goes into research and understanding where to start. We have put together tutorials on how to design, work with and prepare legging pattern for digital placement fabric printing. For this tutorial  you need to be proficient in Illustrator or at least have basic knowlage. Our tutorial is based on industry standards. This technic can be applied to printing other products such as bikinis, t-shirts, singlets , dresses etc.

How to prepare a layout/mark up legging pattern for fabric printing in Photoshop

Once you’ve completed the steps in the tutorial ‘How to use legging pattern in Photoshop’ You may want to print more than 1 design or more than 1 size, the most economic way to do this is to create a mark up/placement layout to have printed.

The following are instructions on how to set up in Photoshop, but could easily be done in Illustrator.

Start off by renaming the pattern layers to insure that you always have a pair of leggings.

layer_photoshop_markup_design_fabric_legging_printing

If you are only wanting the same size with different designs you can just Duplicate the leg layers. If you’d like to bring in different sizes you will need to repeat the steps in ‘How to use legging pattern in Photoshop’

In this tutorial we will be using the same size 10 but printing in new designs.

On the same artboard move files to the left hand side. you will notice that you can only comfortable fit 1 pair within the 147cm width with the current orientation; however there is a lot of wastage as illustrator below.

legging_layout_printing_fabric_design

Like a Jigsaw puzzle you will now need to start moving the patterns, you will need to make sure that you keep in mind that your grain line is parallel to the selvage. To do this, select the leg you’d like to rotate (select both layers) press Ctrl+t to open up the transform tool and while holding down shift rotate the image 360′ and make sure to move the pattern piece as close as possible to other leg (zoom in to make sure it is not overlapping)

tutorial_layout_markup_printing

markup_fashion_layout_tutorial_leggings_bold_rose

You can now start bringing in the other size 10 designs and play around with the layout. It’s best that you make the art board slightly longer than needed and once you’ve set up all the designs crop the excess.

Make sure you zoom in and double check that you haven’t overlapped any areas, when you are happy with the layout save as a JPG, TIFF or PDF.

layout_legging_tutorial_polish_abstract_orchid_black_white_bold_rose_floral_sports_luxe

You’re now on your way to have custom printed fabric which you will be able to make into comfy leggings.

design-your-own-leggings-digital-fabrics-class create-your-own-activewear-design-leggings-digital-fabrics-classes

Save

Save

DIY with Digital Fabrics – The Sara Project

digital fabrics the sara project print your own fabric
“The fabric is so soft, and the print is bright and bold; really great quality! I love how unique my top feels in this fresh print.”
– The Sara Project

The beauty about fabrics is seeing them come to life whether it becomes a pillow cover or a unique piece of clothing. Digital Fabrics recently teamed up with Sara from The Sara Project who loves to share her passion for sewing on her blog.

digital fabrics the sara project print your own fabric
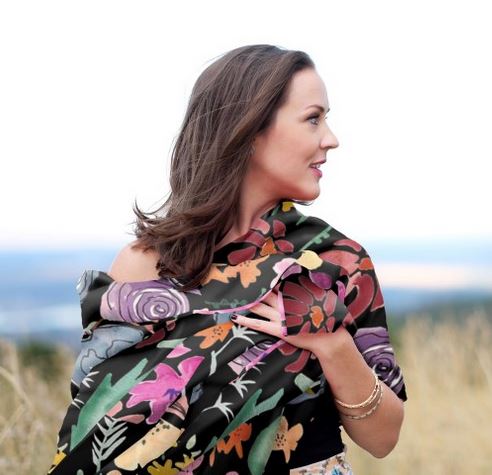
Sara used our Ethnic in Cornflower in micro fabric to create this unique top. It’s fresh, flown and this top can definitely be worn during all seasons. And we’re happy to read she was pleased with the fast shipping and quality of the Digital Fabrics she received

digital fabrics the sara project print your own fabric digital fabrics the sara project print your own fabric