Tag Archives: textile design

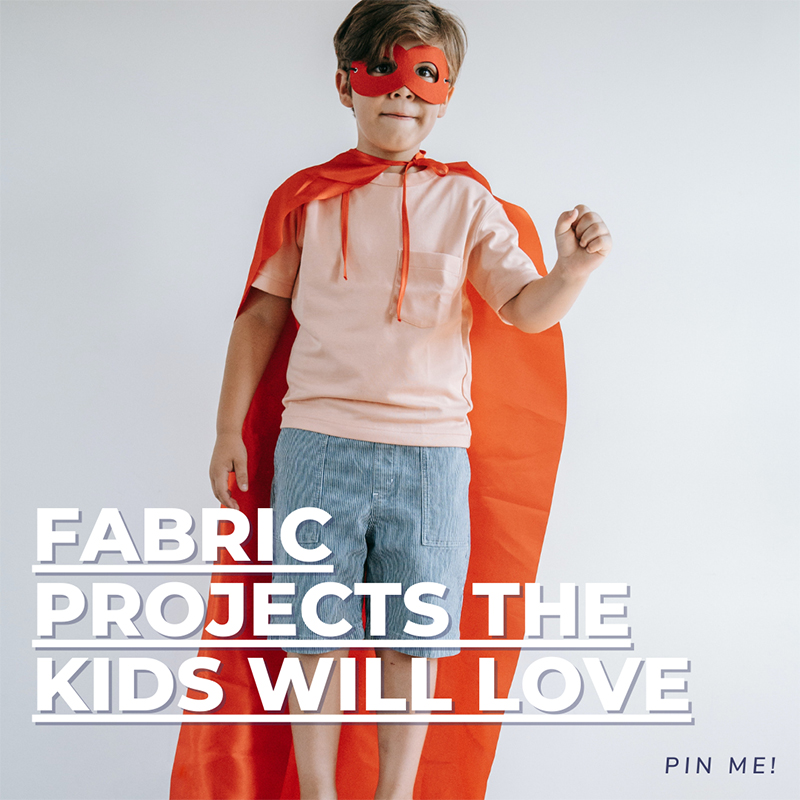
Fabric Projects the Kids Will Love

The Australian spring hasn’t quite begun the way we are used to. The sunny beach trips have turned into rainy weather days at home, meaning it becomes all that more difficult to keep the kids entertained. With a gloomy couple of months ahead, we understand the need to reduce screen time and find some indoor activities to keep the young ones busy. So, get ready to swap their iPads for some creativity as we have put together a list of really easy and simple fabric craft projects for kids to keep those rainy-day blues away!
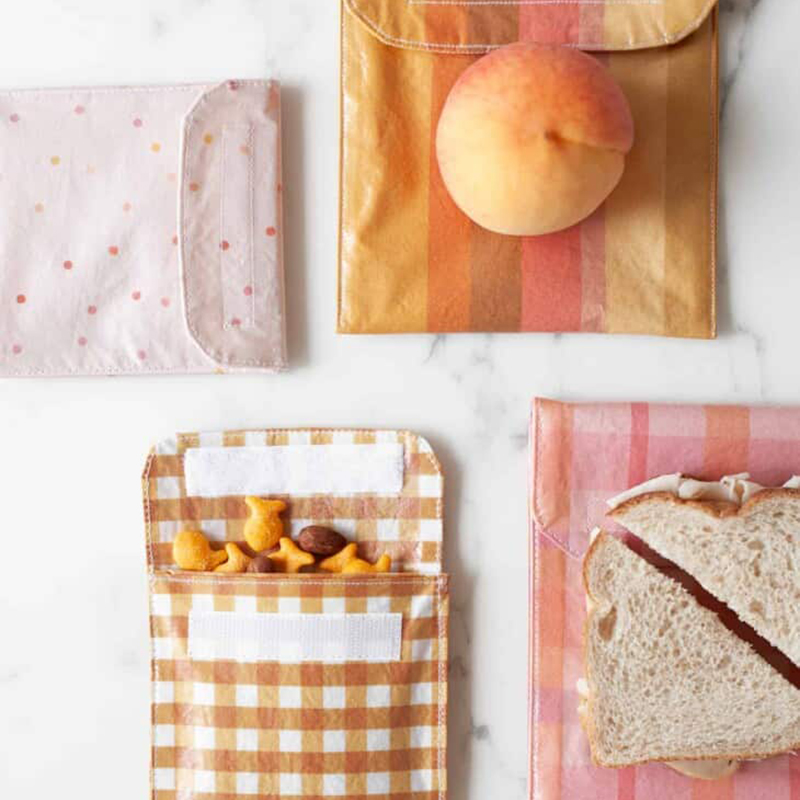
Reusable Sandwich Bags | by A Beautiful Mess

The average Australian household uses 170 zip-lock sandwich bags per year, so this project will not only bring a little flare to school lunches, but will also save you money and bring down your carbon footprint. These reusable lunch bags can be brought to life with some cotton fabric, some thread and velcro, making it an easy project to occupy an afternoon. With the money you will save from buying plastic zip-locks, you can further customise these bags with our designer fabric shop that will no doubt become a household hit. How about these cute fruity fabrics?

Reusable lunch bags. Image: A Beautiful Mess

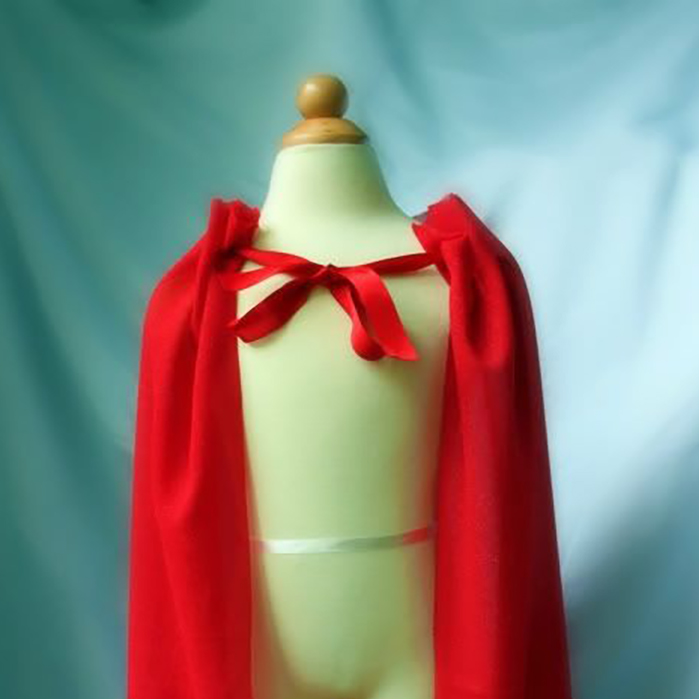
No-Sew Capes | by Little Pink Monsters

Halloween is just around the corner so why not get ready for some trick-or-treating with this easy project that is totally needle free. All you need is 1.5 metres of fabric, 90cm of ribbon and a pair of scissors and you’re on your way to the unveiling of the next Superman or Wonder Woman. And, let’s be honest, Halloween is fun for adults too, so don’t be surprised if you need some longer fabric! Shop our Halloween inspired fabrics here.

DIY Little Red Riding Hood. Image: Little Pink Monsters

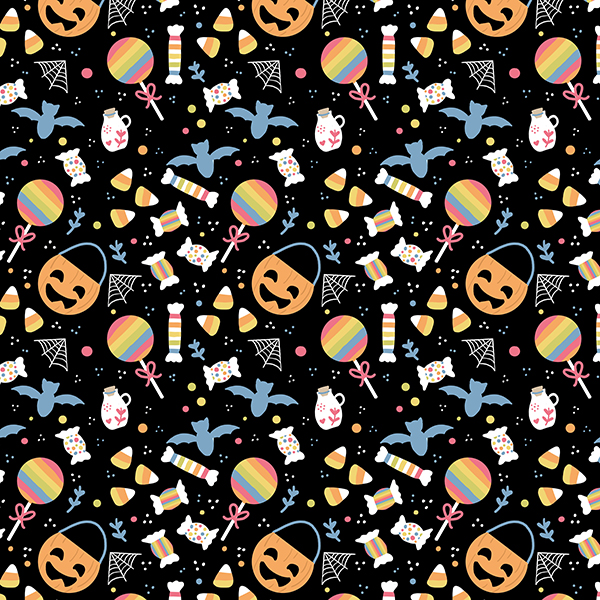
Trick or Treat Black - Kathrin Legg

Trick or Treat Black Halloween fabric – Kathrin Legg

Making Memories

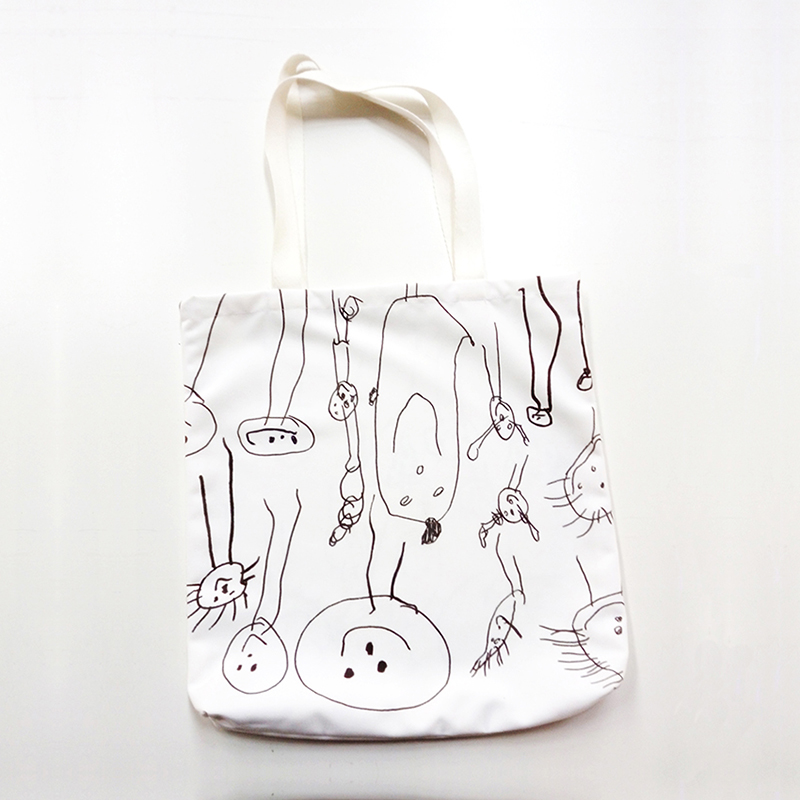
With Christmas around the corner, we know you’re always looking for ways to create memorable gifts that friends and family will cherish. We may be biased here but our custom product printing service is ideal for this time of year! Give the kids some colouring pens and task them with drawing the whole family, even down to the houses they live in, or drawing them with their favourite things and pets. Scan them into your computer then jump onto Digital Fabrics and choose some fabulous homeware items or gifts to print these designs onto. It could be our cushions, tea towels (a favourite for gifting!) scarf, pillow case or tote bag. Or order our Creatives Starter Pack with a little bit of everything! Our team will gladly help bring these designs to life.

Now, if the kids are no modern-day Picasso, there’s another thoughtful option to create memorable gifts. You can send us an image of your favourite holiday moment, family or pet portrait and we’ll print them onto a product option of your choice! Leave it with us and we will turn these masterpieces into a special gift to be adored for years to come. We’re in for a rainy summer ahead, so keeping some of these ideas in your pocket to help the kids unleash their creativity will sure come in handy! We can’t wait to see what they’ll create!


Meredith Simpson – The Designer Project

It’s been such a treat having Meredith Simpson as our Featured Artist for the month of October! We have loved sharing her adorable animal prints and hope you’ve loved them just as much as we have! 

 To coincide with Meredith’s ‘Aussie Cuties’ collection being made available to all of our customers through our Fabric Shop online, the artist herself has put together a guest blog which further explains her one of a kind creative process and what inspires her work. 

Keep reading to find out more about Meredith Simpson, her inspirations and design process! 

9F6F6CE3-A151-4F5B-BB88-189529A53EE6Meredith Simpson

This collection was inspired by our beautifully unique Australian native animals. I feel we are so lucky to have such wonderful creatures that are native to our home, they are just so gorgeous that I had to draw them. It started off only going to be a collection of 3 or 4 animals but grew as people kept suggesting others that were their favourites. 

90CB44C35017415E99A02EC1DA6116B7

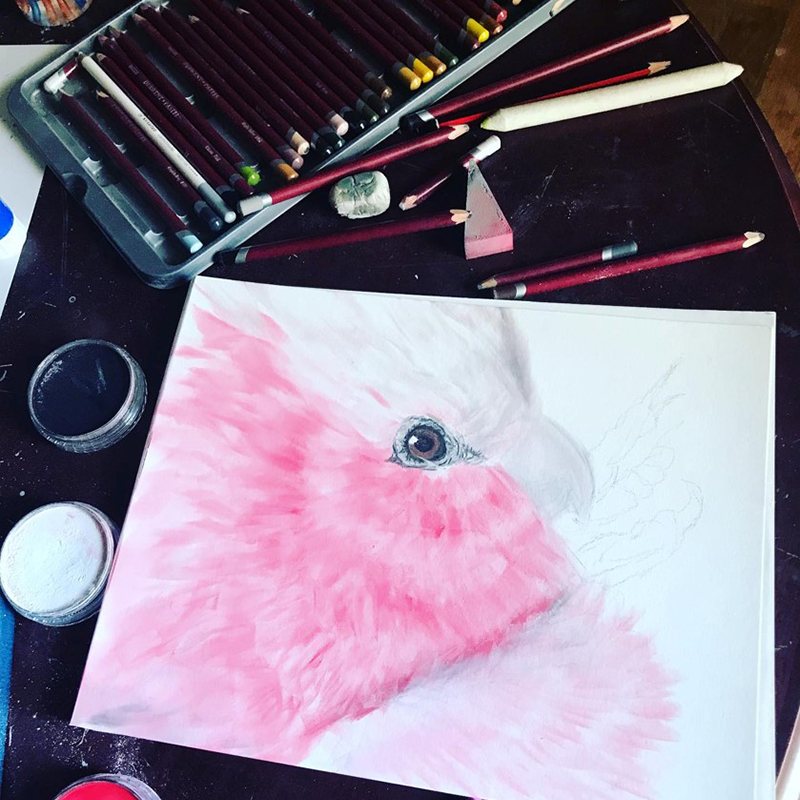
Galah Bird Drawing

This design process has been a learning curve for me, as it is my first real experience using my artwork to create digital designs. I love drawing and painting and now also enjoy using my artwork digitally too – it has opened up so many more possibilities of how to share my artwork with others. 

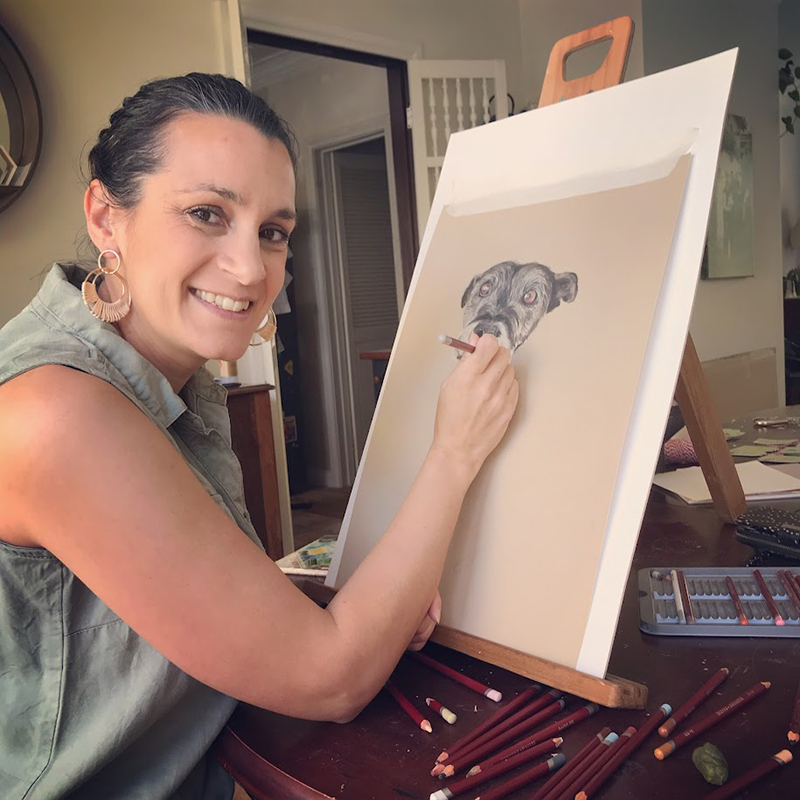
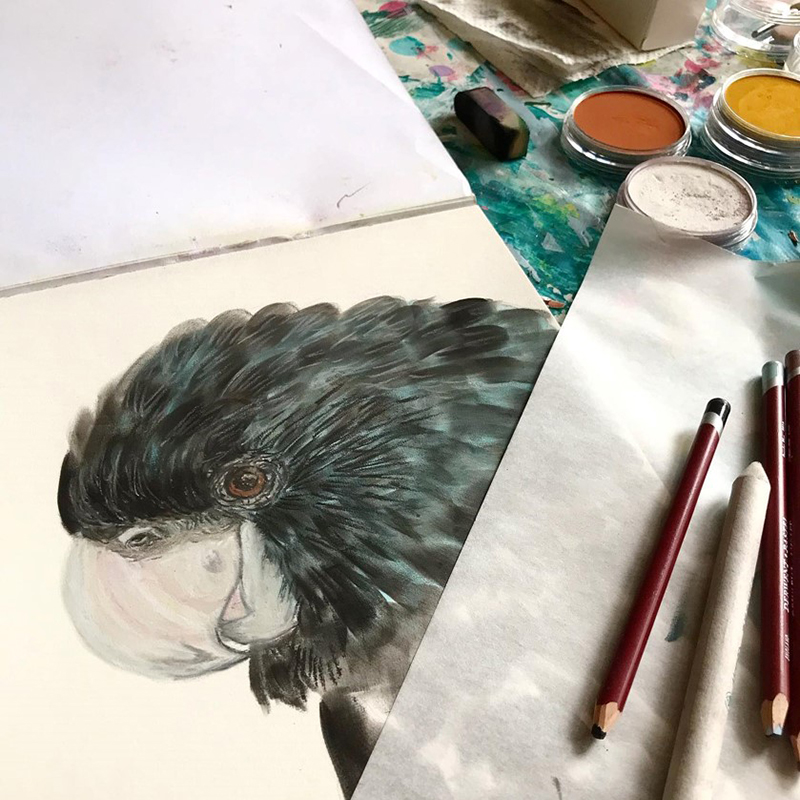
My designs all start off with hand drawn artwork. I enjoy working with both pastel pencils and watercolour paints, but find that for furry animals the soft texture I can achieve with pastel pencils is best. 

0E837DABD8C047AD8B4756D4068C8275

Black Cockatoo Bird Drawing

To create my prints, I first used an editing program to remove the backgrounds from my pictures and to cut small details, such as leaves and gum nuts, from larger art works. I then used Publisher to experiment with various backgrounds and combinations, with the ever patient help and feedback from Ella. 

0912DB5D05B942E8A16745DDD00C1AC9

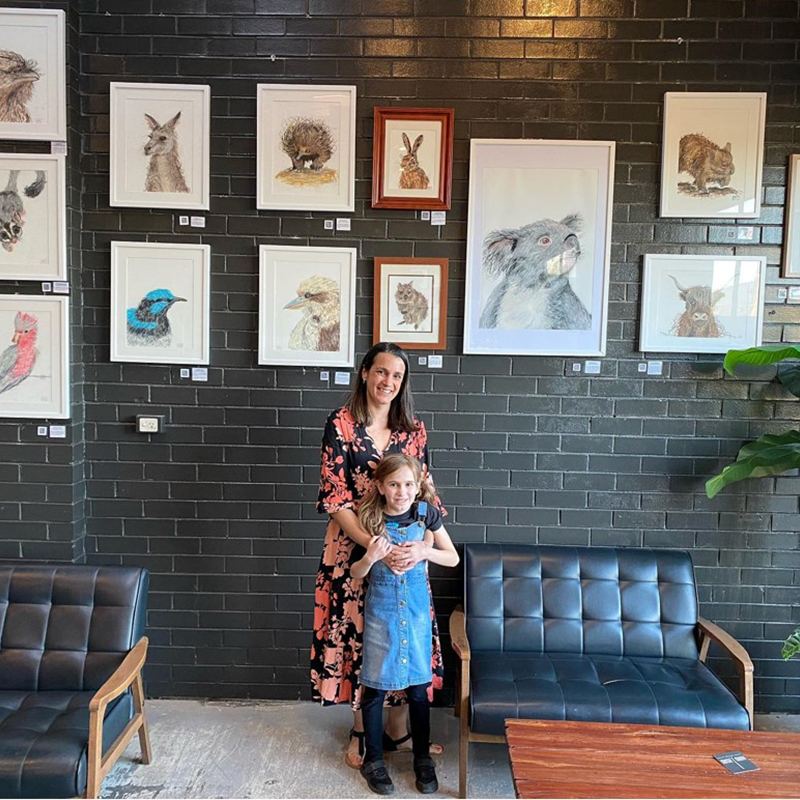
Meredith and her daughter with her Animal Artworks

The Australian animals used in the ‘Aussie Cuties’ collection were created by me as part of me finding time to create art work for the enjoyment of it. I had been drawing lots of pet portraits and then drew some woodland animals for my sister in law’s nursery. I loved the freedom of drawing animals that weren’t for a particular person and wanted to draw our native animals because I feel they are just so beautiful and unique. 

IMG_1801

Titch the Tasmanian Devil Sketch

It was fun collaborating over email to create these designs and I am so thankful to the Design Project for their guidance and for this opportunity. I look forward to creating more from my artworks in the future. 


If you want to collaborate with us on The Designer Project and become part of this creative club, please apply! Send us an email with your portfolio and why you would like to be part of this initiative, and we will be in touch! 

Lilli of Frocks and Frou Frou – Make an Impressionist

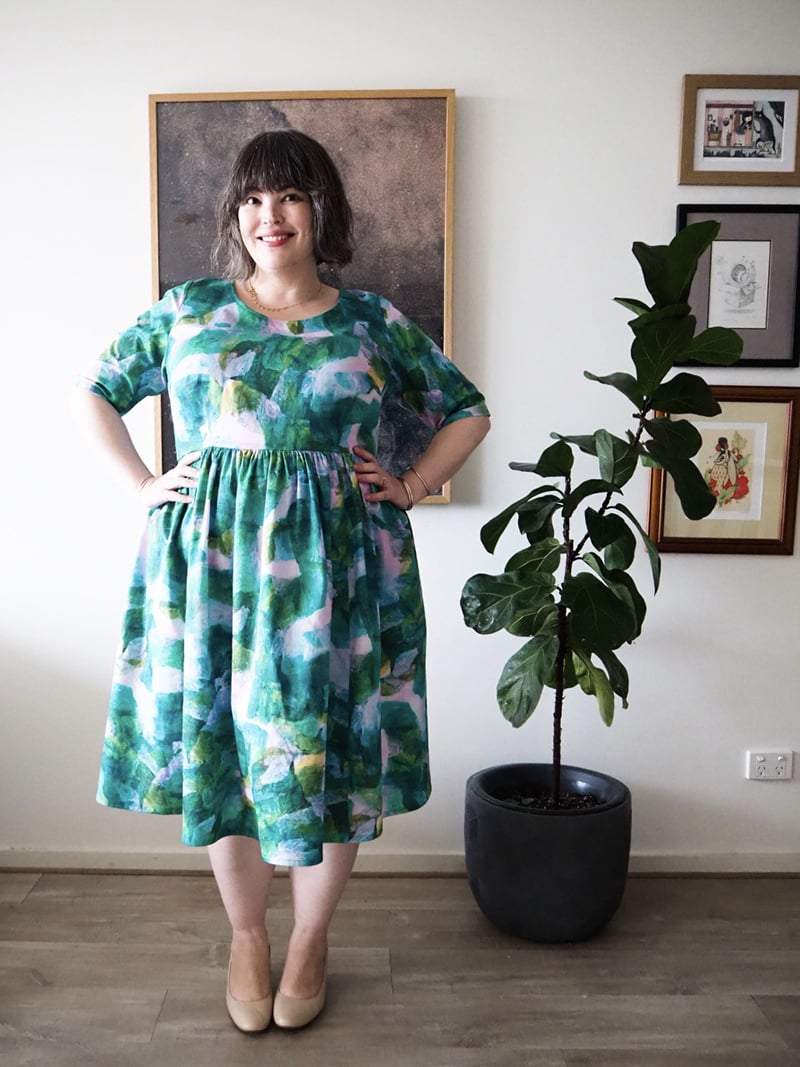
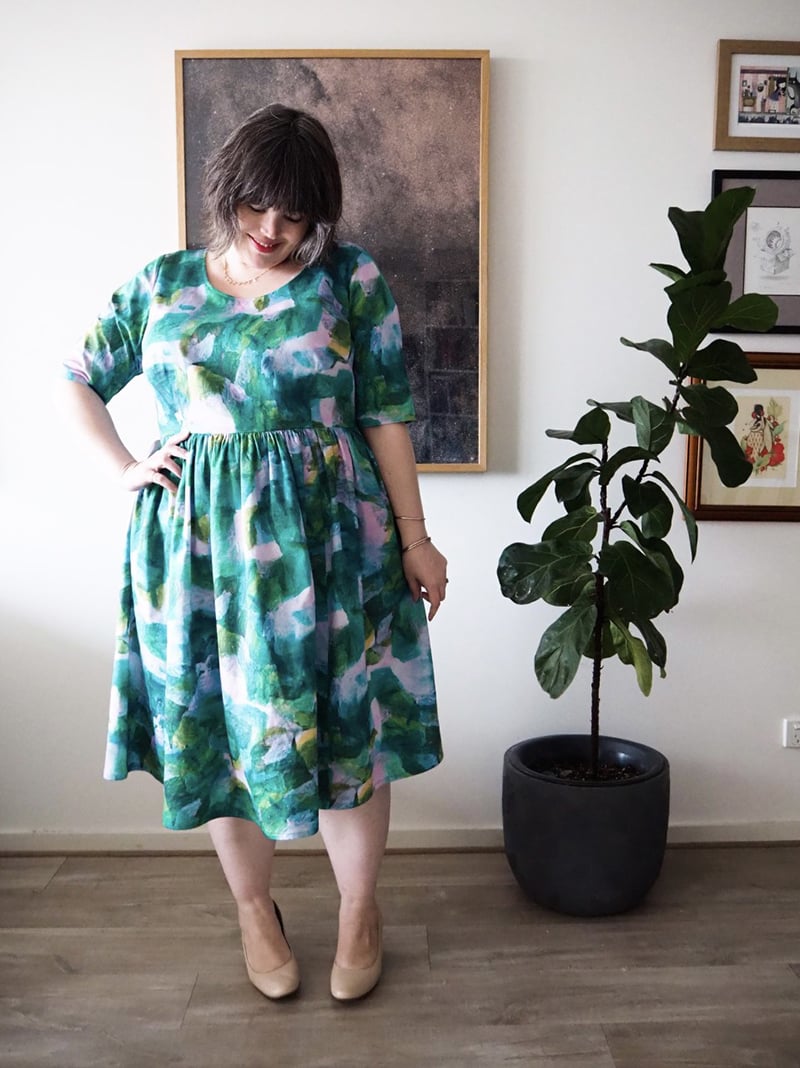
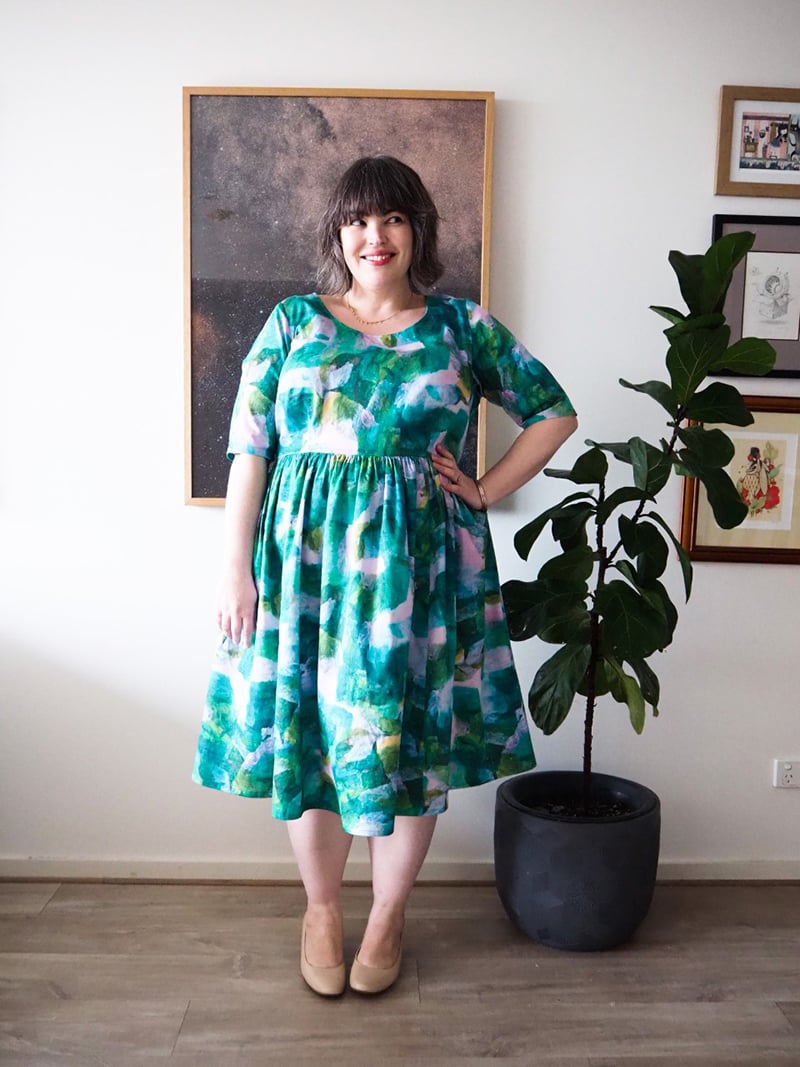
For the launch of our new organic cotton fabric Poppy we asked Lilli of Frocks and Frou Frou to test it for us. Lilli is a creator and a maker and we were so excited to collaborate with her. We sent her the Hearts Garden design print by Susanna April on Poppy sateen fabric to create a dress that her readers would love, and to share with you also! As Lilli said: The Poppy is light enough to billow when it catches the wind, but with a weight of 140gsm, it’s perfect for use in items that need just a little structure! Interested to know more about Lilli’s creation? Keep reading Lilli’s blog post! 
green organic cotton designer fabric-1950’s party-dress

Dress pattern: Cashmerette Honeybourne, made from cotton sateen fabric Poppy printed by Digital Fabrics (print design by Susanna April)

I am not, let’s just say, an accomplished sewist. I can sew a straight(ish) seam, and I’ve more or less learned how to read the instructions of a sewing pattern. I know the difference between a French seam and a felled one. But apart from moving a hem up or down I don’t really know how to do alterations. About this time last year I bought myself a copy of Jenny Rushmore’s book Ahead of the Curve, thinking that it was probably time to teach myself how to do a full bust adjustment at the very least.

Reader, the book sat on my shelf. Then it sat on my shelf a little more. And then the team at Digital Fabrics got in contact to see if I’d like to road-test their brand-new cotton sateen, and I thought ‘Ooooh, I’ll need to make something really special with that!” and decided maybe it was time to try my very first Cashmerette pattern.

Based in Sydney, Digital Fabrics is a digital textile print house that prides itself on its quality, quick turnaround, and ease of design services. All their inks are non-toxic and water based, and they have a huge range of fabrics on offer including cotton, rayon, linen, ponti, lycra, canvas and more. They also offer on-demand cut-and-make product services for people who might not sew, but would like to take advantage of the ability to print their own artwork onto cushions, teatowels, curtains, totebags, etc.

On the website they have straightforward tutorials on how to create your own seamless fabric repeats, and if you’re feeling Very Serious about this textile design thing, you can actually take a one-on-one online class that will guide you through the process. Or you can do what I did, and simply choose an existing print from Digital Fabrics’ gallery of artists.

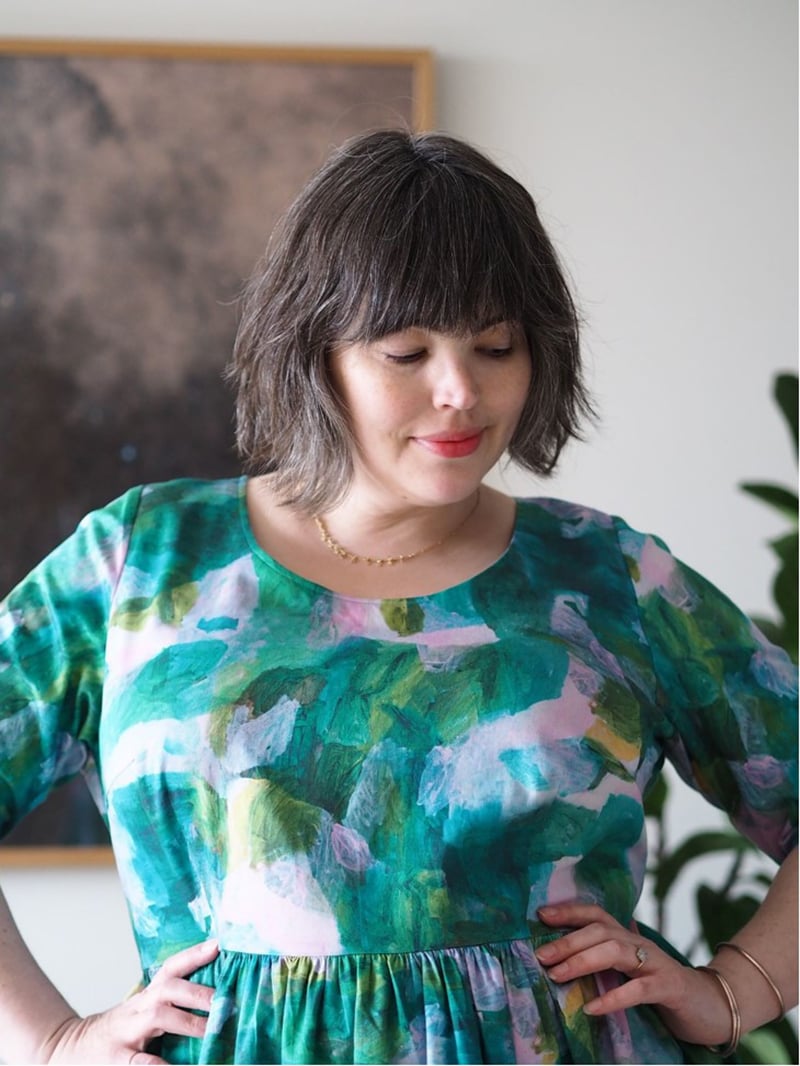
The print that I chose leapt out to me from the screen with its gorgeous painterly hues of blues and greens and hints of pinks. It reminded me immediately of Claude Monet’s Water Lillies series. Perhaps aptly, it’s called My Heart’s Garden, and it’s by Brisbane based artist, Susanna April.

Digital Fabrics sent me My Hearts Garden printed on their beautiful new Poppy sateen, a 100% cotton fabric with a slight sheen, and a soft hand-feel. It’s light enough to billow when it catches the wind, but with a weight of 140gsm, it’s perfect for use in items that need just a little structure. Which is to say: it was perfect for Cashmerette’s Honeybourne.

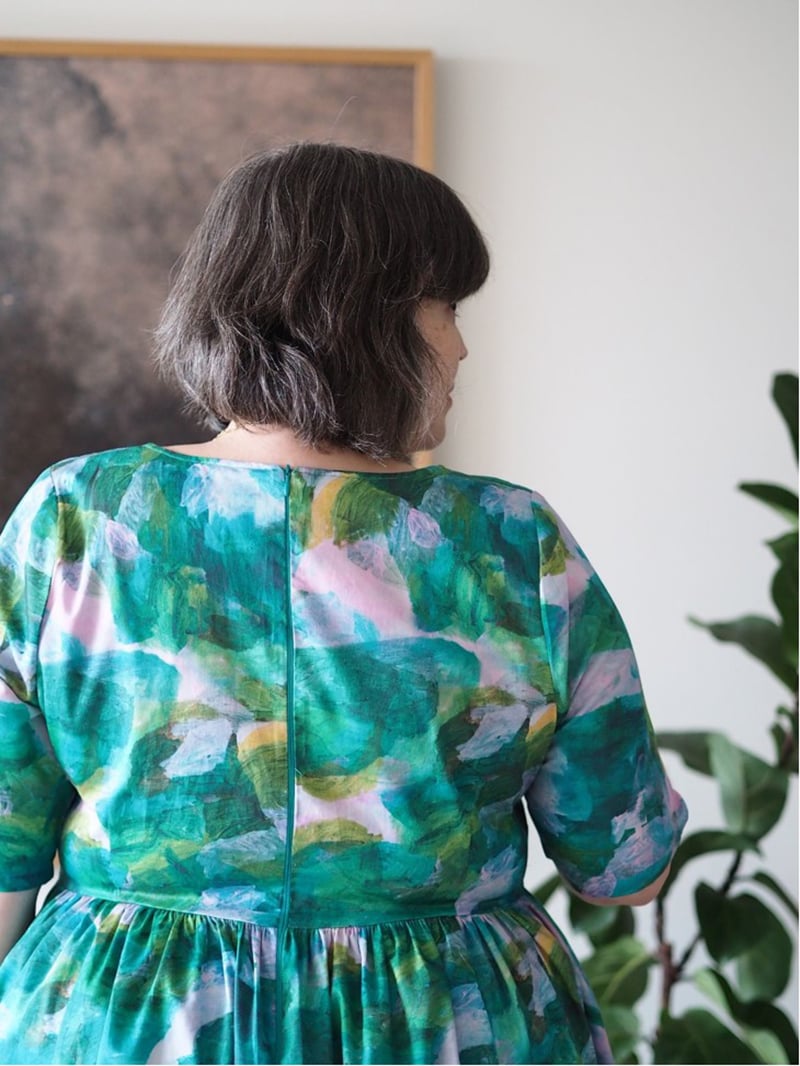
The Honeybourne is available exclusively with Ahead of the Curve, and it’s a woven dress pattern with a darted front, sleeves, and a full skirt. It’s the pattern where Jenny teaches you a brand range of alteration techniques, including full and small bust adjustments, a narrow shoulder adjustment, a full bicep adjustment, a swayback adjustment, and broad back adjustment. It comes in sizes 12-32 and in three cup ranges: C/D, E/F, G/H. I made the 18 E/F, and full disclosure – for all my hyping myself up to learn how to do adjustments, it fit perfectly (as far as I can tell) straight out of the packet.

With the full gathered skirt, fitted bodice, and half-length sleeves, it’s got a real 1950’s party-dress vibe to it. There’s an enormous amount of yardage in that skirt – it’s actually six panelled, though the abstract print disguises that well – and it’s actually the perfect length for me to wear over my tulle skirt when I really want to fancy it up.

I love the pattern, and I LOVE the fabric; which at just $44 per metre (limited time only) is virtually the same price you’ll pay for fabric from one of the big European design houses. I’m keen to try my hand at designing my own print next time (or enlisting some three-year-old help!)

Have you felt inspired reading Lilli’s blog post? Are you ready to dive into your own creative project? If so, don’t forget to visit out fabric shop online to view an enviable range print-to-order designer prints!

‘Aussie Cuties’ Textile Collection by Meredith Simpson

We’re super excited to announce that our next featured artist from The Designer Project will be ever so talented, Meredith Simpson! 

The ‘Aussie Cuties’ collection was inspired by our beautifully unique Australian native animals. Meredith feels that we are so lucky to have such wonderful creatures that are native to our home and finds them so gorgeous to draw.  Created from pastel pencils and that she finds to be the perfect medium for capturing the texture and softness of animal fur. 


Keep reading to find out more about Meredith Simpson and her adorable animal designs! 

custom fabric_designer fabric_meredith simpson_walter wombat

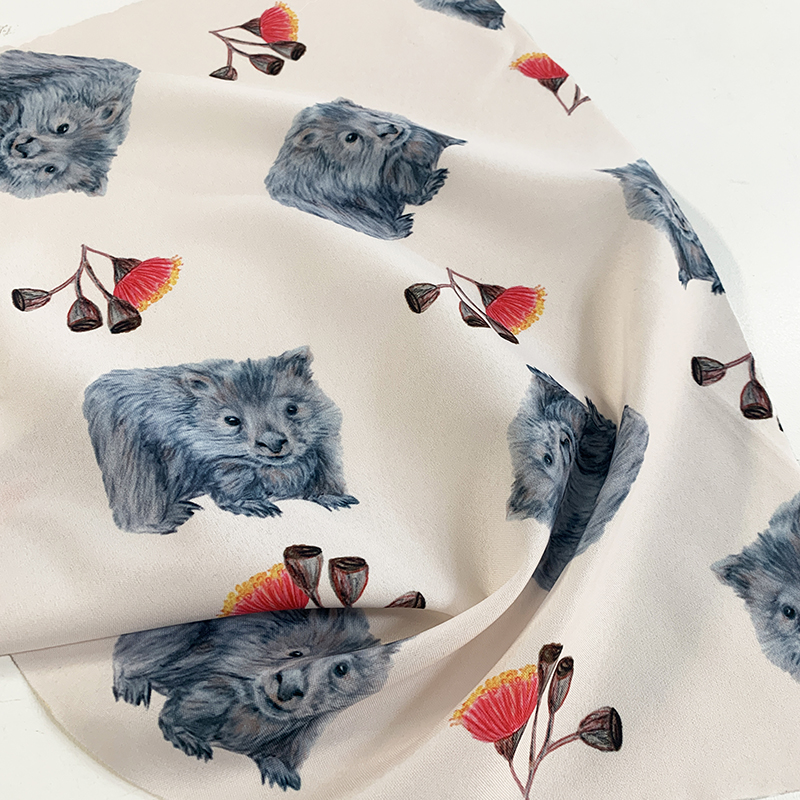
Walter Wombat on pink

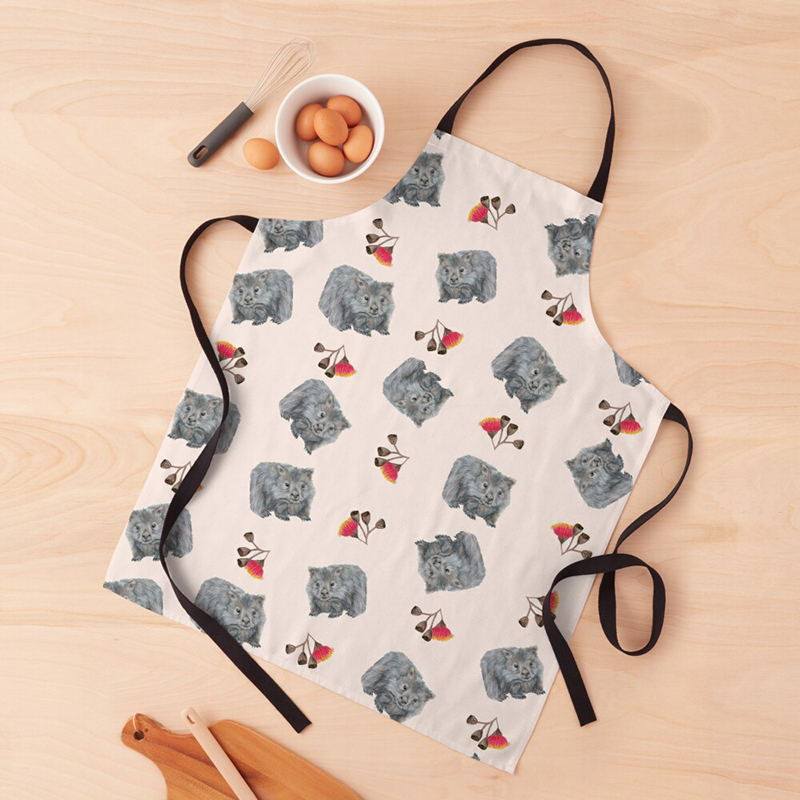
‘Walter Wombat’ is a fluffball full of fun. Paired with our beautiful native gum blossoms, this print is pretty and playful. 

‘Walter Wombat’ would be such an adorable design for kitchen homewares and garments such as aprons! 

custom fabric_designer fabric_meredith simpson_native cuties

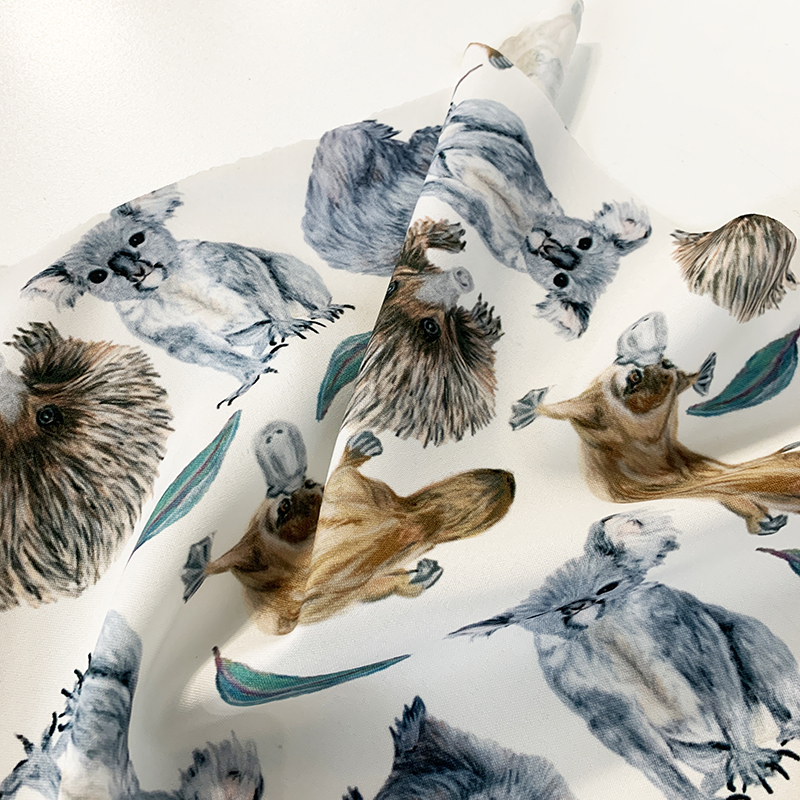
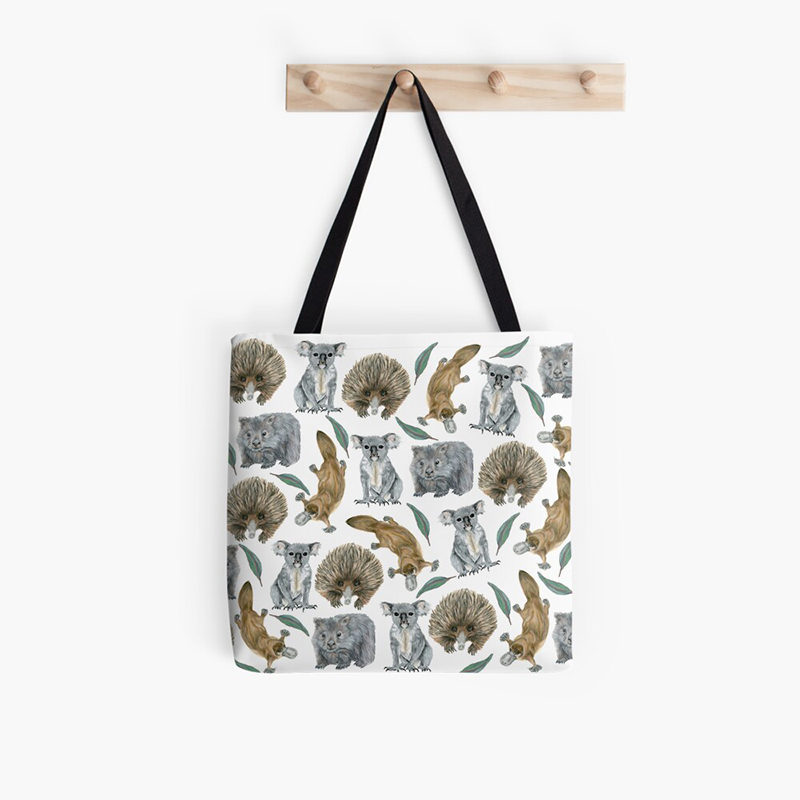
Australian Animals on white

‘Native Cuties’ is a super cute print that features four of our iconic native animals: koala, echidna, platypus and wombat. The natural colours of the animals and the green gum leaves against the bright white background make the colours shine! 

We love ‘Native Cuties’ for some fun fashion accessories like tote bags or even some kidswear! 

custom fabric_designer fabric_meredith simpson_keeley koala

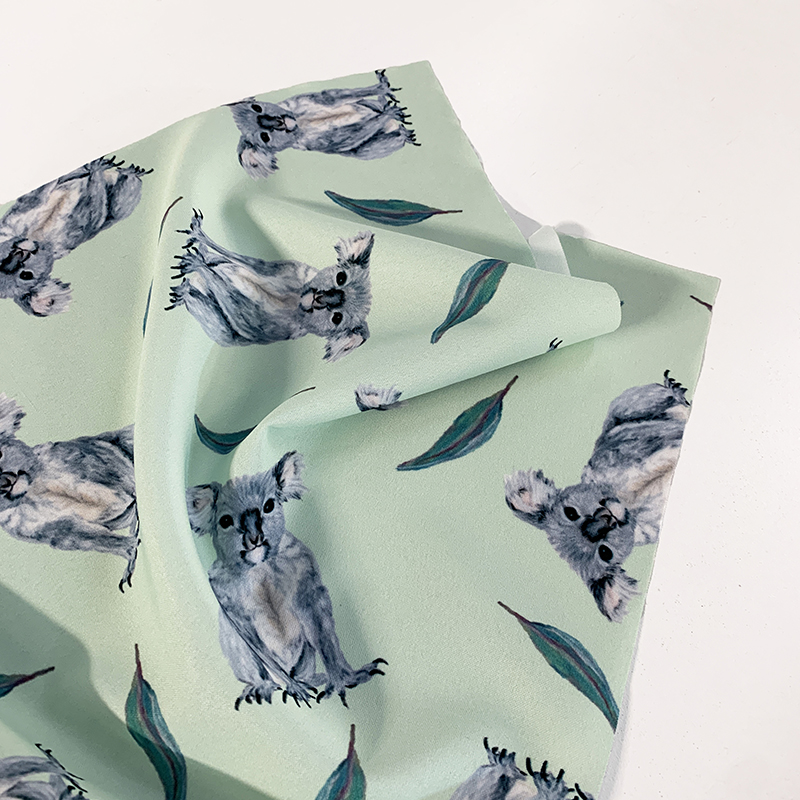
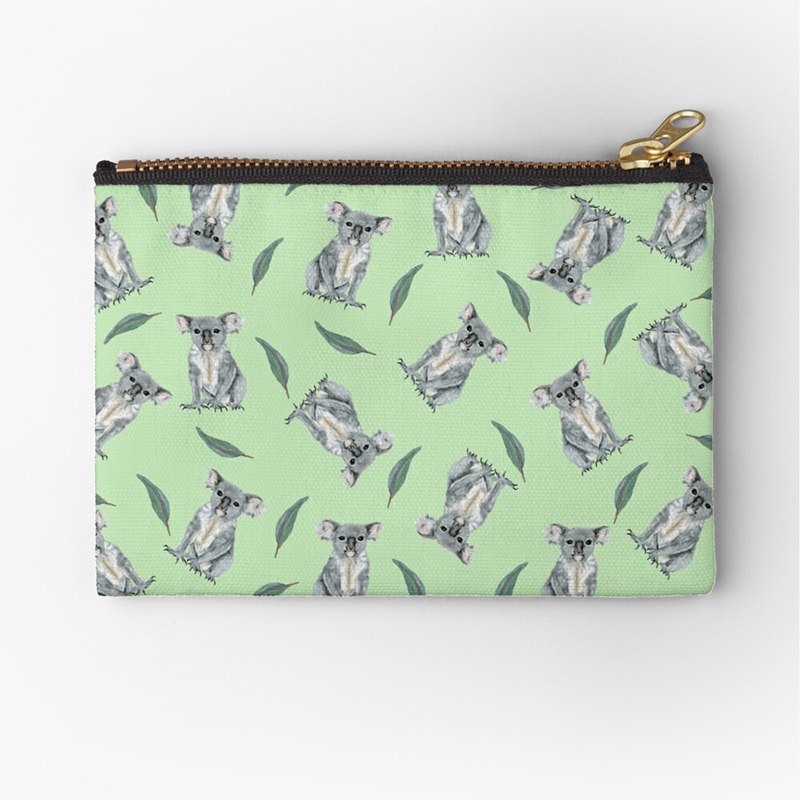
Keeley Koala on green

‘Keeley Koala’ is the most gorgeous green print that features the cute Keeley koala together with her favourite eucalyptus leaves! 

‘Keeley Koala’ is the perfect print for sweet accessories such as pouches and bags! 

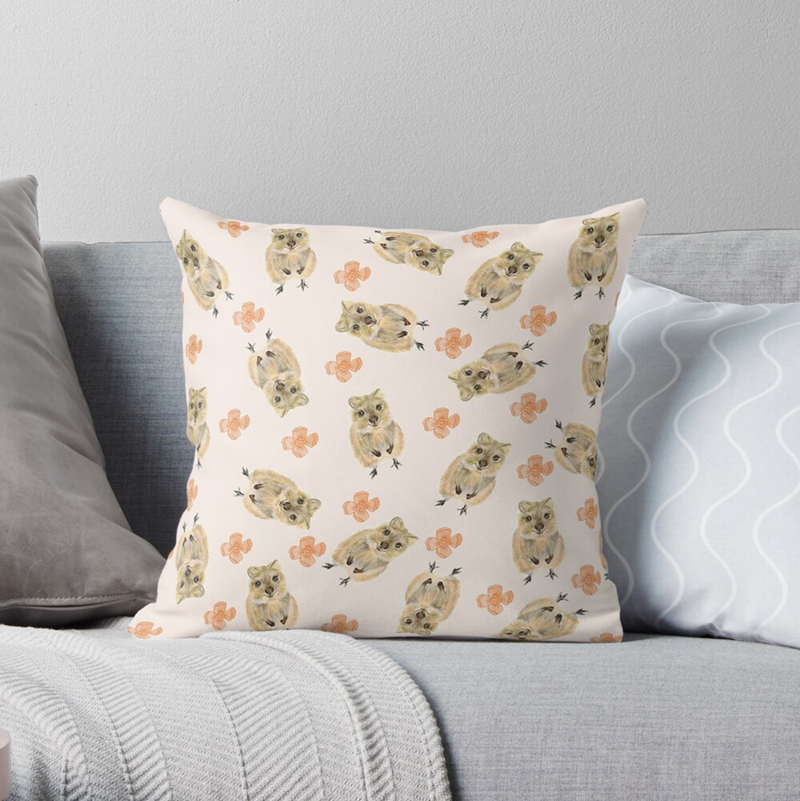
custom fabric_designer fabric_meredith simpson_quinn quokka

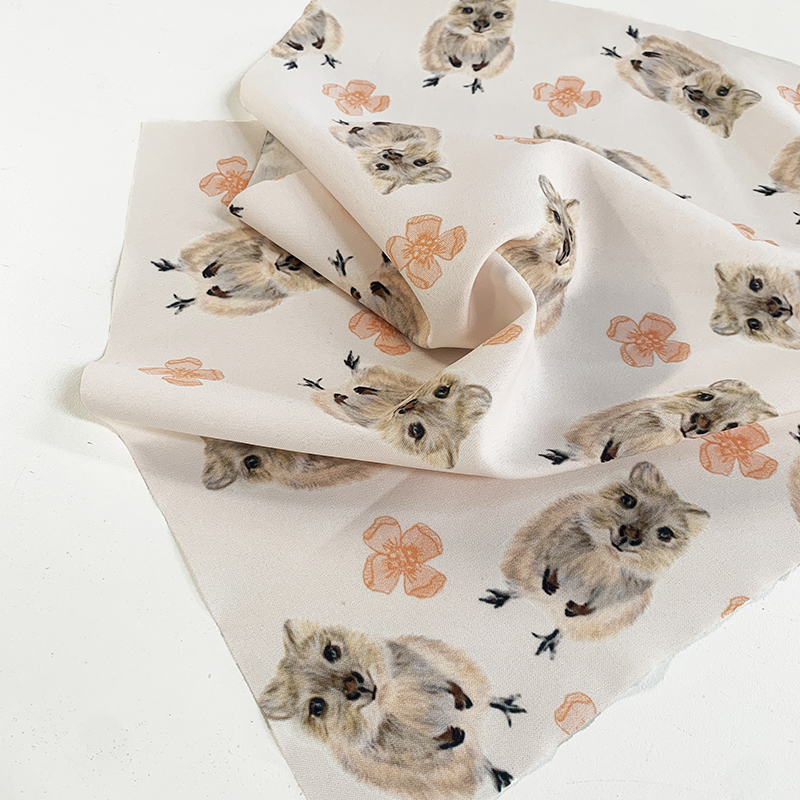
Quinn Quokka on peach

‘Quinn Quokka’, this cheerful, adorable print features the always smiling Quokka! The watercolour flower detail and warm colour palette make this such a joyful print that will make you want to smile too. 

We think ‘Quinn Quokka’ would be an amazing design for home and interior projects such as Cushions! 

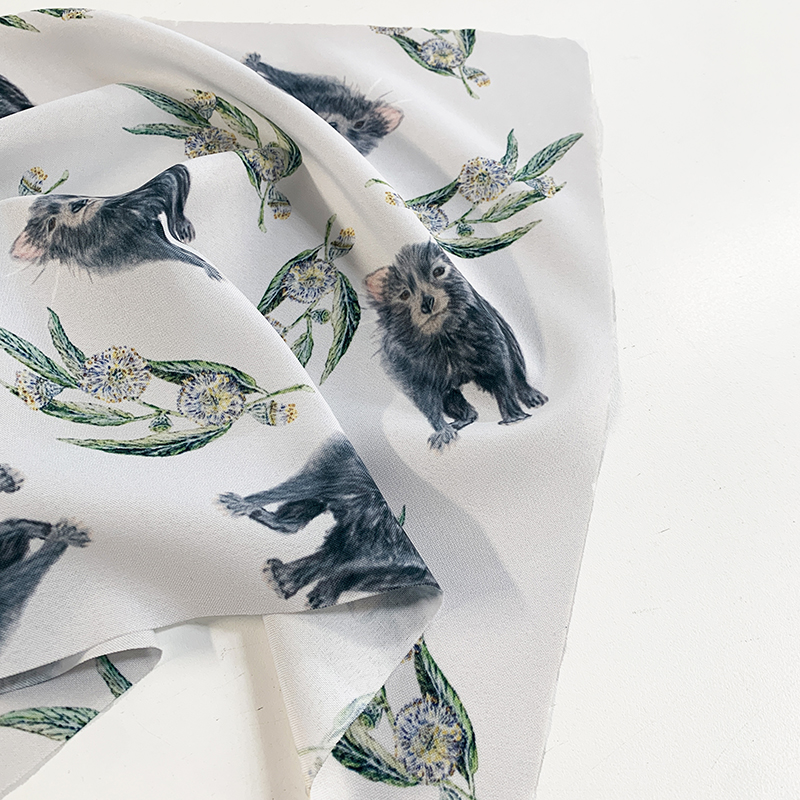
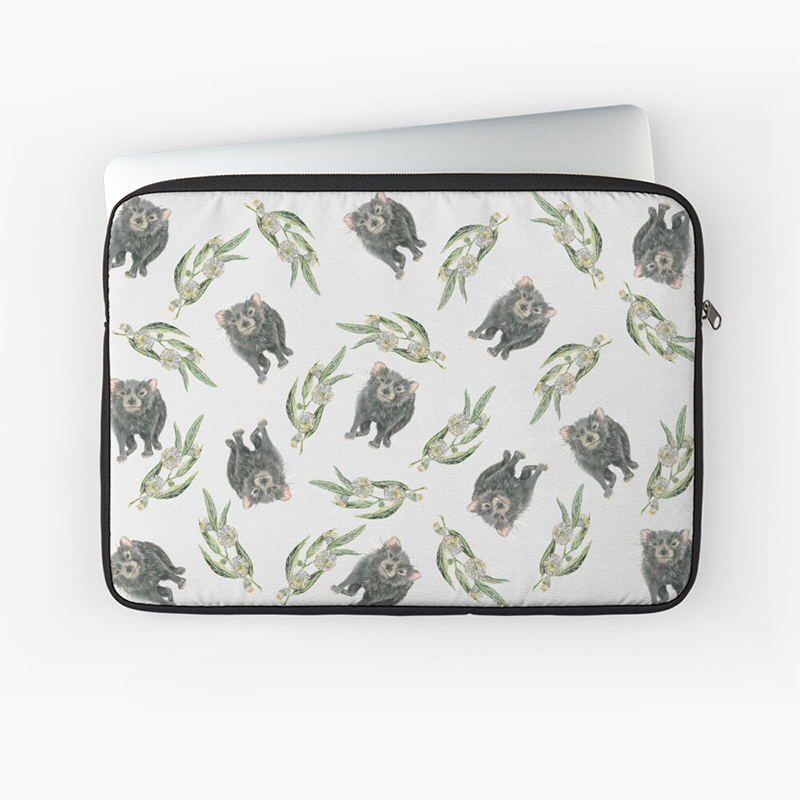
custom fabric_designer fabric_meredith simpson_titch the tasmanian devil

Titch the Tasmanian Devil on grey

‘Titch the Tasmanian Devil’ is a celebration of all things Tasmanian! This lovely print features Titch the Tasmanian Devil together with the beautiful Tasmanian Blue Gum. 

‘Titch the Tasmanian Devil’ is a super fun print that would be perfect for projects such as a DIY laptop case or homewares such as Tea Towels! 

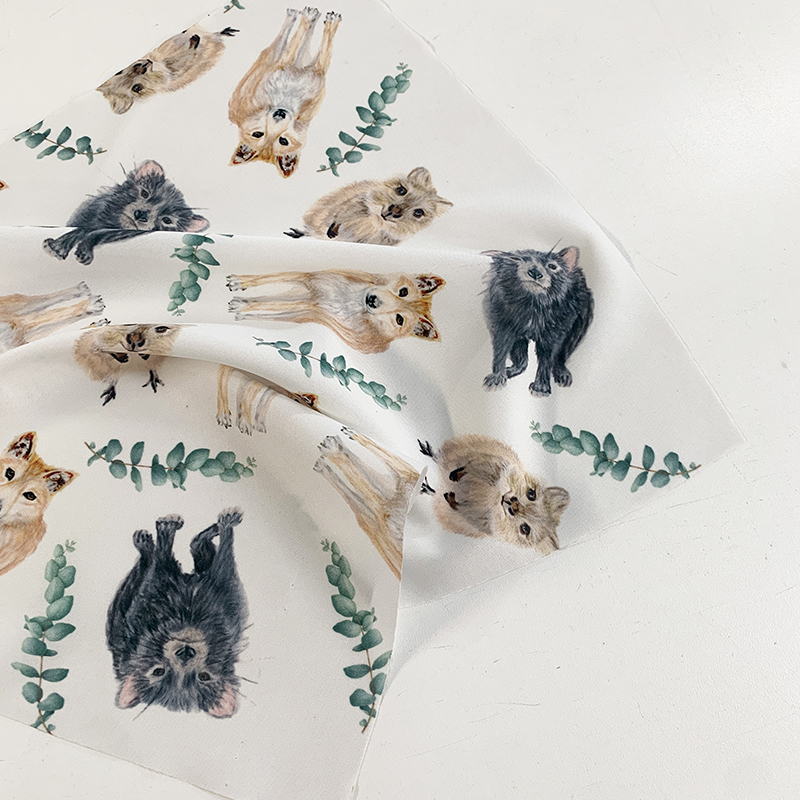
custom fabric_designer fabric_meredith simpson_native cuties 2

‘Native Cuties 2’ is a sweet print featuring three of our unique native animals: dingo, quokka and Tasmanian devil together with our beautiful blue gum leaves. The natural colours of the animals and the native foliage against the bright white background make the print come to life! 

‘Native Cuties 2’ would work perfect for some cute fashion garments like an adorable skirt or even some kidswear! 


All of our project ideas above are suggestions only as the sky’s truly the limit with Meredith’s adorable animal collection! Each of Meredith’s designs can be found in our Fabric Shop, so head on over to be inspired for your next DIY project! 

Print on organic cotton. New Organic Cotton Fabric – Poppy!

Print on organic cotton. Organic cotton fabric Poppy

This year our focus is to test as many new fabrics as we can find and get to know fabric mills worldwide. Through our exploration, we came across our new fabric base which has won our hearts.

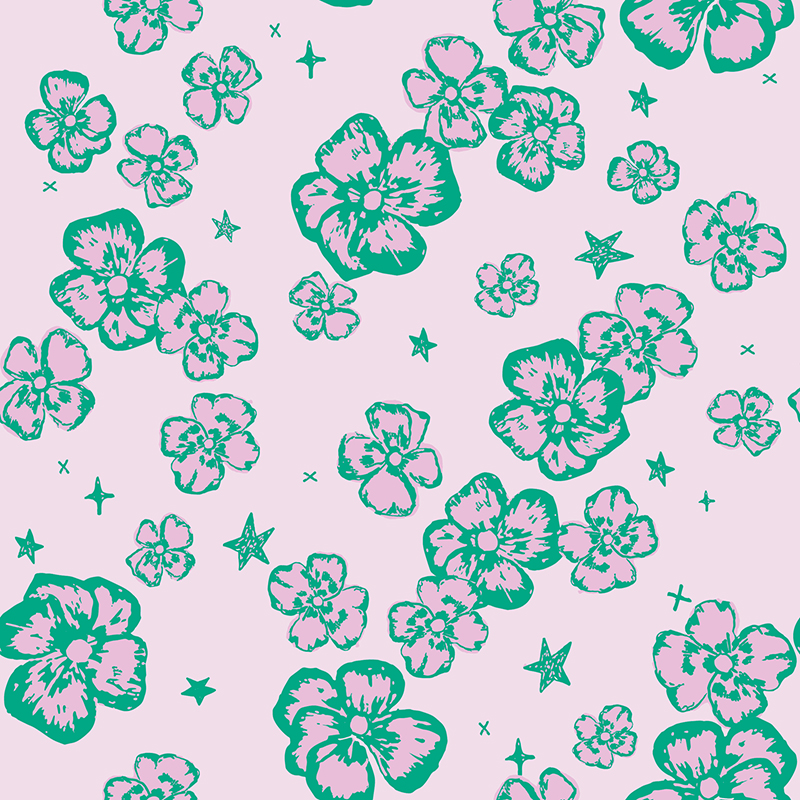
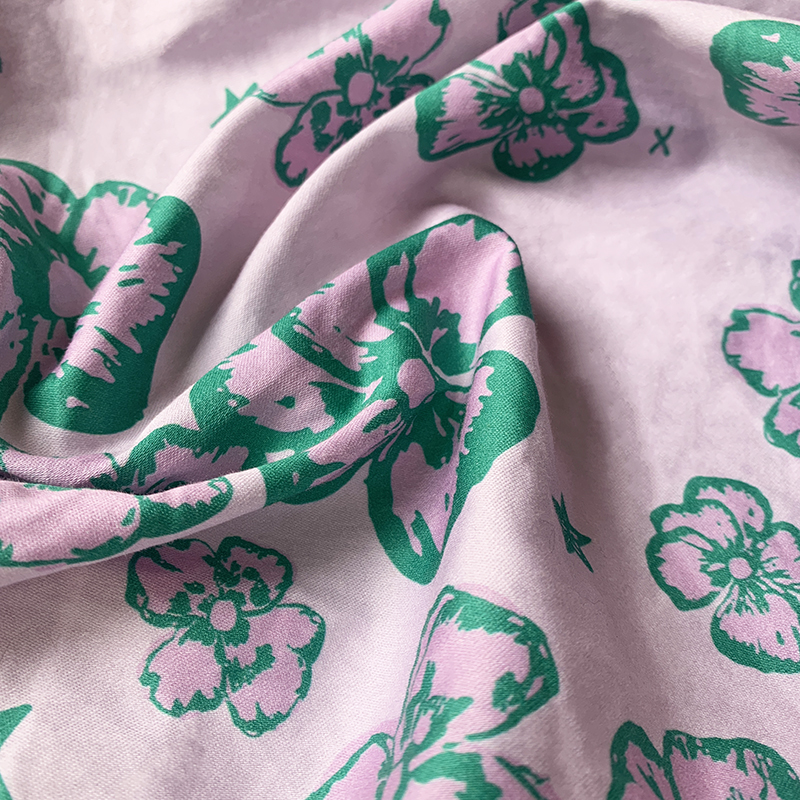
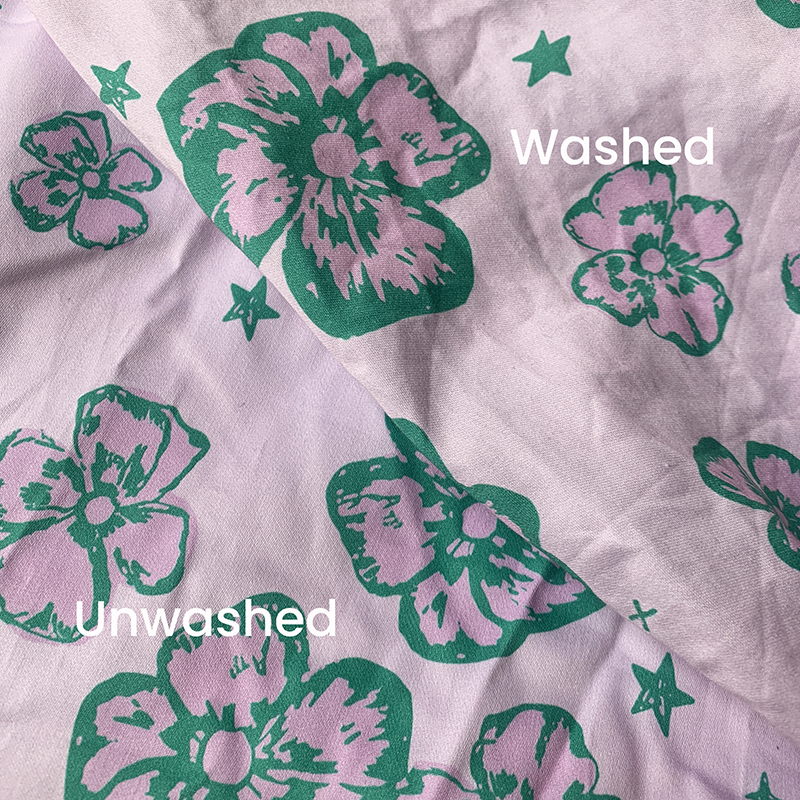
Say Hello to our latest addition to the fabric family, Poppy! This fabric has a soft handle, a lovely texture when washed (you probably won’t even want to iron it!), brilliant colour reproduction and most important of all, colour fastness.  We simply couldn’t resist introducing this glorious fabric to our range.

Keep on reading to find out more about our brand-new natural fabric print base and get inspired for your next project!

holiday theme fabric

Fabric design: Sunday Drive to the Coast – Sue Michael

designer fabric Digital Fabrics

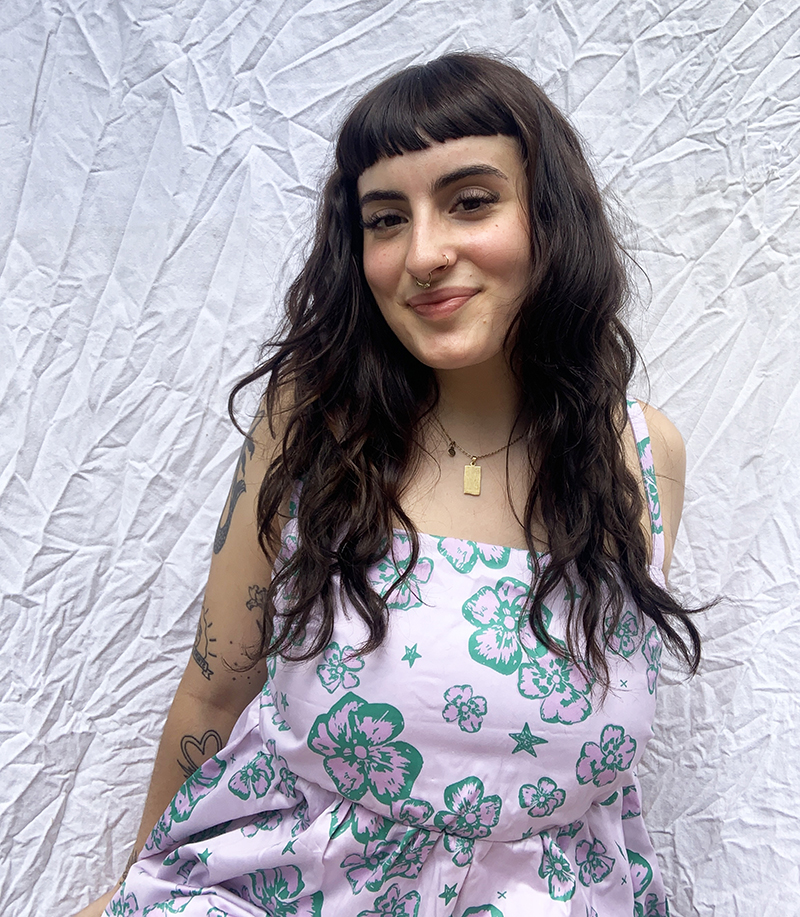
Printed Poppy fabric. You can print your own artwork online or select a unique design from Australian artists and designers in our Fabric Shop! 

 checkered fabric

Fabric design: Checkered Lavender – Britney Munday

sunflowers fabric

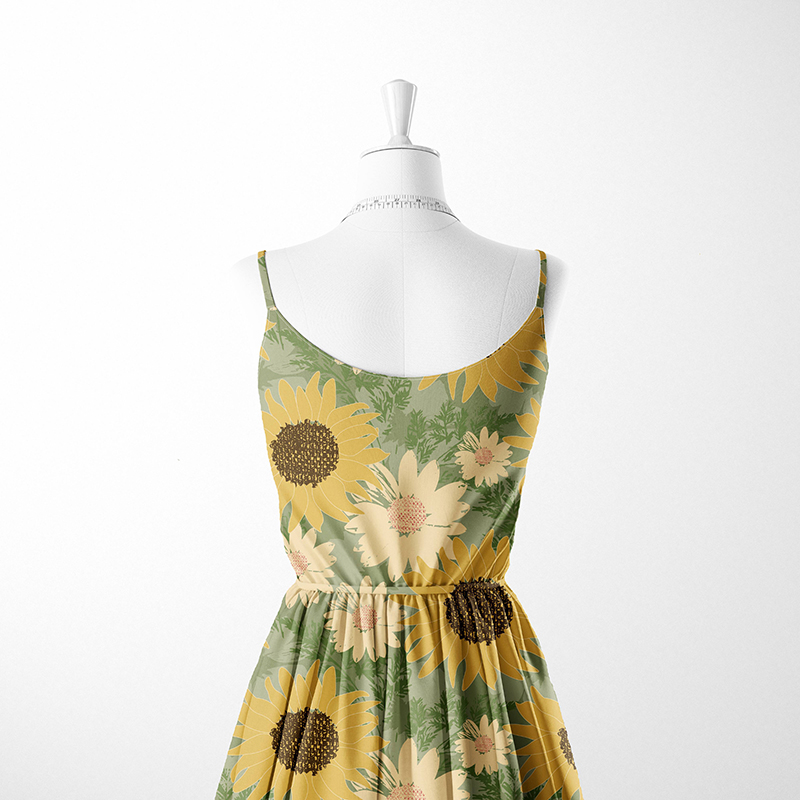
Fabric design: Sunflower Fields – Andrea Maurer

Poppy is a luscious 100% Organic Cotton fabric woven in fine sateen weave with a slight sheen. It has beautiful colour reproduction when printed due to its bright white base and washes well keeping the print lovely and bright. Even though this fabric washes well, the pigment inks are one of the most fragile inks on the market and require special care. For the best results, we recommend washing the fabric gently by hand with cold water or a cold, gentle machine wash with phosphate free detergent.

unprinted Poppy fabric

Unprinted Poppy fabric

colour wash testing

Left side: colour chart before wash. Right side: colours and shrinkage after wash.

It’s a wonderfully versatile, easy to sew fabric with a maximum printable width of 145cm. It has a weight of 140 GSM making it a perfect lightweight print base for fashion garments and accessories such as skirts, dresses, pants, shirts, bandanas and hair scarves. It would also be suitable for some homewares such as table linen, pillowcases or even a sweet wedding banner!

textile design inspiration

Image source: Rachel Antonoff

textile design inspiration

Image source: Poppy and Honesty via Etsy

Sample swatches of Poppy are available through our Sample Pack Order Form in our ‘Natural Fabrics’, ‘For the Little Ones’ and ‘Super Pack’ sample packs on the website. Contact us to find out if this fabric is a suitable option for your next textile project!!

red poppy fabric

Fabric design: Sunset Poppy – Jenni Rogers

snake fabric

Fabrics design: Snakes in Leaves Peachy Pink – Dominique Collins

Poppy fabric printing base samples

Samples of Poppy fabric can be ordered online

diy-cat-bandana-halloween-fabrics

DIY Halloween Cat Bandanas Tutorial

diy-cat-bandana-halloween-fabrics With Spooky Season well and truly on its way, we wanted to give you a fun little Halloween DIY project to make for your pets…well, cats specifically!  

Everyone on our team is avid cat lovers and most of us have our own fur babies to dress up. We always see cute seasonal looks for dogs but where’s all the fun cat costumes, right? Well with this tutorial, you can create your own custom Halloween bandana for your cats this October! 

Get creative, keep on reading to find out how you can make your own Spooky Cat Bandanas! 


What you need:  

  • Custom Printed Fabric (we recommend our Ashton, Ebe, Oliver, Aerocorp and Cotton Poplin fabrics). 
  • Scissors 
  • Dressmaker Pins 
  • Sewing Machine or Sewing Needle 
  • Sewing Thread – you can match the colour of your fabric. 
  • A cat of course! 

Introducing our cats:

Halloween Cat Bandanas_5

Method: 

1. The most important step of all…order some wonderful custom printed fabric, you can design your own or order designer fabrics from our Fabric Shop. We recommend our Ashton, Ebe and Cotton Poplin for a natural fabric option or our Oliver and Aerocorp fabrics for a polyester (easy care) option!   We’ve gone with our Ashton fabric which is a lovely lightweight Cotton Jersey.

Halloween Cat Bandanas_6 Halloween Cat Bandanas_7

2. Using a pair of scissors cut out a square shape, we’ve gone with 40 x 40cm, but you can go smaller or larger depending on the size of your cat.   

Halloween Cat Bandanas_12

3. Once you’ve got an even square cut out, you’re going to fold over your fabric diagonally – printed side to printed side, corner to corner; to create a triangle shape.  

Halloween Cat Bandanas_13 Halloween Cat Bandanas_16

4. Once you have your triangle shape and all the edges match up, you’re going to pin together the edges so the fabric doesn’t move around when trying to sew.  

Halloween Cat Bandanas_15

5. Now it’s time to sew! We’ve used a sewing machine for our bandanas but you can easily use a sewing needle as well. You’re going to stitch a straight stitch, 1cm in from the raw edge starting from one of the corners. Sew around the sides of your triangle angle shape, leaving a 6cm open gap so you can flip it right-way out when you’re done.  

Halloween Cat Bandanas_14 Halloween Cat Bandanas_4

6. Once you’ve got your pieces stitched together, from the 6cm opening you’re going to pull the inside out. Make sure all the corners are completely pulled out and everything is lying flat, as we’ll be stitching around each edge again.  

Halloween Cat Bandanas_18 Halloween Cat Bandanas_17 Halloween Cat Bandanas_3


7. When you’ve got your Bandana completely pulled out, so that the print is now on the outside; you’re going to top stitch 0.5cm in from each side, the whole way around. Make sure to tuck in the raw edge of the 6cm gap, pin it and stitch over this part as well. This will create nice, flat edges around your Bandana and a stronger stitch for durability. 

Halloween Cat Bandanas_2 Halloween Cat Bandanas_8 Halloween Cat Bandanas_1

You now have an adorably spooky Cat Bandana to dress your cat in for the Halloween Season!  

Halloween Cat Bandanas_9

Keep on scrolling to check out some more fun Halloween Prints that are available now in our Fabric Shop. You can order any of these prints on our stock fabrics and create your own custom cat bandana or any Halloween themed DIY project! 

Bone Collector_Sami Sparrow web‘Bone Collector’ by Sami Sparrow

Zombie Ducks_Krystal-Anne Knafl‘Zombie Ducks’ by Krystal-Anne Knafl

Vintage Halloween Masks_Sue Michael‘Vintage Halloween Masks’ by Sue Michael

Emilie Otto_Spooky Ink‘Spooky Ink’ by Emilie Otto

Crows_Carly Westbye‘Crows’ by Carly Westbye

Crows Gathering_Carly Westbye‘Crows Gathering’ by Carly Westbye

SPOOKY SKULLS_IANNY BASTOS‘Spooky Skulls’ by Ianny Bastos

SKULLS AND ROSES_IANNY BASTOS‘Skulls and Roses’ by Ianny Bastos

MONOCHROMATIC SKULLS_IANNY BASTOS‘Monochromatic Skulls’ by Ianny Bastos

Spooky Costume Cats_Ella Mackay‘Spooky Costume Cats’ by Ella Mackay

Spooktacular Halloween_Ella Mackay‘Spooktacular Halloween’ by Ella Mackay

Coffee Monsters Messy - Blue‘Coffee Monsters’ by Louise Addison

Emilie Otto – The Designer Project

We have absolutely loved sharing these fun loving designs by creative Emilie Otto and hope you’ve loved her designs as much as we have! To coincide with Emilie’s ‘Life of the Party’ collection being made available to all of our customers through our Fabric Shop online, the artist herself has put together a guest blog which further explains her one of a kind creative process and what inspires her work. 

Keep reading to find out more about Emilie Otto and her unique design process! 

Emilie Otto 10‘Emilie Otto’

Hi, I’m Emilie Otto (aka Em). 

Let’s get creative friends, I’m so excited to share these fun filled fabric prints with you all! It has been one of my wildest dreams since I can remember to create bold, eccentric and joy filled designs to inspire people to create and feel authentically themselves. I am never someone who likes to blend into a crowd or follow the leader and I wanted these designs to reflect this. 

Emilie Otto 04‘Emilie painting in her studio’

This a slice of my first collection “Life of the Party” an eccentric mix of colourful coordinates. Curated for fun lovers, sun-seekers, and most importantly good times! These designs are created from hand carved stamps, which have been elevated using a variety of digital techniques. The bright colour palettes embody my favourite parts of summer. These designs where made to suit fashion and accessories projects, but the sky’s the limit. 

  Emilie Otto 07‘Carving design stamps’

These designs didn’t come about in a conventional way, in fact it woke me up at 2am! I couldn’t stop thinking about carving little stamps and creating little still life artworks. It all happened within a matter of hours, I was listening to my favourite playlist hand carving wine bottles, crabs, lemons, and a range of flowers. I fell in love instantly and after finishing the carvings I could head back to bed for some more sleep. 

  Emilie Otto 06‘Emilie using her handmade stamps’

Most of the designs are inspired by items I have in my studio, which spark happiness. Items have been collected from thrift stores, gifted, and saved to remind me of special moments. I love bright colours and love high contrast patterns, so these colour combinations feel very true to my style as a designer. 

  Emilie Otto 05‘Emilie painting in her studio’

All of the designs I create are something that I would love wearing, most of the time they don’t start out with a purpose in mind. I focus on enjoying the making process and more often that not they turn into whatever they were meant to be, these stamps started as card designs but evolved into statement fabric designs. 

  Emilie Otto Fabric Design‘Clothing Mockups of Designs’

Here are a few clothing examples that really get me excited, they have an element of comfort, are carefree and also let people’s personalities shine through. Any of the fabrics in this collection would work well on their own, they can also be mixed and match to really turn up the fun. 

  Emilie Otto 01‘Emilie Otto’

My studio space is full of dancing lights, disco balls and prims hanging from the windows along with artwork from other designers who inspire me. It’s a chaotic space, but I always feel so inspired when I sit down at my desk and start painting. 

I hope that these designs bring some energy and fun into your next DIY project. 

Em xo 


If you want to collaborate with us on The Designer Project and become part of this creative club, please apply! Send us an email with your portfolio and why you would like to be part of this initiative, and we will be in touch! 

‘Life of the Party’ Textile Collection by Emilie Otto

We couldn’t be more excited to announce that our next featured artist from The Designer Project will be none other than the amazing Emilie Otto! 

Her ‘Life of the Party’ collection is an eccentric mix of colourful coordinates. Curated for fun lovers, sun-seekers, and most importantly good times! These designs are created from hand carved stamps, which have been elevated using a variety of digital techniques. The bright colour palettes embody the best part of the Australian Summer. 

Keep reading to find out more about Emilie Otto and her fun loving designs! 

custom fabric_designer fabric_emilie otto_play time ocean bluesEmilie Otto - Play Time Ocean Blues - Tote Bag

Play Time Ocean Blues is a feel-good vibrant print, featuring a few items that you would find at a celebration with friends. The colours are inspired by warm sunny days and sparkling blue oceans.    

We think this is the perfect print for some funky swimwear, can’t you picture it as some board-shorts or a bikini? 

custom fabric_designer fabric_emilie otto_picnic rug candyEmilie Otto - Picnic Rug Candy

Picnic Rug Candy is a vibrant gingham print, inspired by picnic catchups with friends. The colours are warm and are like those you can enjoy during a candy-coloured sunset.   

This print would look fantastic for fashion garments and homewares! We love this colourway for a super fun picnic blanket or perhaps a summer dress. 

  custom fabric_designer fabric_emilie otto_picnic rug dawnEmilie Otto - Picnic Rug Dawn

Picnic Rug Dawn is a vibrant gingham print, inspired by picnic catchups with friends. The colours are cool and soft like those you can enjoy during a dreamy early morning.  

Another amazing print for a range of fashion and home and interior projects, think flowing pants or cushions! 

custom fabric_designer fabric_emilie otto_stripey bubblegumEmilie Otto - Stripey Bubblegum

Stripey Bubblegum is a bold geometric print; it is a statement and fun take on traditional tartan. The colour combination is what make this print POP, which was inspired by watermelon flavoured candy.  

This design is perfect for some summer accessories such as bucket hats or tote bags/beach bags! 

  custom fabric_designer fabric_emilie otto_stripey violetEmilie Otto - Stripey Violey - V2

Stripey Violet is a bold geometric print; it is a statement and fun take on traditional tartan. The colour combination is what make this print POP, which was inspired by wildflowers.  

We think this print would work so well for a statement beach towel or even a new onepiece. 

  custom fabric_designer fabric_emilie otto_sunday sesh mintEmilie Otto - Sunday Sesh Mint

Sunday Sesh Mint is a hand carved print inspired by long days in the sun with friends, sipping on your favourite drinks. The colour combination is what make this print POP, which was inspired by Mint & Pink Gin cocktails.  

This design is so perfect for beachy/pool attire, think a loose over shirt with matching shorts! 

custom fabric_designer fabric_emilie otto_sunday sesh violetEmilie Otto -Sunday Sesh Violet


Sunday Sesh Violet is a hand carved print inspired by long days in the sun with friends, sipping on your favourite drinks. The colour combination is what make this print POP, which was inspired by Lemons & blueberries.  

We love this print for a fun kaftan to throw on at the beach!  


All of our project ideas above are suggestions only as the sky’s truly the limit with Emilie’s super fun collection! Each of Emilie’s designs can be found in our Fabric Shop, so head on over to be inspired for your next DIY project! 

DIY Beeswax Wraps Tutorial

You asked and we listened! After receiving plenty of interest in a DIY tutorial on how to make your own Beeswax Wraps, we’re very excited to give you this wonderful Blog post. Beeswax Wraps are such an easy at home project and are a great addition to anyone’s eco journey. You can make them by yourself, with a friend, or even get the kids involved!

We love using beeswax wraps in the office and at home, it is a very simple thing that we all can do for food waste and plastic wrap reduction! Use them to cover tins, jars, bowls and plates, wrap around cut fruit and veg or close up an open fresh food packaging. Get creative, keep on reading to find out how you can make your own Beeswax Wraps!

What you need: 

  • Custom Printed Cotton Poplin Fabric. Featured designs in this post are: Going Bananas -Tammy De Zilva, Lemonade -Crystal Kruger, Spring Bee – Kathrin Legg, and She’ll be Apples -Katrina Potter.
  • Pinking Shears or Regular Scissors
  • Large Flat Baking Tray
  • Baking Paper or Reusable Baking Sheet
  • Beeswax (bar or pellets). We used pellets from Bunnings.

Beeswax Wrap Blog Post 1

Method: 

  1. The most important step of all…order some wonderful custom printed fabric on our Cotton Poplin, you can design your own or order designer fabrics from our Fabric Shop. Our Cotton Poplin fabric is the best fabric in our range for beeswax wraps! Its a perfect fabric for the job, it has a smooth texture and a perfect weight for an even wax distribution.
    Beeswax Wrap Blog Post 5
  2. Using pinking shears, if you want beeswax wraps to look a little bit fancy or just some regular scissors, cut out some squares at your desired size (we’ve gone with 30 x 30cm). You can create beeswax wrap in any size or shape, as long as it will fit into an oven.
    Beeswax Wrap Blog Post 3 Beeswax Wrap Blog Post 6
  3. Preheat your oven to a low temperature, 100 degrees works best as we don’t want the fabric to burn. 
  4. On a large, flat baking tray, an old cookie tray is great for this, place a sheet of baking paper (or a reusable baking sheet). Then place your cut fabric on top. 
    Beeswax Wrap Blog Post 2
  5. Sprinkle a generous handful of beeswax across your piece of fabric evenly. Keep in mind that once the wax melts, it will double in diameter. We’ve used a bar of beeswax which we’ve cut up for ours but you can use whatever beeswax you can find, whether it be a bar or pellets.  If using a bar, you can grate it or cut it into little pieces like we have (be careful when cutting at the wax is quite hard).
    **As an extra step after this, you can add a few drops of Jojoba Oil across the fabric. This helps keep the coating soft and supple, and it is also food safe. This is optional and your beeswax wraps will still be perfect without it!
  6. Once your fabric is happily covered in beeswax, place the tray into the oven. 
    Beeswax Wrap Blog Post 4
  7. Keep an eye on the fabric piece whilst it’s in the oven, as you want to take it out when all the wax has melted. This will take about 5 minutes.
    Beeswax Wrap Blog Post 11 Beeswax Wrap Blog Post 9
  8. Once the wax has all melted, this is where you need to be quick and careful! Take the tray out of the oven and place it down on the bench. Whilst the wax is still melted, grab the top two corners of your fabric and lift it up. Hold the fabric over your tray until the wax has completely dried and hardened.
    Beeswax Wrap Blog Post 13

You now have your own wonderful beeswax wrap! This can be used to cover opened jars, leftover meals, wrap around cut fruit and veg, or to close up open fresh food packaging. You can also fold your beeswax wraps to create some reusable ‘sandwich bags’ or snack pouches. 

Beeswax Wrap Blog Post 8 Beeswax Wrap Blog Post 7 Beeswax Wrap Blog Post 10 Beeswax Wrap Blog Post 12

 All the featured designs that we’ve used to create our Beeswax Wraps are available to order via our Fabric Shop. You can also design your own fabric and make a beeswax wrap with your own artwork!

designer fabric_custom fabric_designer project_madeline hawkins 3

Madeline Hawkins – The Designer Project

It’s been such a treat sharing these wonderfully sweet designs by illustrator and pattern designer Madeline Hawkins. We hope that you’ve enjoyed all of her amazing prints as much as we have!  

To coincide with Madeline’s Scenes from a Daydream’ collection being made available to all of our customers through our Fabric Shop online, the artist herself has put together a guest blog which further explains her one of a kind approach to creating surface patterns and what inspires her work. 

Keep reading to find out more about Madeline Hawkins and her beautiful designs! 

designer fabric_custom fabric_designer project_madeline hawkins 6‘Madeline Hawkins’

Heya! I’m Madeline, Artist behind Wilder Studio. I create whimsy illustrations, from which I design into repeat patterns for textiles. I work from my home studio based in Murwillumbah, NSW – a beautiful, creative and vibrant town where my little family and I reside. I have lived and breathed drawing since I could hold a pencil and have in recent years found a love of home textiles. When I put two and two together and began teaching myself online, I knew I had found where I wanted to play – textile pattern design! 

designer fabric_custom fabric_designer project_madeline hawkins 5‘Madeline Hawkins in her studio’

 I’m super excited to have an array of Wilder Studio repeat patterns available here at Digital Fabrics. This collection of handcrafted, stand-alone patterns speaks of romance, femininity, nostalgia and wonder. Inspired by the likes of Lewis Carrolls ‘Alice in Wonderland’, these patterns are an ode to day-dreaming. 

designer fabric_custom fabric_designer project_madeline hawkins 3‘Madeline creating in her studio’

An ideal start to a morning in the studio consists of music, a brew and a little playtime- sketching or painting anything that comes to mind with no pressure to turn it into anything. Then I’ll get stuck into whatever I have on the to-do list. 

designer fabric_custom fabric_designer project_madeline hawkins 4‘Madeline working on original paintings’

designer fabric_custom fabric_designer project_madeline hawkins 1‘Madeline colour matching her design’

When designing a repeat pattern for a client, I generally write down a bunch of descriptive words of what the general feel is I’m wanting to create, and a rough description of the colours, layout and orientation and any other parameters the brief has set. I then have a little rough sketch of motif ideas. Sometimes these may be used in the final design, otherwise they are set aside with the rest of my notes for when I begin illustrating. I love using watercolors and gouache for romantic florals, but I’m most fond of inkline pens, poscas and pencils for whimsy, detailed illustration. 

designer fabric_custom fabric_designer project_madeline hawkins 7‘Close up of Madeline’s studio’

I love watching my illustrations come to life on fabric and seeing others make something with a piece of my imagination. It’s really a collaboration with other creatives. I think there’s the most magic in collaboration. The coming togetherness of it. Expressing ourselves and inspiring others to do the same. A ripple effect of creativity. It brings me deep joy as I hope my prints inspire joy in others. 

designer fabric_custom fabric_designer project_madeline hawkins 8‘Madeline’s studio’

If you want to collaborate with us on The Designer Project and become part of this creative club, please apply! Send us an email with your portfolio and why you would like to be part of this initiative, and we will be in touch!